NEC SUPERSCRIPT 1800
IRDA AND SERIAL INTERFACE UPGRADE KIT — I NSTRUCTIONS
A
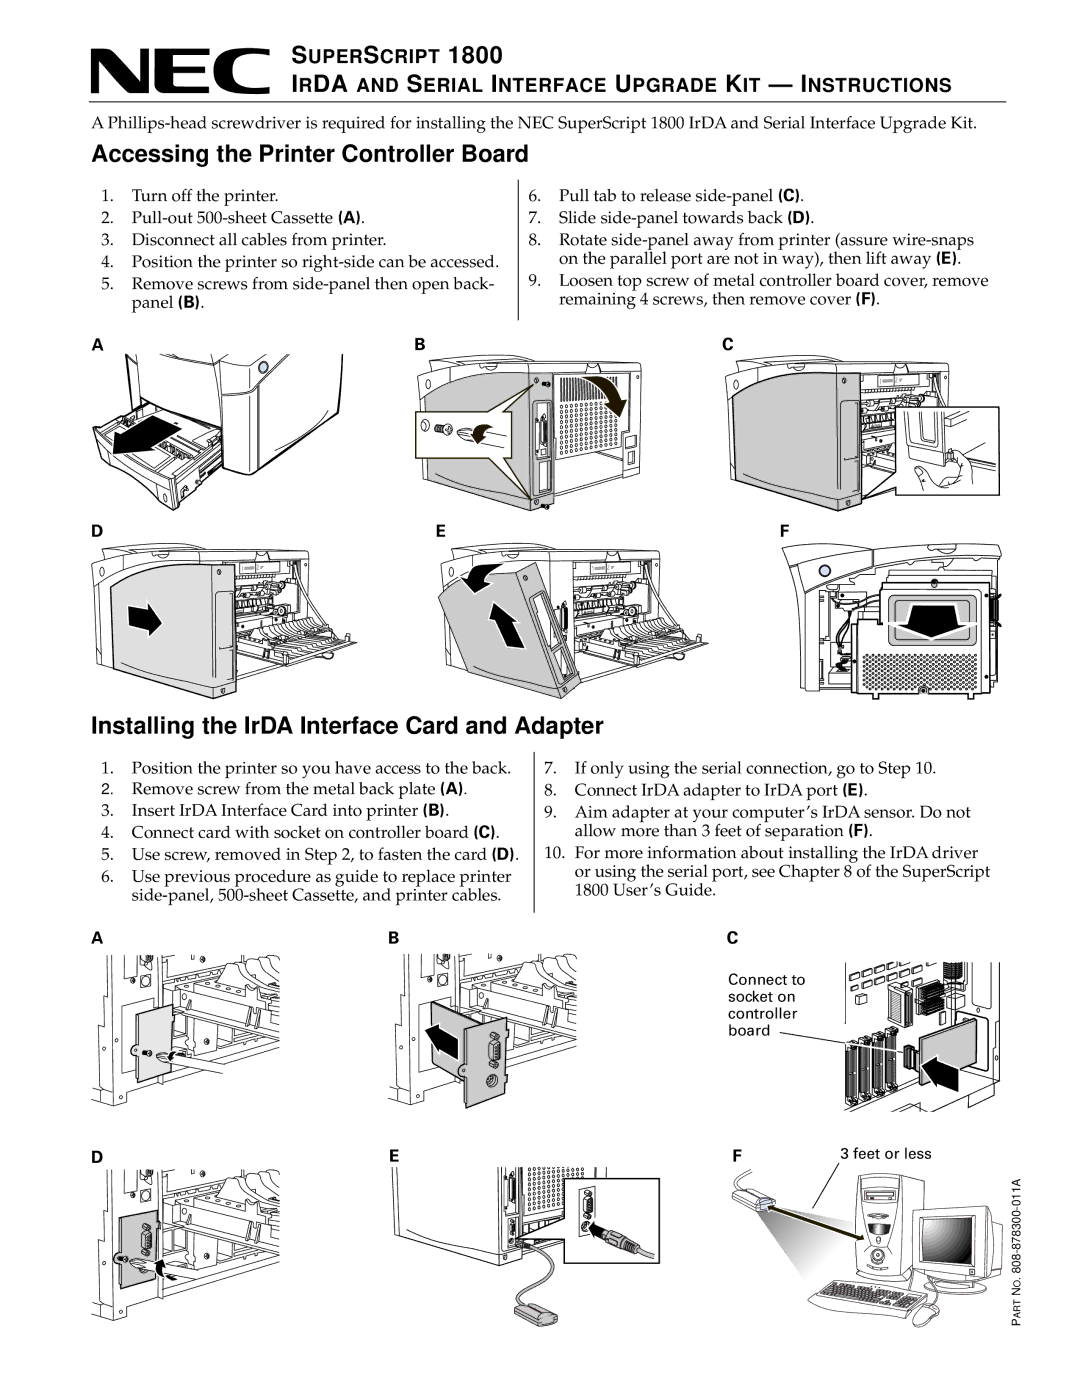
Accessing the Printer Controller Board
1.Turn off the printer.
2.
3.Disconnect all cables from printer.
4.Position the printer so
5.Remove screws from
A ![]() B
B
6.Pull tab to release
7.Slide
8.Rotate
9.Loosen top screw of metal controller board cover, remove remaining 4 screws, then remove cover (F).
C
DEF
Installing the IrDA Interface Card and Adapter
1.Position the printer so you have access to the back.
2.Remove screw from the metal back plate (A).
3.Insert IrDA Interface Card into printer (B).
4.Connect card with socket on controller board (C).
5.Use screw, removed in Step 2, to fasten the card (D).
6.Use previous procedure as guide to replace printer
AB
DE
7.If only using the serial connection, go to Step 10.
8.Connect IrDA adapter to IrDA port (E).
9.Aim adapter at your computer’s IrDA sensor. Do not allow more than 3 feet of separation (F).
10.For more information about installing the IrDA driver or using the serial port, see Chapter 8 of the SuperScript 1800 User’s Guide.
C
Connect to socket on controller board
F | 3 feet or less |
PART NO.