NEC SUPERSCRIPT 1800
OPTIONAL 500-SHEET 2ND CASSETTE — INSTRUCTIONS
Use this instruction sheet for installing the optional NEC SuperScript 1800
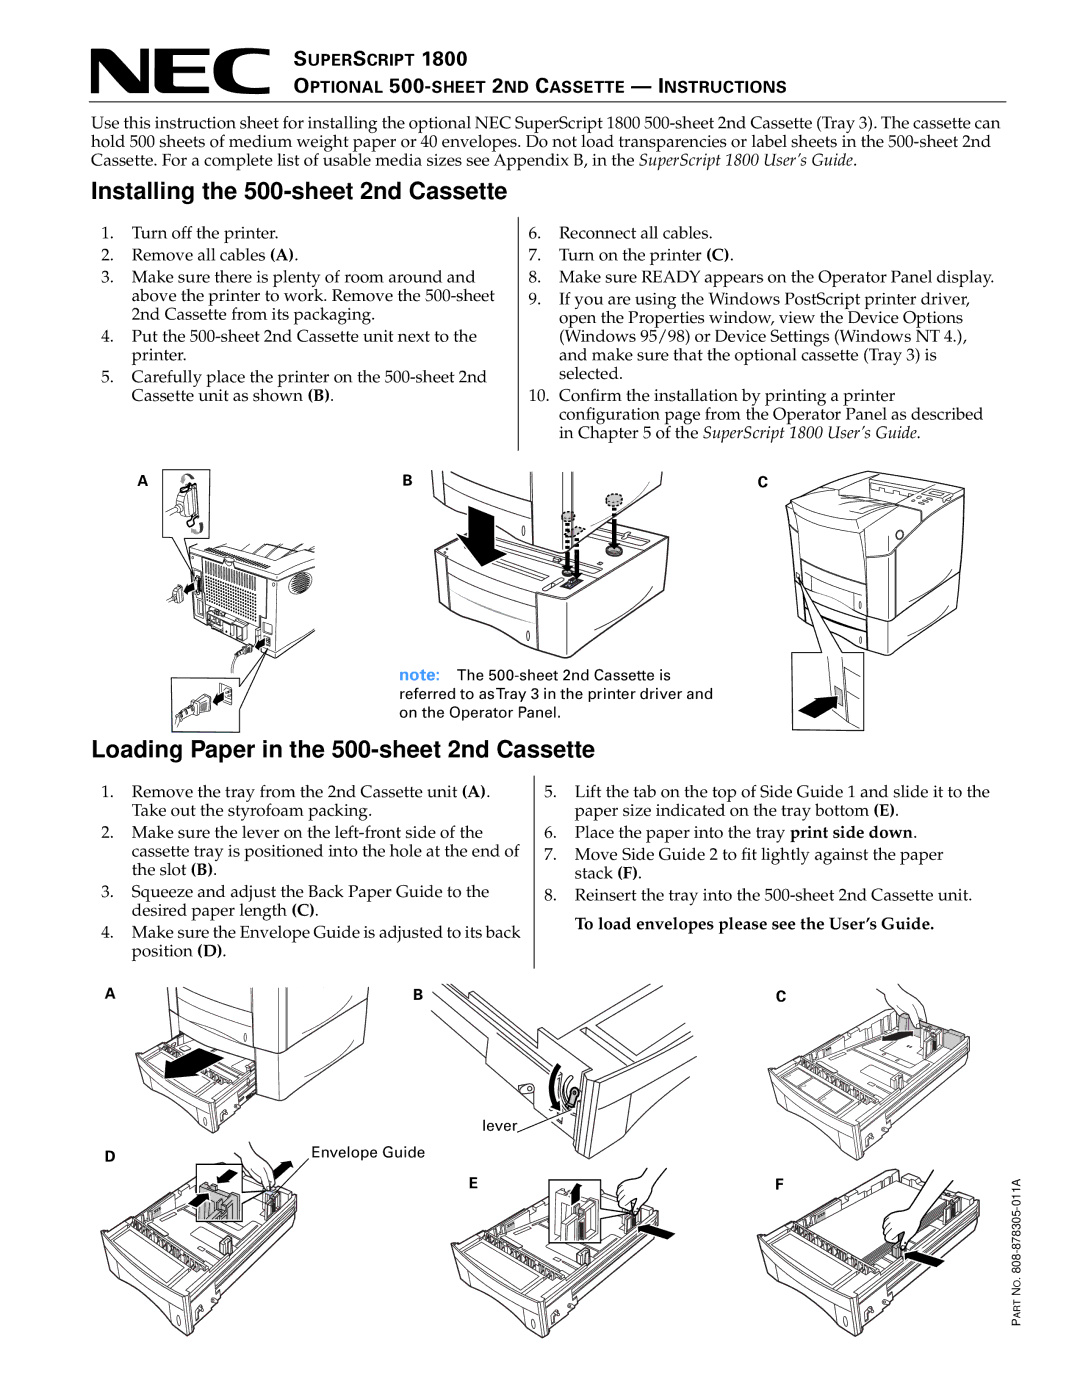
Installing the 500-sheet 2nd Cassette
1.Turn off the printer.
2.Remove all cables (A).
3.Make sure there is plenty of room around and above the printer to work. Remove the
4.Put the
5.Carefully place the printer on the
6.Reconnect all cables.
7.Turn on the printer (C).
8.Make sure READY appears on the Operator Panel display.
9.If you are using the Windows PostScript printer driver, open the Properties window, view the Device Options (Windows 95/98) or Device Settings (Windows NT 4.), and make sure that the optional cassette (Tray 3) is selected.
10.Confirm the installation by printing a printer configuration page from the Operator Panel as described in Chapter 5 of the SuperScript 1800 User’s Guide.
A ![]() B
B
C
note: The
Loading Paper in the 500-sheet 2nd Cassette
1.Remove the tray from the 2nd Cassette unit (A). Take out the styrofoam packing.
2.Make sure the lever on the
3.Squeeze and adjust the Back Paper Guide to the desired paper length (C).
4.Make sure the Envelope Guide is adjusted to its back position (D).
5.Lift the tab on the top of Side Guide 1 and slide it to the paper size indicated on the tray bottom (E).
6.Place the paper into the tray print side down.
7.Move Side Guide 2 to fit lightly against the paper stack (F).
8.Reinsert the tray into the
To load envelopes please see the User’s Guide.
A ![]()
![]() BC
BC
lever![]()
D | Envelope Guide |
E![]()
![]() F
F
PART NO.