NEC-ADA201 Eng/Fr. manual 9/8/98 12:26 PM
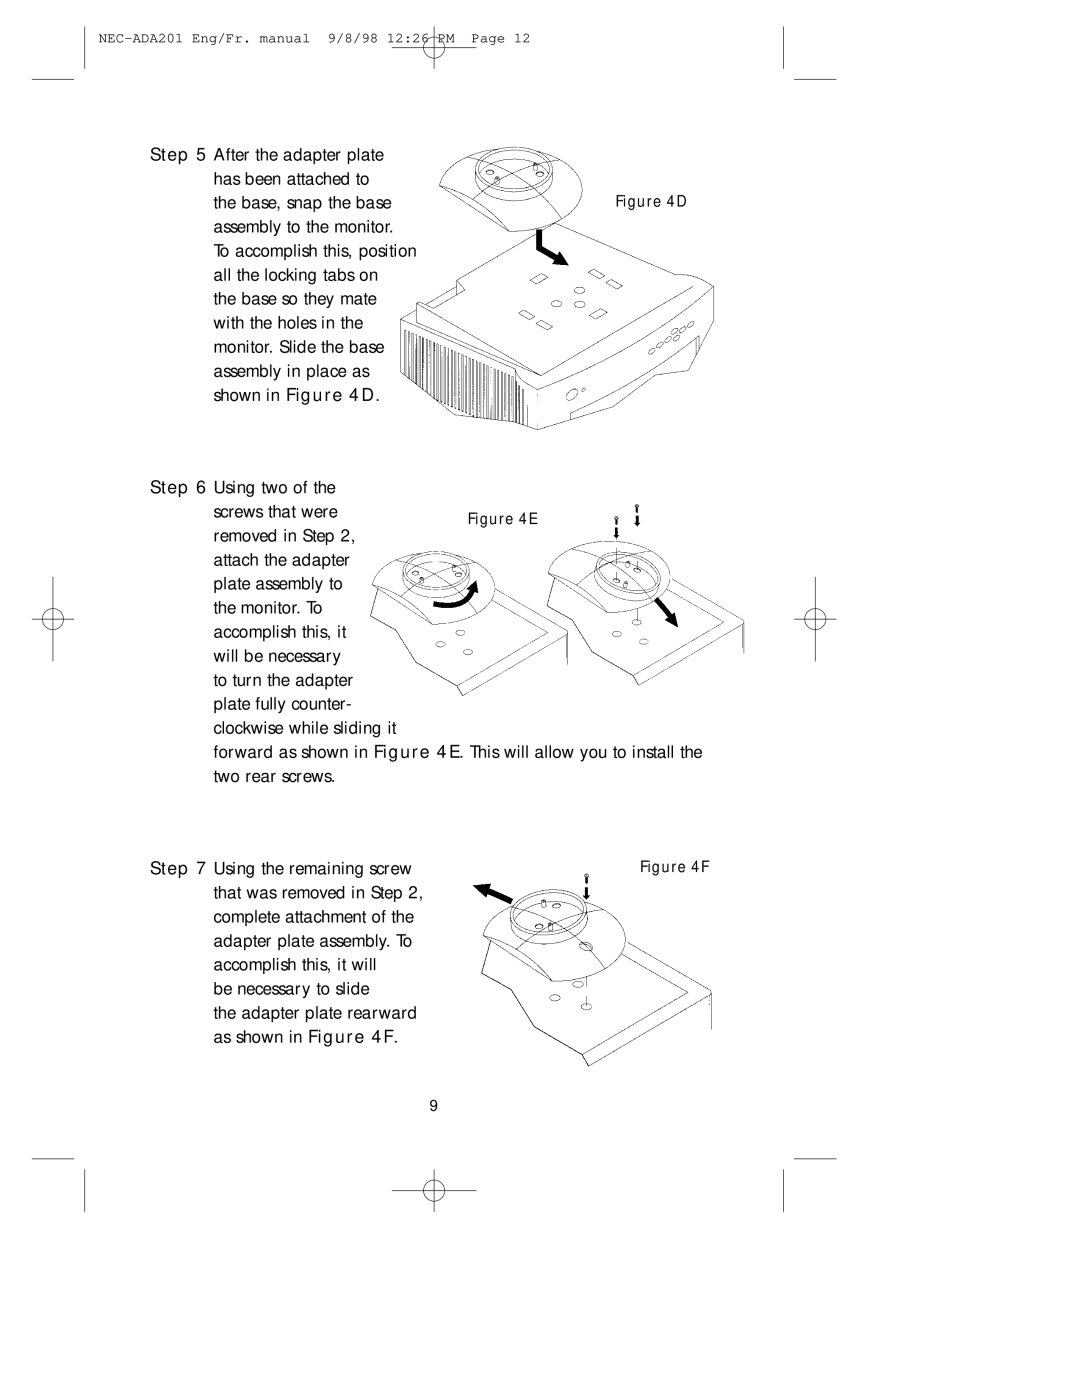
Step 5 After the adapter plate has been attached to
the base, snap the baseFigure 4D assembly to the monitor.
To accomplish this, position all the locking tabs on the base so they mate with the holes in the monitor. Slide the base assembly in place as shown in Figure 4D.
Step 6 Using two of the screws that were removed in Step 2, attach the adapter plate assembly to the monitor. To accomplish this, it will be necessary to turn the adapter plate fully counter- clockwise while sliding it
forward as shown in Figure 4E. This will allow you to install the two rear screws.
Step 7 Using the remaining screw | Figure 4F |
that was removed in Step 2, |
|
complete attachment of the |
|
adapter plate assembly. To |
|
accomplish this, it will |
|
be necessary to slide |
|
the adapter plate rearward |
|
as shown in Figure 4F. |
|
| 9 |
