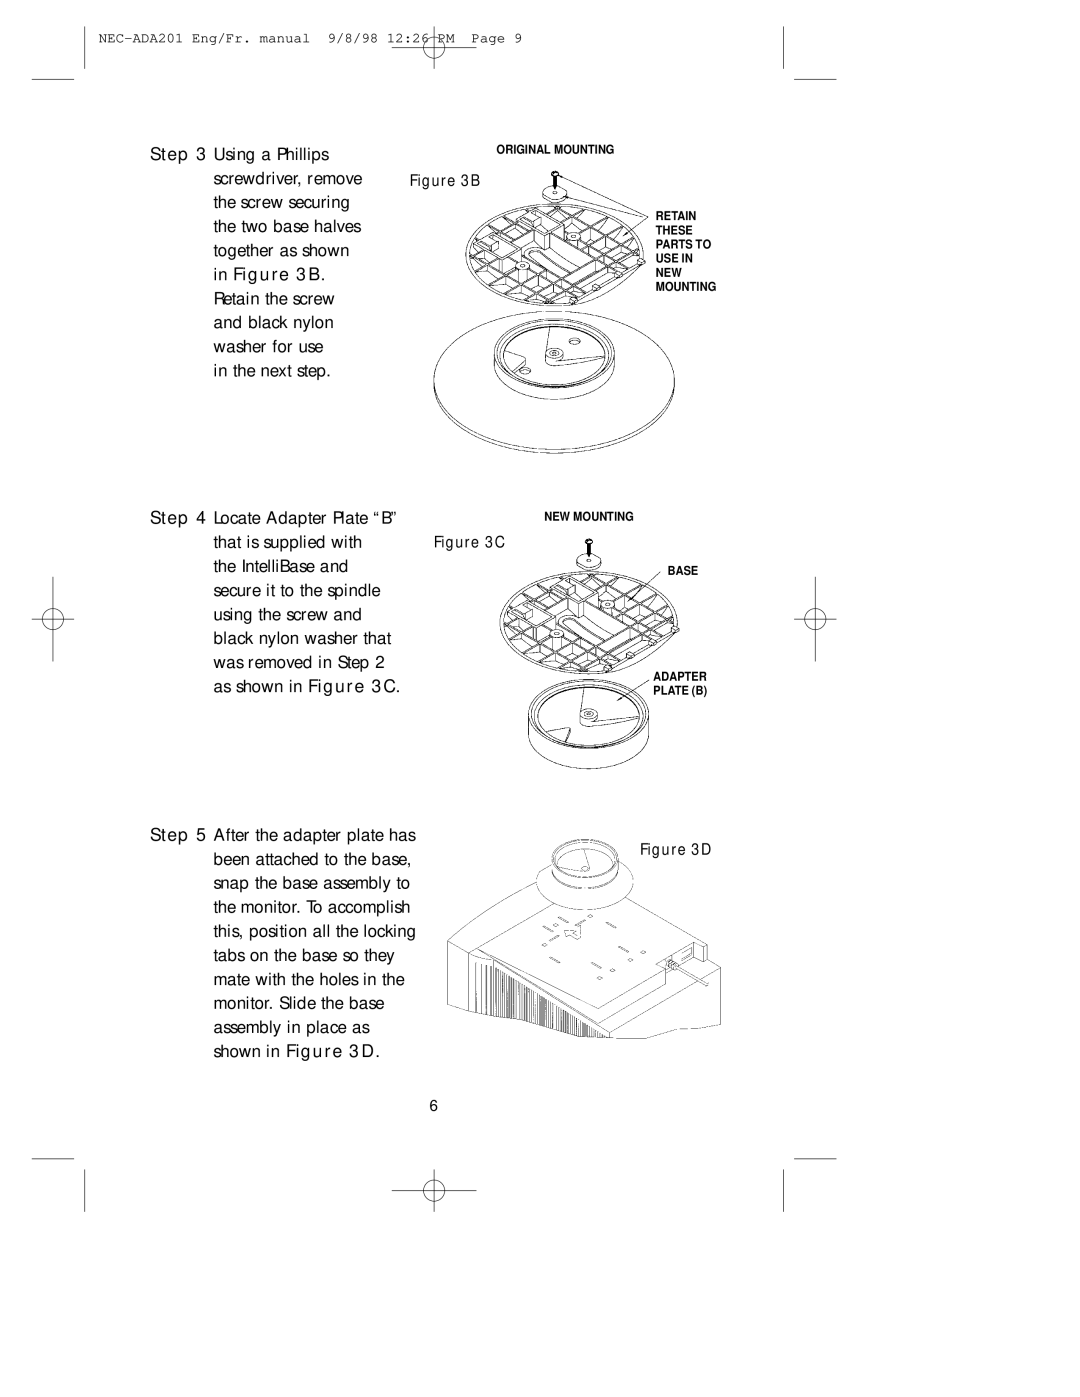
Step 3 Using a Phillips | ORIGINAL MOUNTING |
| |
screwdriver, remove | Figure 3B |
the screw securing |
|
the two base halves |
|
together as shown |
|
in Figure 3B. |
|
Retain the screw |
|
and black nylon |
|
washer for use |
|
in the next step. |
|
RETAIN
THESE PARTS TO USE IN NEW MOUNTING
Step 4 Locate Adapter Plate “B”
that is supplied with Figure 3C the IntelliBase and
secure it to the spindle using the screw and black nylon washer that was removed in Step 2 as shown in Figure 3C.
Step 5 After the adapter plate has been attached to the base, snap the base assembly to the monitor. To accomplish this, position all the locking tabs on the base so they mate with the holes in the monitor. Slide the base assembly in place as shown in Figure 3D.
NEW MOUNTING
BASE
ADAPTER PLATE (B)
Figure 3D
6
