User Guide
NB6, NB6W, NB6Plus4, NB6Plus4W, NB6Plus4Wn User Guide
Copyright Notice
Contents
NAT ALG
Port Mapping
Before You Use
NB6 Series Package Contents
Subscription for Adsl Service
As under PPPoA, PPPoE, or MER mode
Dynamic IP
Static IP address
Overview
NB6 LED Indicators
Flash Red Firmware upgrades in progress
Off No PPPoA or PPPoE connection Solid Green
Internet now
Line
Reset Ethernet Power
NB6 Rear Panel
NB6W LED Indicators
Wlan
Power Reset Ethernet
NB6W Rear Panel
NB6Plus4 LED Indicators
Connector Description
NB6Plus4 Rear Panel
NB6Plus4W LED Indicators
NB6Plus4W Rear Panel
Wireless antenna
Line RJ-11 connector Telephone line
Off WPS is off Flash Green
NB6Plus4Wn LED Indicators
Access the Internet now
NB6Plus4Wn Rear Panel
System Requirements
OS independent for Ethernet
Do I need a Micro filter?
Follow the steps below to connect the related devices
Connecting the Adsl Router Ethernet
Choosing a place for the Adsl Router
For Windows ME
For Windows
For Windows XP/Vista
YML854 Rev1
For Windows ME
For Windows XP/Vista
Setting up TCP/IP
For Windows NT
Mac OSX
Open the Start menu, point to Control Panel and click it
YML854 Rev1
NB6, NB6W, NB6Plus4, NB6Plus4W, NB6Plus4Wn User Guide
YML854 Rev1
Renewing IP Address on Client PC
For Windows 98/ME
For Windows NT/2000/XP/Vista
Open the Start menu, and click Run
Accessing the Internet
Description
PPP over ATM PPPoA Mode
Configuration
PPP over ATM PPPoA IP Extension Mode
PPP over Ethernet PPPoE Mode
PPP over Ethernet PPPoE IP Extension Mode
Numbered IP over ATM IPoA
Numbered IP over ATM IPoA+NAT
Unnumbered IP over ATM IPoA
Unnumbered IP over ATM IPoA+NAT
Bridge Mode
MER
Web Configuration
Using Web-Based Manager
Language
To Have the New Settings Take Effect
Outline of Web Manager
Quick Start
Connect to Internet
Quick Setup
VCI Virtual Channel Identifier
Connection Type
PPP over ATM/ PPP over Ethernet
MTU
PPP Username & PPP Password
Secondary IP Address & Subnet Mask
YML854 Rev1
Click Enable NAT if you want
IP over ATM
Obtain DNS server address automatically
Use the following DNS server addresses
MTU
NB6, NB6W, NB6Plus4, NB6Plus4W, NB6Plus4Wn User Guide
Bridging
WAN IP Address, WAN Subnet Mask, and Default Gateway
Please refer to PPPoA/ PPPoE
Dhcp Server On
Status
Overview
Adsl Line
This page shows all information for Adsl
Adsl BER Test
Traffic Statistics
Click Close to close this window
Internet Connection
Wireless Clients NB6W, NB6Plus4W and NB6Plus4Wn only
Dhcp Table
Routing Table
This table shows the routing rules that your router uses
Advanced Setup
Local Network IP Address
MTU
Local Network Dhcp Server
YML854 Rev1
Local Network UPnP
Local Network Igmp Snooping
NB6, NB6W, NB6Plus4, NB6Plus4W, NB6Plus4Wn User Guide
Internet Connections
Service Category
Vlan ID
NB6, NB6W, NB6Plus4, NB6Plus4W, NB6Plus4Wn User Guide
Please refer to Quick Setup for more information
Internet DNS Server
Enable Automatic Assigned DNS
If you are satisfied with the settings, click Apply
Internet Igmp Proxy
Seamless Rate Adaptation
Enable Adsl Port
Internet Adsl
IP Routing Static Route
Router B
Internet
Operation
IP Routing Dynamic Routing NB6Plus4W/NB6Plus4Wn only
RIP Version
Internet
Virtual Server Port Forwarding
Add New Port Forwarding
Pre-defined
Forward to Internal Host IP Address
YML854 Rev1
Virtual Server Port Triggering
Virtual Server DMZ Host
Virtual Server Dynamic DNS
Status It displays current status
Virtual Server Static DNS
NAT ALG
An example for firewall setup
Firewall
Firewall IP Filtering
Protocol
NB6, NB6W, NB6Plus4, NB6Plus4W, NB6Plus4Wn User Guide
Quality of Service
Quality of Service Bridge QoS
NB6, NB6W, NB6Plus4, NB6Plus4W, NB6Plus4Wn User Guide
Quality of Service IP QoS
Source IP Address/ Subnet Mask/ Port
Destination IP/ Subnet Mask/ Port
High
100
Port Mapping
Virtual LAN Function on Ethernet
When the setting is done, click Apply
101
Pppoe0351br035
102
103
Wireless
Wireless Guest Network Name Ssid
104
Transmission Rate
Multicast Rate
105
106
Afterburner
107
Security
108
109
For 64-bit WEP/128-bit WEP Wireless Security
Authentication Type
110
111
802.1x environment Configuration
112
For WPA Wi-Fi Protected Access
113
114
115
For WPA-2 Mixed WPA2/WPA Wireless Security
WPA2 Pre-authentication
For Wi-Fi protected Setup WPS NB6Plus4Wn only
116
117
Access Control
118
119
AP Mode Choose an AP mode that you would like to use
Repeater
120
121
Diagnostics
Management
122
Management Accounts
123
Management Control From Remote
124
Management Control From Local
125
Internet Time
126
Configuring System Log
System Log
Display Level
127
128
129
130
Backup Config
131
132
133
Update Firmware
Reset Router
UPnP for XP
134
135
Problems with LAN
Problems with WAN
PC on the LAN cannot access the Web page of the Adsl Router
PCs on the LAN cannot get IP addresses from the Adsl Router
Problems with Upgrading
137
ARP Address Resolution Protocol
Dhcp Dynamic Host Configuration Protocol
LAN Local Area Network & WAN Wide Area Network
NAT Network Address Translation IP Address
139
Retreiving Client Certificate
140
141
142
143
Enabling 802.1x Authentication and Security
Click Add to continue
Click OK, and then select the Authentication Tab
144
145
146
147
Enabling WPA Authentication and Security
148
149
150
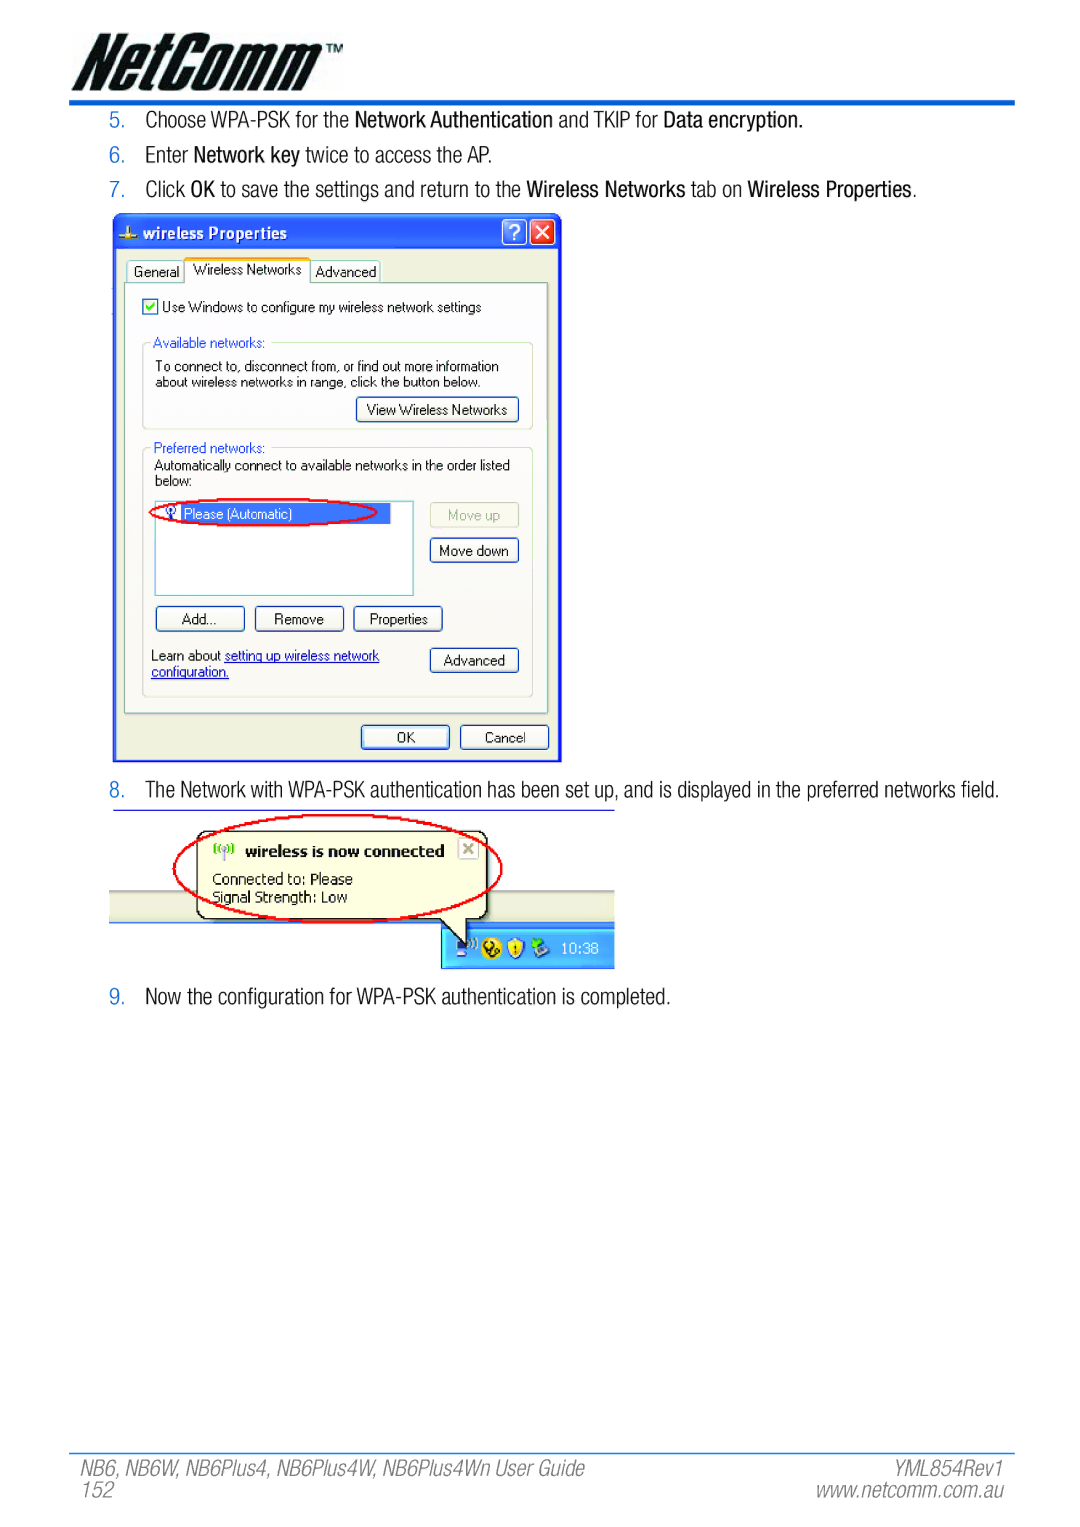
Enabling WPA-PSK Authentication and Security
151
152
153
Windows XP service pack
Following examples use the default wireless configuration
154
Mac OSX
155
Windows Vista
156
157
158
159
Now the connection is ready
160
Troubleshooting
Windows can not configure this wireless connection
Enable Wireless Zero Configuration by following these steps
Wireless drop outs and low signal quality
WEP encryption
162
Click on Apply
163
WPA encryption
164
165
Customer Information
166
167
Product Warranty
Limitations of Warranty
Page
169
PO Box 1200, Lane Cove NSW 2066 Australia

