
WGE101 specifications
The NETGEAR WGE101 is a pioneering wireless gaming adapter that enables online gaming on consoles without the need for a wired connection. Designed primarily to support gaming consoles like the PlayStation 2, Xbox, and other Ethernet-enabled devices, this adapter bridges the gap between traditional gaming setups and modern wireless networking technologies. With its compact design and user-friendly setup, the WGE101 has become a popular choice among gamers seeking to enhance their gaming experience.One of the key features of the NETGEAR WGE101 is its wireless compatibility. It operates on the IEEE 802.11b standard, providing a wireless connection with a maximum throughput of up to 11 Mbps. While this may seem modest by today’s standards, it was quite effective during the adapter's peak usage and sufficient for many online gaming applications. The WGE101 supports a range of wireless security protocols including WEP and WPA, ensuring a secure connection for users.
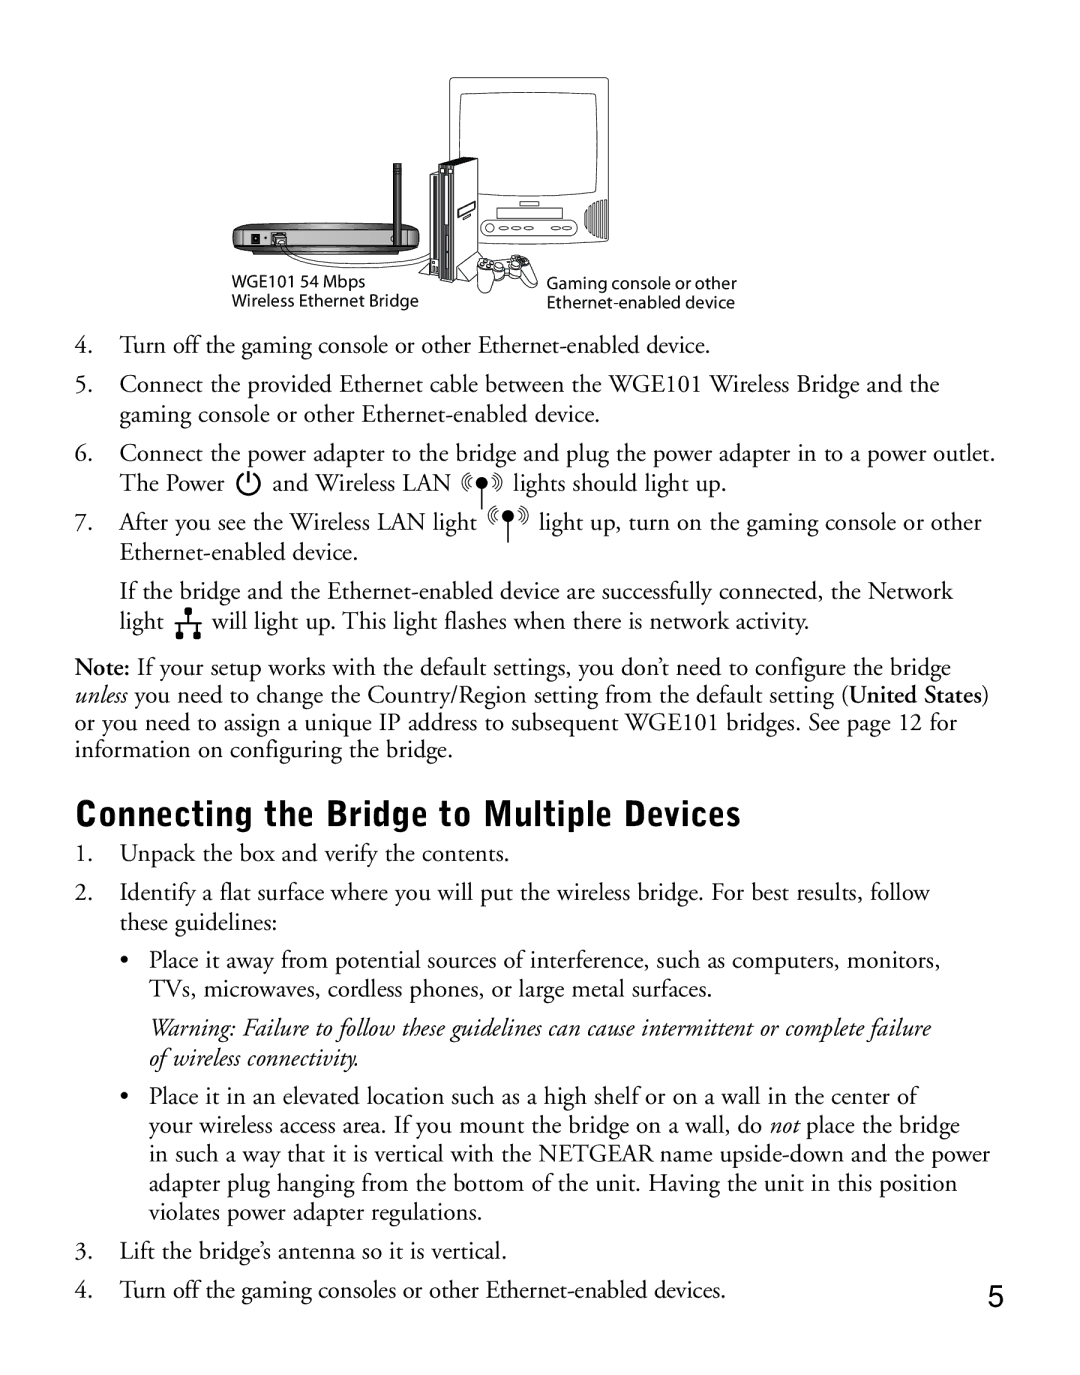
The setup process of the WGE101 is notably straightforward. It features a plug-and-play design, allowing users to connect it directly to their gaming console via an Ethernet cable. The built-in configuration utility simplifies the connection to the home Wi-Fi network, making it accessible even for those who may not be tech-savvy. Additionally, the WGE101’s compact size allows it to be conveniently placed near a gaming console without taking up much space.
The NETGEAR WGE101 also boasts advanced features such as QoS (Quality of Service) capabilities that prioritize gaming traffic over other types of data. This ensures that online gaming sessions can proceed smoothly without significant lag, even when other devices are using the network. Moreover, its ability to work seamlessly with a variety of routers enhances flexibility for users.
Furthermore, the WGE101 includes an LED indicator that provides real-time feedback on connection status, helping users troubleshoot potential connectivity issues. This added convenience is critical for gamers who desire uninterrupted gameplay.
In conclusion, the NETGEAR WGE101 wireless gaming adapter remains a noteworthy option for gamers looking to connect their consoles to the internet wirelessly. With its reliable performance, easy setup, and essential features tailored for gaming, the WGE101 has made a lasting impact in the realm of online gaming connectivity.