Easy Setup 6-5
2. Easy Setup Profile
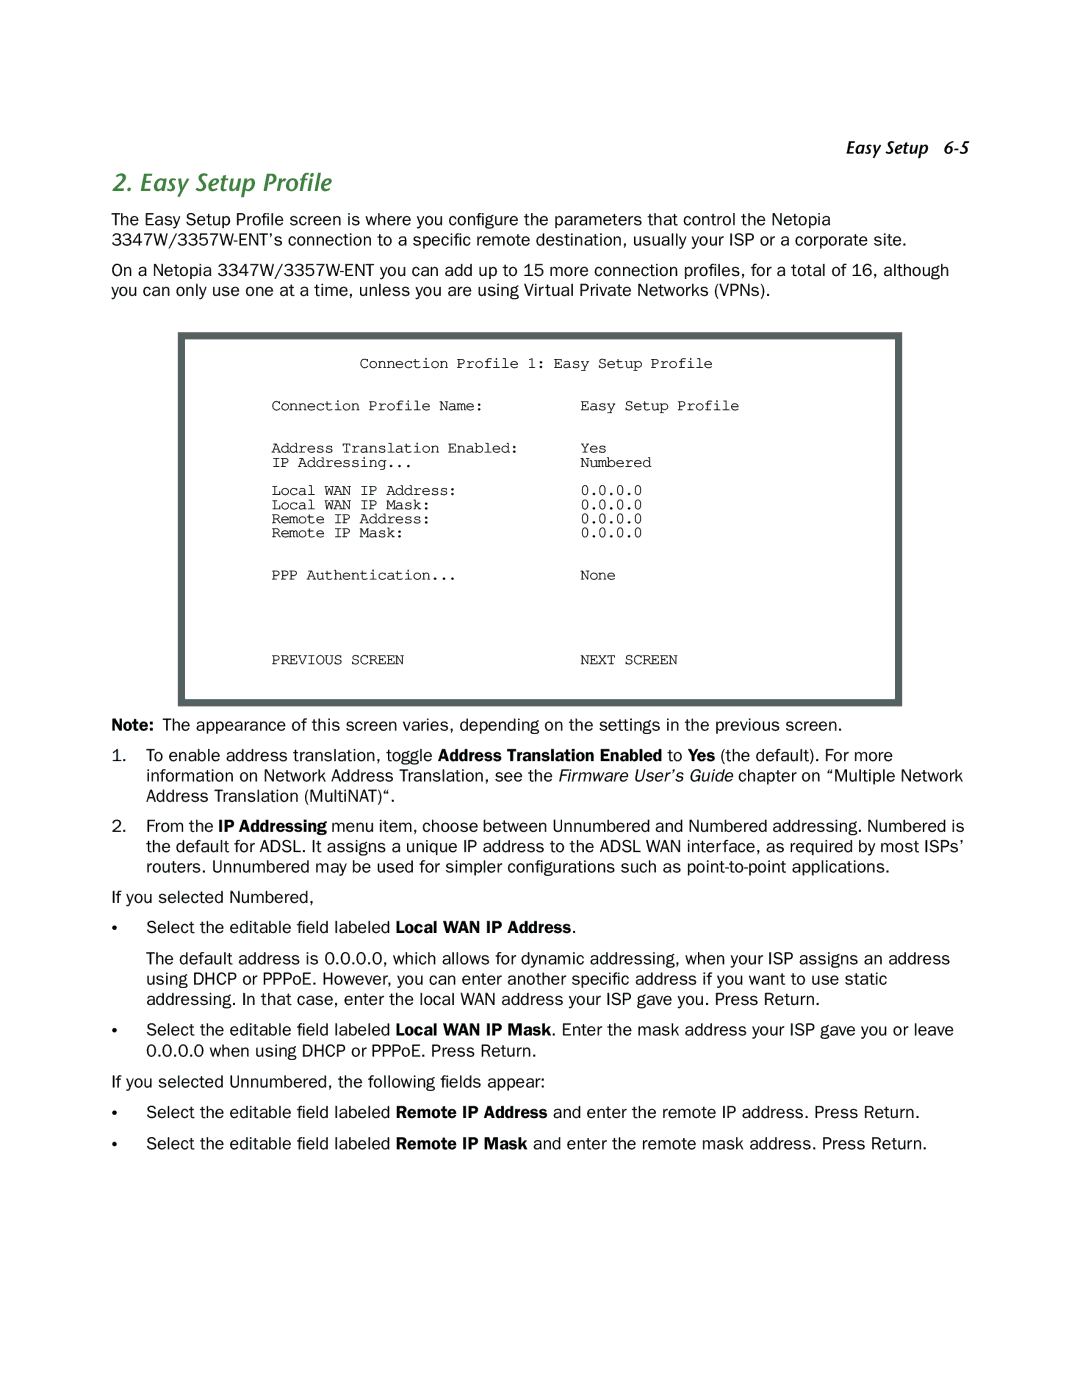
The Easy Setup Profile screen is where you configure the parameters that control the Netopia
On a Netopia
Connection Profile 1: Easy Setup Profile
Connection Profile Name: | Easy Setup Profile |
Address Translation Enabled: | Yes |
IP Addressing... | Numbered |
Local WAN IP Address: | 0.0.0.0 |
Local WAN IP Mask: | 0.0.0.0 |
Remote IP Address: | 0.0.0.0 |
Remote IP Mask: | 0.0.0.0 |
PPP Authentication... | None |
PREVIOUS SCREEN | NEXT SCREEN |
Note: The appearance of this screen varies, depending on the settings in the previous screen.
1.To enable address translation, toggle Address Translation Enabled to Yes (the default). For more information on Network Address Translation, see the Firmware User’s Guide chapter on “Multiple Network Address Translation (MultiNAT)“.
2.From the IP Addressing menu item, choose between Unnumbered and Numbered addressing. Numbered is the default for ADSL. It assigns a unique IP address to the ADSL WAN interface, as required by most ISPs’ routers. Unnumbered may be used for simpler configurations such as
If you selected Numbered,
•Select the editable field labeled Local WAN IP Address.
The default address is 0.0.0.0, which allows for dynamic addressing, when your ISP assigns an address using DHCP or PPPoE. However, you can enter another specific address if you want to use static addressing. In that case, enter the local WAN address your ISP gave you. Press Return.
•Select the editable field labeled Local WAN IP Mask. Enter the mask address your ISP gave you or leave 0.0.0.0 when using DHCP or PPPoE. Press Return.
If you selected Unnumbered, the following fields appear:
•Select the editable field labeled Remote IP Address and enter the remote IP address. Press Return.
•Select the editable field labeled Remote IP Mask and enter the remote mask address. Press Return.