NTI UNIMUX SERIES USB DVI KVM SWITCH
RACKMOUNTING INSTRUCTIONS
This NTI switch was designed to be mounted to a rack or to set on a desktop. It includes rackmount ears to make attachment to a rack easy, and rubber feet to be applied to the bottom of the case if it will instead sit on a flat surface. If this will sit on a flat surface, simply apply the rubber feet to the bottom of the case in each of the 4 corners.
To Mount to a Rack
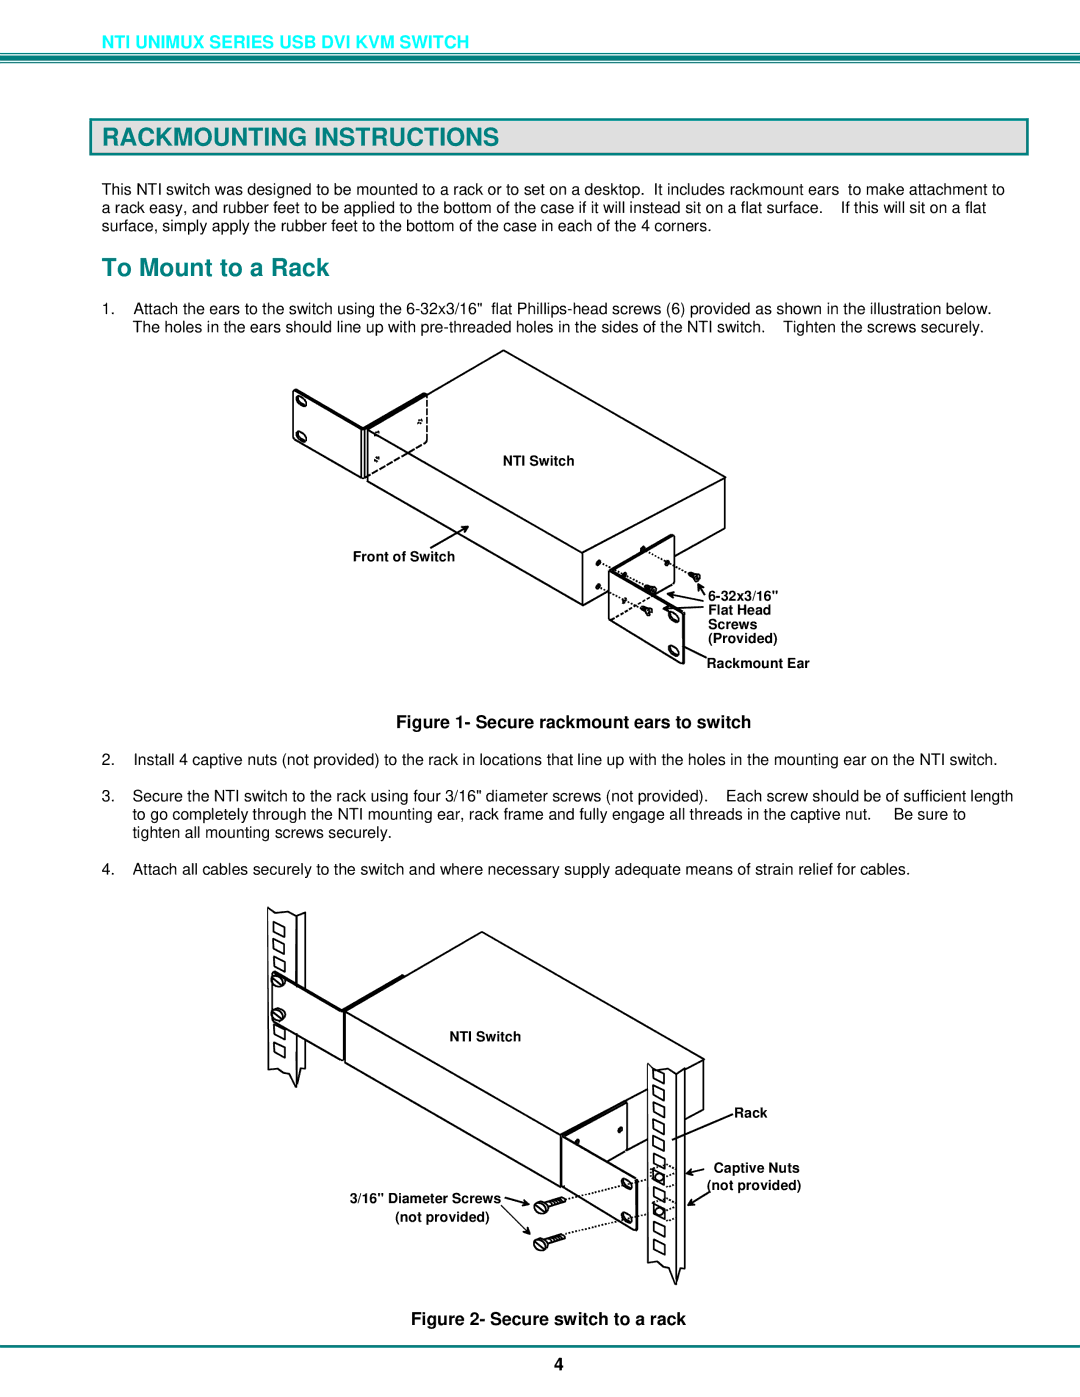
1.Attach the ears to the switch using the
NTI Switch
Front of Switch
![]()
![]()
![]()
![]()
![]()
![]()
![]()
![]()
![]() Flat Head
Flat Head
Screws (Provided)
Rackmount Ear
Figure 1- Secure rackmount ears to switch
2.Install 4 captive nuts (not provided) to the rack in locations that line up with the holes in the mounting ear on the NTI switch.
3.Secure the NTI switch to the rack using four 3/16" diameter screws (not provided). Each screw should be of sufficient length to go completely through the NTI mounting ear, rack frame and fully engage all threads in the captive nut. Be sure to tighten all mounting screws securely.
4.Attach all cables securely to the switch and where necessary supply adequate means of strain relief for cables.
NTI Switch
Rack
Captive Nuts
(not provided)
3/16" Diameter Screws ![]() (not provided)
(not provided) ![]()
Figure 2- Secure switch to a rack
4