NTI UNIMUX SERIES USB DVI KVM SWITCH
INSTALLATION
1.It is not necessary to turn the CPUs or monitors OFF during this installation.
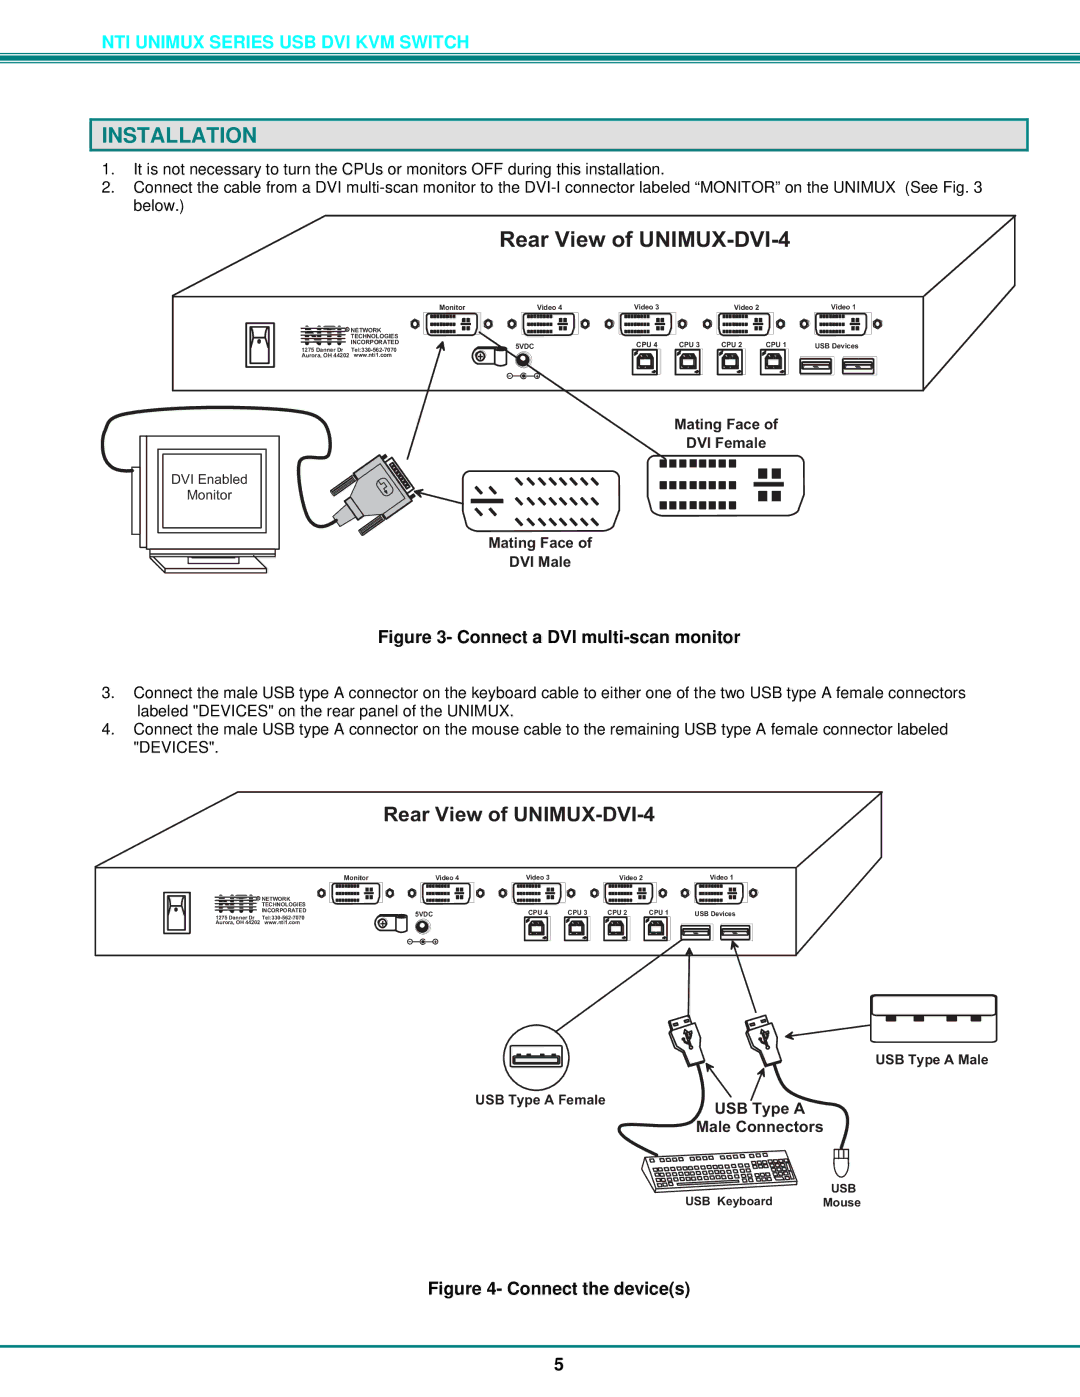
2.Connect the cable from a DVI
RearViewofUNIMUX-DVI-4
Monitor | Video4 | Video3 | Video2 | Video1 |
R NETWORK |
|
|
|
|
|
|
| |
TECHNOLOGIES |
|
|
|
|
|
|
| |
NTINCORPORATED | 5VDC | CPU4 | CPU3 | CPU2 | CPU1 | USBDevices | ||
1275DannerDr | ||||||||
+ |
|
|
|
|
|
| ||
Aurora,OH44202 www.nti1.com |
|
|
|
|
|
| ||
|
|
|
|
|
|
| ||
| - | + |
|
|
|
|
| |
DVIEnabled
Monitor
MatingFaceof
DVIFemale
MatingFaceof
DVIMale
Figure 3- Connect a DVI multi-scan monitor
3.Connect the male USB type A connector on the keyboard cable to either one of the two USB type A female connectors labeled "DEVICES" on the rear panel of the UNIMUX.
4.Connect the male USB type A connector on the mouse cable to the remaining USB type A female connector labeled "DEVICES".
RearViewofUNIMUX-DVI-4
Monitor | Video4 | Video3 | Video2 | Video1 | |||
|
|
|
|
|
|
|
|
R NETWORK |
|
|
|
|
|
|
|
TECHNOLOGIES |
|
|
|
|
|
|
|
NTINCORPORATED | 5VDC | CPU4 | CPU3 | CPU2 | CPU1 | USBDevices | |
1275DannerDr | |||||||
Aurora,OH44202 www.nti1.com | + |
|
|
|
|
|
|
|
|
|
|
|
|
| |
| - | + |
|
|
|
|
|
USBTypeAFemale
USBTypeAMale
USBTypeA
MaleConnectors
| USB |
USB Keyboard | Mouse |
Figure 4- Connect the device(s)
5