NTI UNIMUX SERIES USB KVM SWITCH
INSTALLATION
1. | It is not necessary to turn the CPUs or monitors OFF during this installation. |
|
2. | Connect a | ) |
| on the front of the UNIMUX (See Fig. 3 below.) |
|
Front View of
Scan Broadcast Command
1 | 2 | 3 | 4 | 5 | 6 | 7 | 8 |
RS232
DDC ON
1 8
NTI
Ne twork Technologies Inc
UNIMUX TM
DVI Enabled
Monitor
Mating Face of | Mating Face of |
DVI Male | HDMI Type A Male |
Figure 3- Connect a DVI monitor
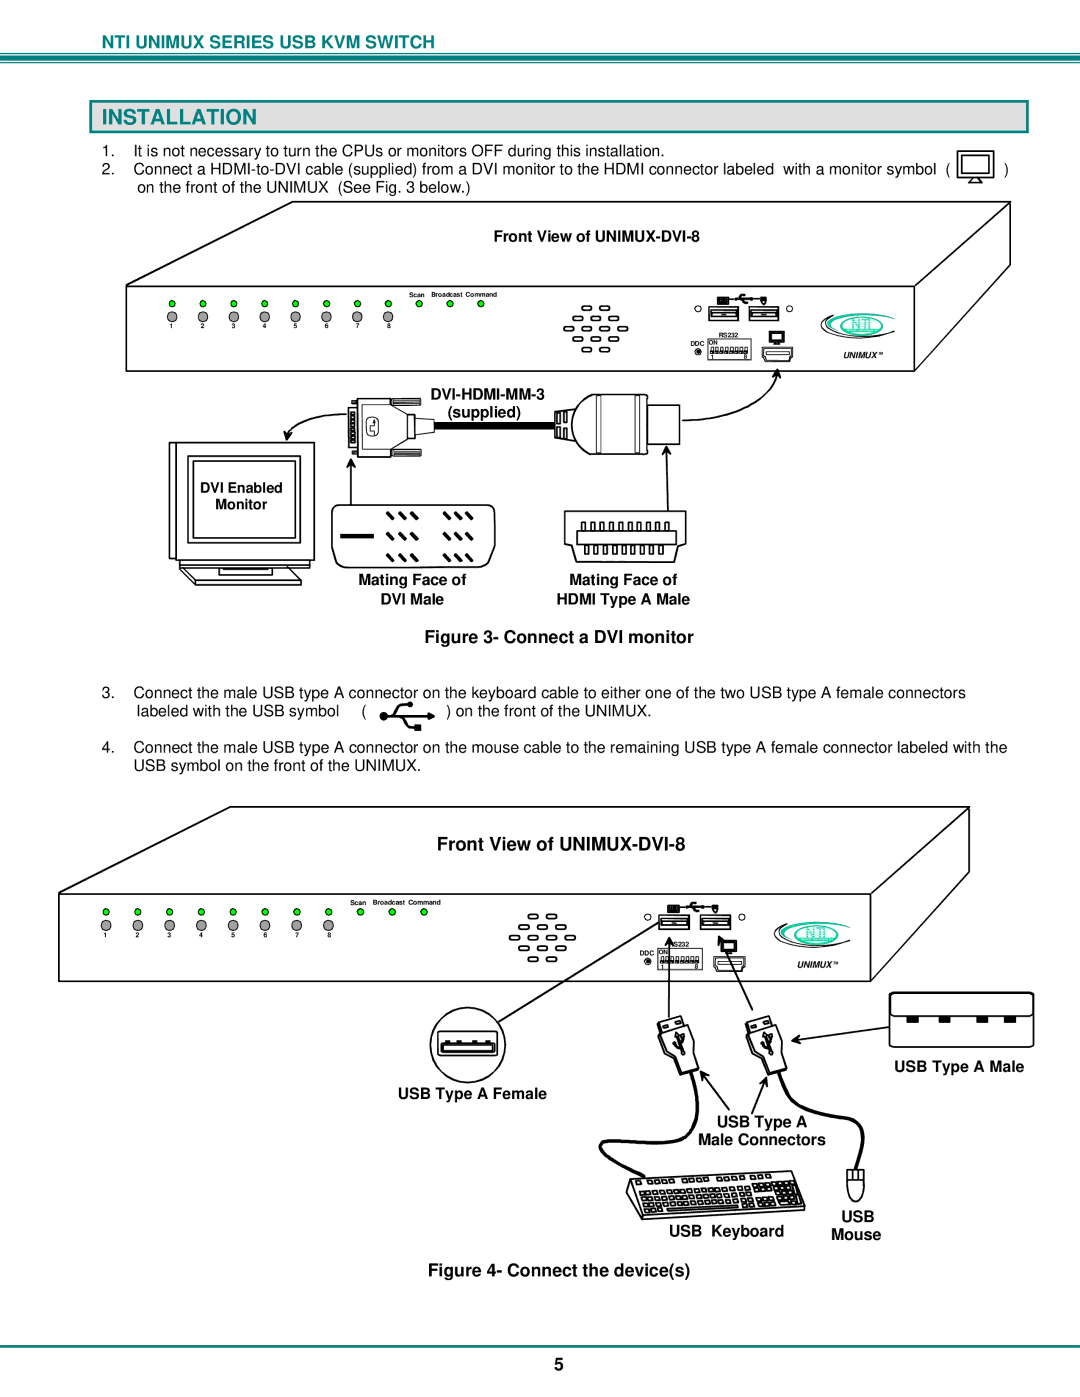
3.Connect the male USB type A connector on the keyboard cable to either one of the two USB type A female connectors
labeled with the USB symbol ( | ) on the front of the UNIMUX. |
4.Connect the male USB type A connector on the mouse cable to the remaining USB type A female connector labeled with the USB symbol on the front of the UNIMUX.
Front View of UNIMUX-DVI-8
Scan Broadcast Command
1 | 2 | 3 | 4 | 5 | 6 | 7 | 8 |
RS232
DDC ON
1 8
NTI
Network Technologies Inc
UNIMUX TM
USB Type A Male
USB Type A Female
USB Type A
Male Connectors
USB Keyboard | USB |
Mouse |
Figure 4- Connect the device(s)
5