Manuals
/
Neuro Logic Systems
/
Computer Equipment
/
Computer Monitor
Neuro Logic Systems
RFT-17 inch LCD/Keyboard Rack Kit Installation Guide, Step, Detail
Models:
RFT-17
1
5
14
14
Download
14 pages
44.12 Kb
1
2
3
4
5
6
7
8
Specifications
Install
Connecting your LCD/Keyboard
Warranty
Activates the Auto Adjust
Page 5
Image 5
Page 4
Page 6
Page 5
Image 5
Page 4
Page 6
Contents
17 inch LCD/Keyboard Rack Kit
Page 2 of
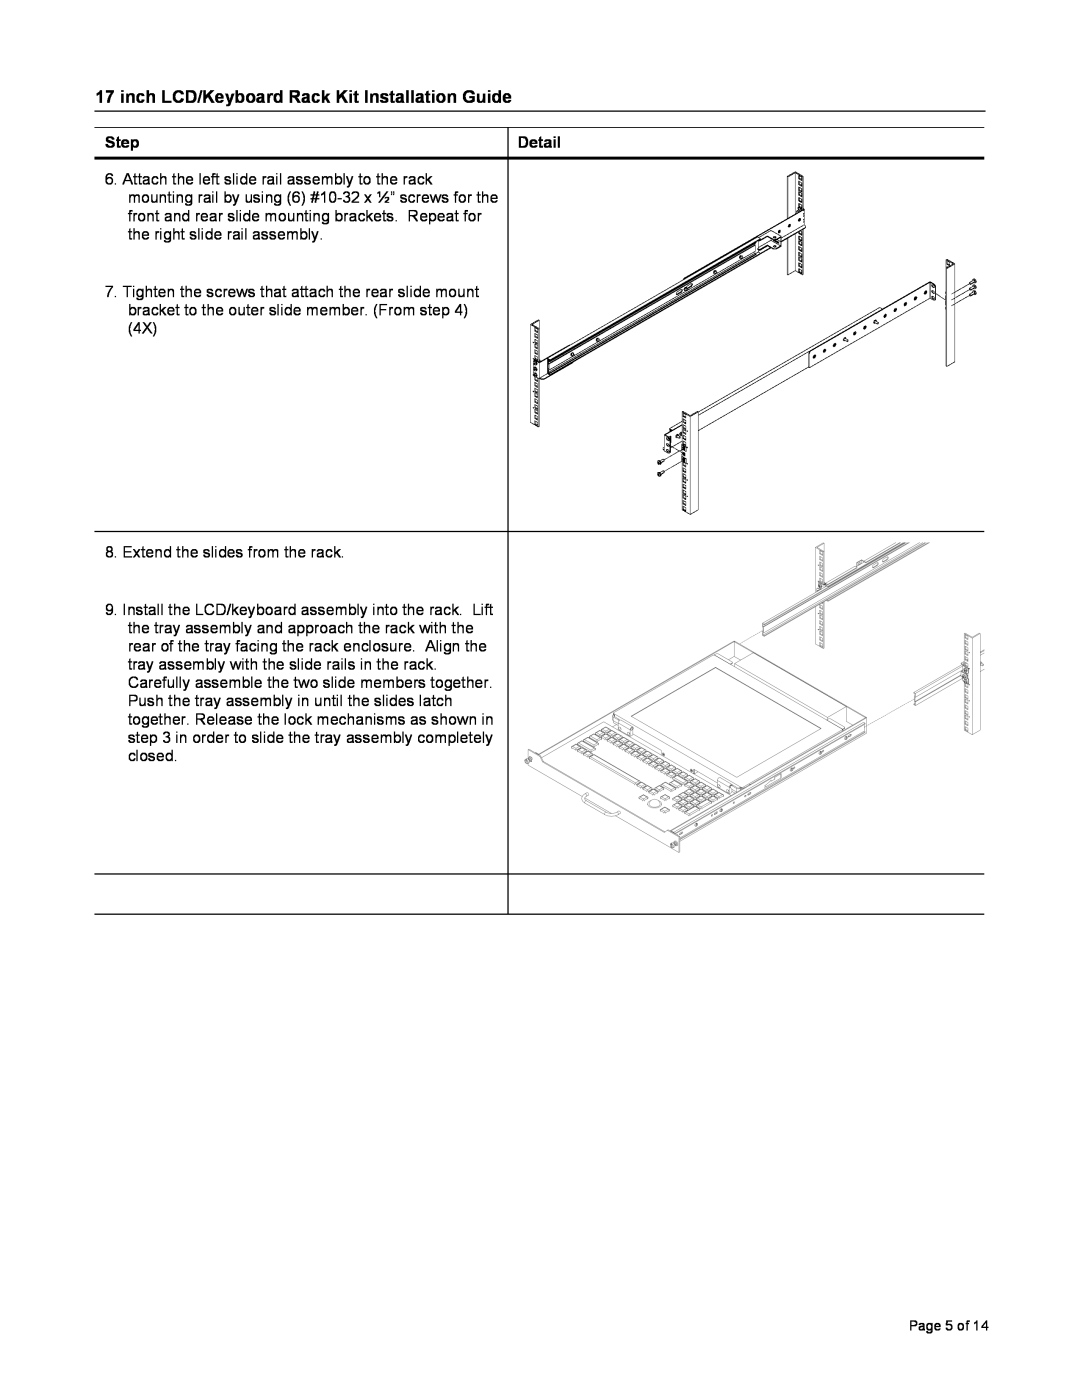
17 inch LCD/Keyboard Rack Kit Installation Guide
Detail
Hardware Installation
Step
the outer slide members must be removed to be
8. Extend the slides from the rack
Page 6 of
Connecting your LCD/Keyboard
Page 7 of
Operating your LCD/Keyboard
On some models the menu panel may be located on the back of the LCD
Page 8 of
Function when displaying
Function when not
Activates the Auto Adjust
Label
On-Screen Display OSD Menus
Auto-Adjustment will reset all parameters to the factory default
Trouble Shooting Bad Image Quality
Page 12 of
Keyboard Specifications
LCD Panel Specifications
General Specifications
Frame Buffer Compatibility
Warranty
Top
Page
Image
Contents