Shooting Techniques | Static Subjects |
Suggested Settings
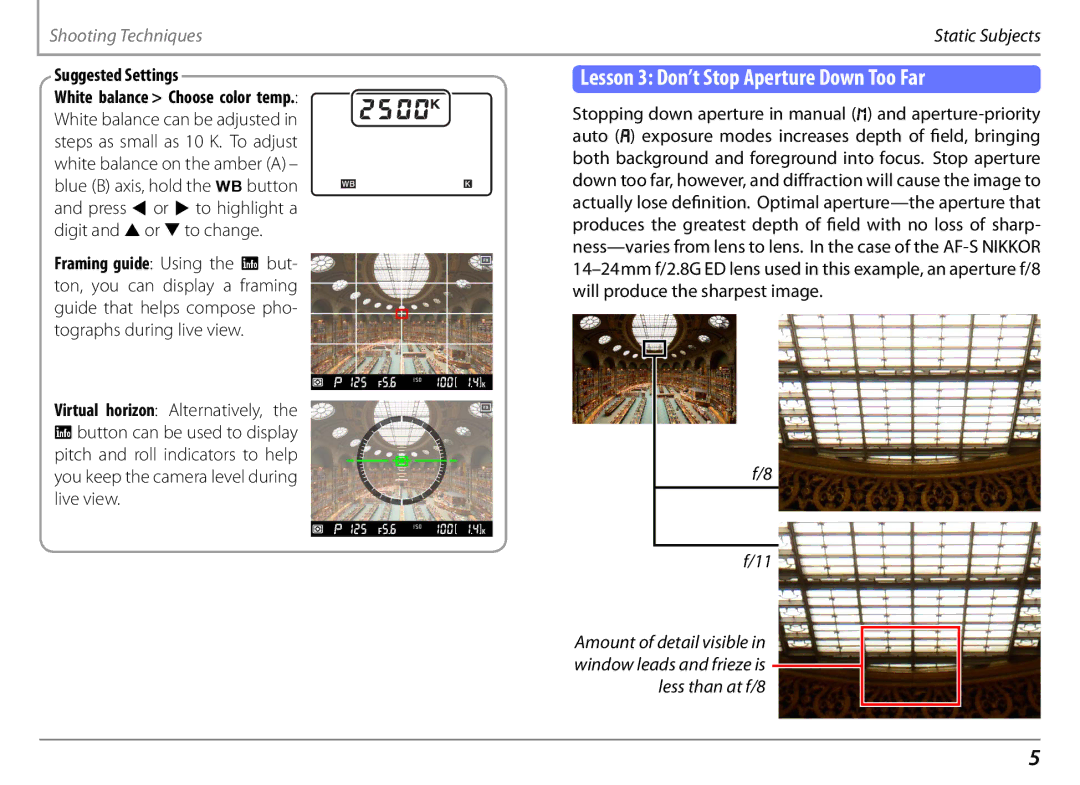
White balance > Choose color temp.: White balance can be adjusted in steps as small as 10 K. To adjust white balance on the amber (A) – blue (B) axis, hold the Ubutton and press 4 or 2 to highlight a digit and 1 or 3 to change.
Framing guide: Using the R but- ton, you can display a framing guide that helps compose pho- tographs during live view.
Virtual horizon: Alternatively, the Rbutton can be used to display pitch and roll indicators to help you keep the camera level during live view.
 Lesson 3: Don’t Stop Aperture Down Too Far
Stopping down aperture in manual (h) and
f/8
f/11
Amount of detail visible in window leads and frieze is ![]() less than at f/8
less than at f/8
5
