ATTIX 9 H/M
7.2.2Replacing the disposal bag
B |
C |
![]()
![]()
![]() G
G
A |
A |
![]()
![]()
![]()
![]() D
D
![]()
![]()
![]()
![]() E
E
F |
B |
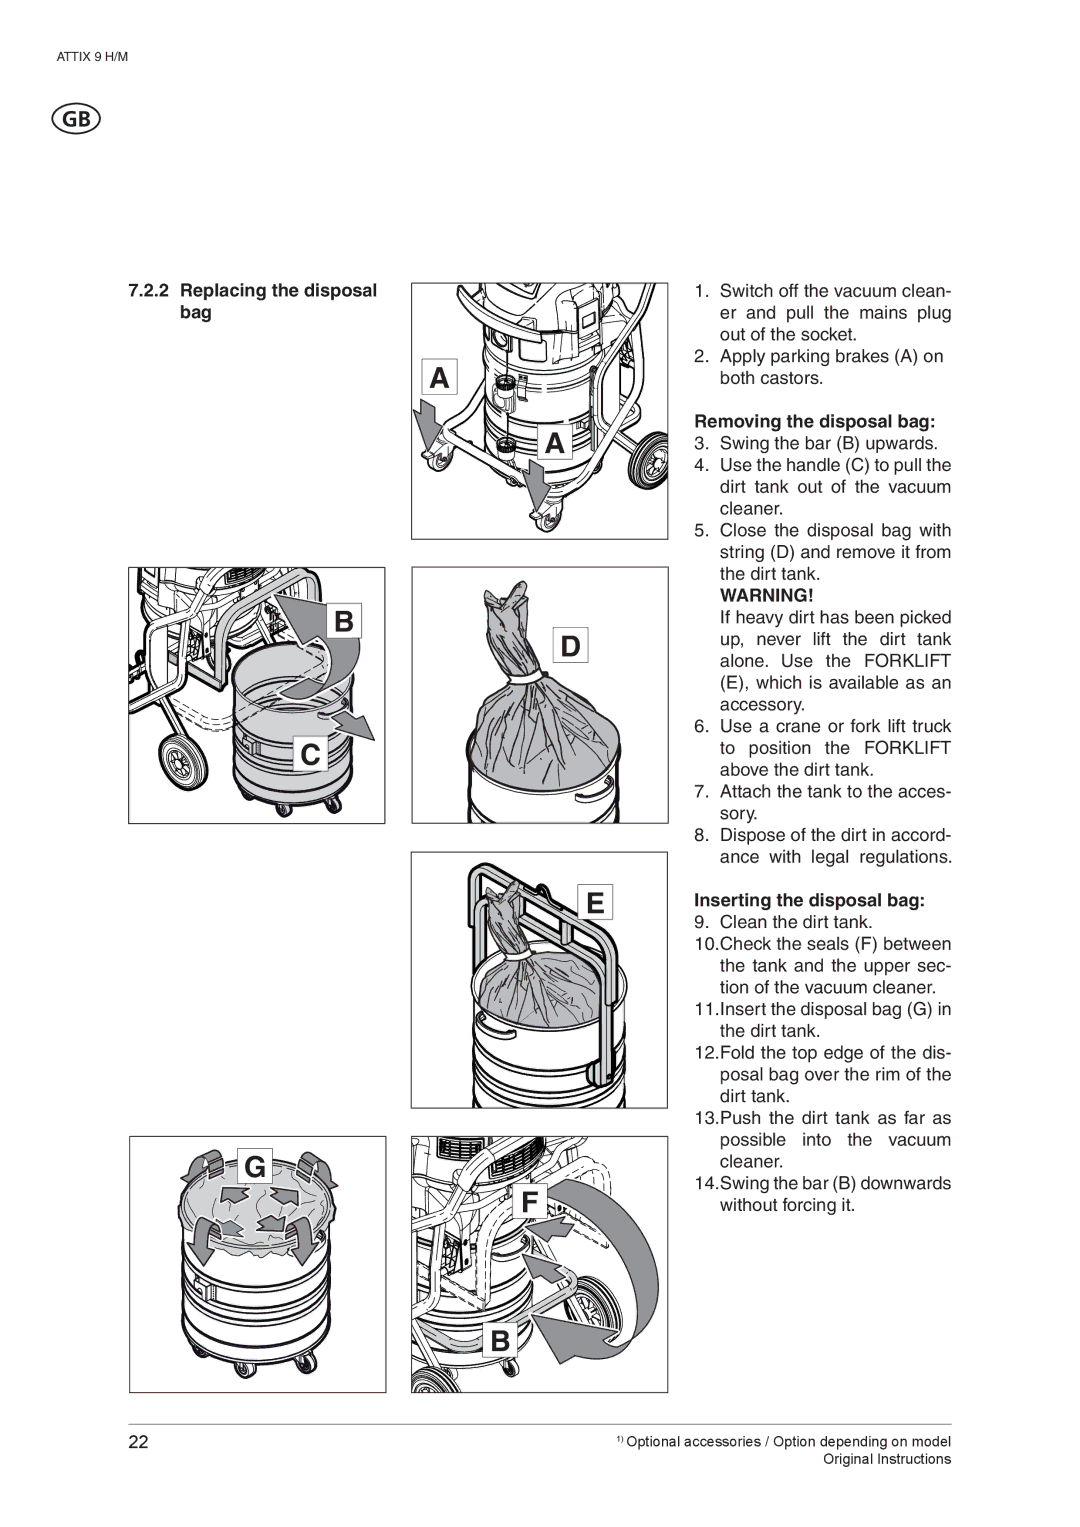
1.Switch off the vacuum clean- er and pull the mains plug out of the socket.
2.Apply parking brakes (A) on both castors.
Removing the disposal bag:
3.Swing the bar (B) upwards.
4.Use the handle (C) to pull the dirt tank out of the vacuum cleaner.
5.Close the disposal bag with string (D) and remove it from the dirt tank.
WARNING!
If heavy dirt has been picked up, never lift the dirt tank alone. Use the FORKLIFT (E), which is available as an accessory.
6.Use a crane or fork lift truck to position the FORKLIFT above the dirt tank.
7.Attach the tank to the acces- sory.
8.Dispose of the dirt in accord- ance with legal regulations.
Inserting the disposal bag:
9. Clean the dirt tank.
10.Check the seals (F) between the tank and the upper sec- tion of the vacuum cleaner.
11.Insert the disposal bag (G) in the dirt tank.
12.Fold the top edge of the dis- posal bag over the rim of the dirt tank.
13.Push the dirt tank as far as possible into the vacuum cleaner.
14.Swing the bar (B) downwards without forcing it.
22 | 1) Optional accessories / Option depending on model |
| Original Instructions |