PART IDENTIFICATION CHART
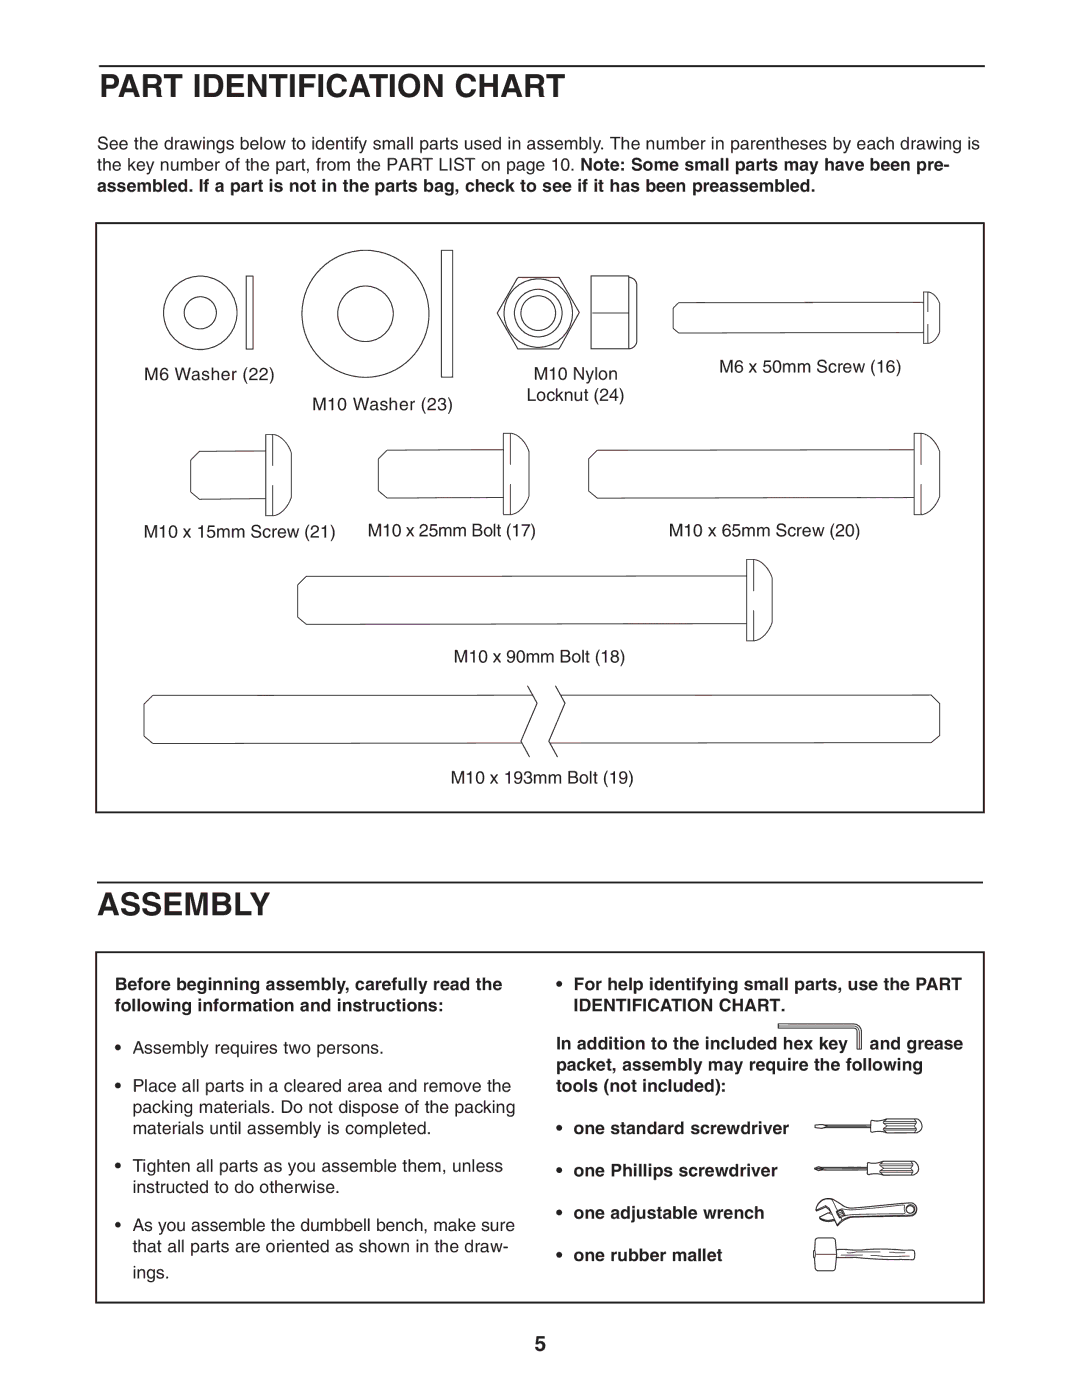
See the drawings below to identify small parts used in assembly. The number in parentheses by each drawing is the key number of the part, from the PART LIST on page 10. Note: Some small parts may have been pre- assembled. If a part is not in the parts bag, check to see if it has been preassembled.
M6 Washer (22) |
| M10 Nylon | M6 x 50mm Screw (16) |
|
| ||
M10 Washer (23) | Locknut (24) |
| |
|
| ||
M10 x 15mm Screw (21) | M10 x 25mm Bolt (17) | M10 x 65mm Screw (20) | |
|
| M10 x 90mm Bolt (18) |
|
| M10 x 193mm Bolt (19) |
| |
ASSEMBLY
Before beginning assembly, carefully read the following information and instructions:
•Assembly requires two persons.
•Place all parts in a cleared area and remove the packing materials. Do not dispose of the packing materials until assembly is completed.
•Tighten all parts as you assemble them, unless instructed to do otherwise.
•As you assemble the dumbbell bench, make sure that all parts are oriented as shown in the draw-
ings.
•For help identifying small parts, use the PART IDENTIFICATION CHART.
In addition to the included hex key and grease packet, assembly may require the following tools (not included):
• one standard screwdriver
• one Phillips screwdriver
• one adjustable wrench
• one rubber mallet
5
