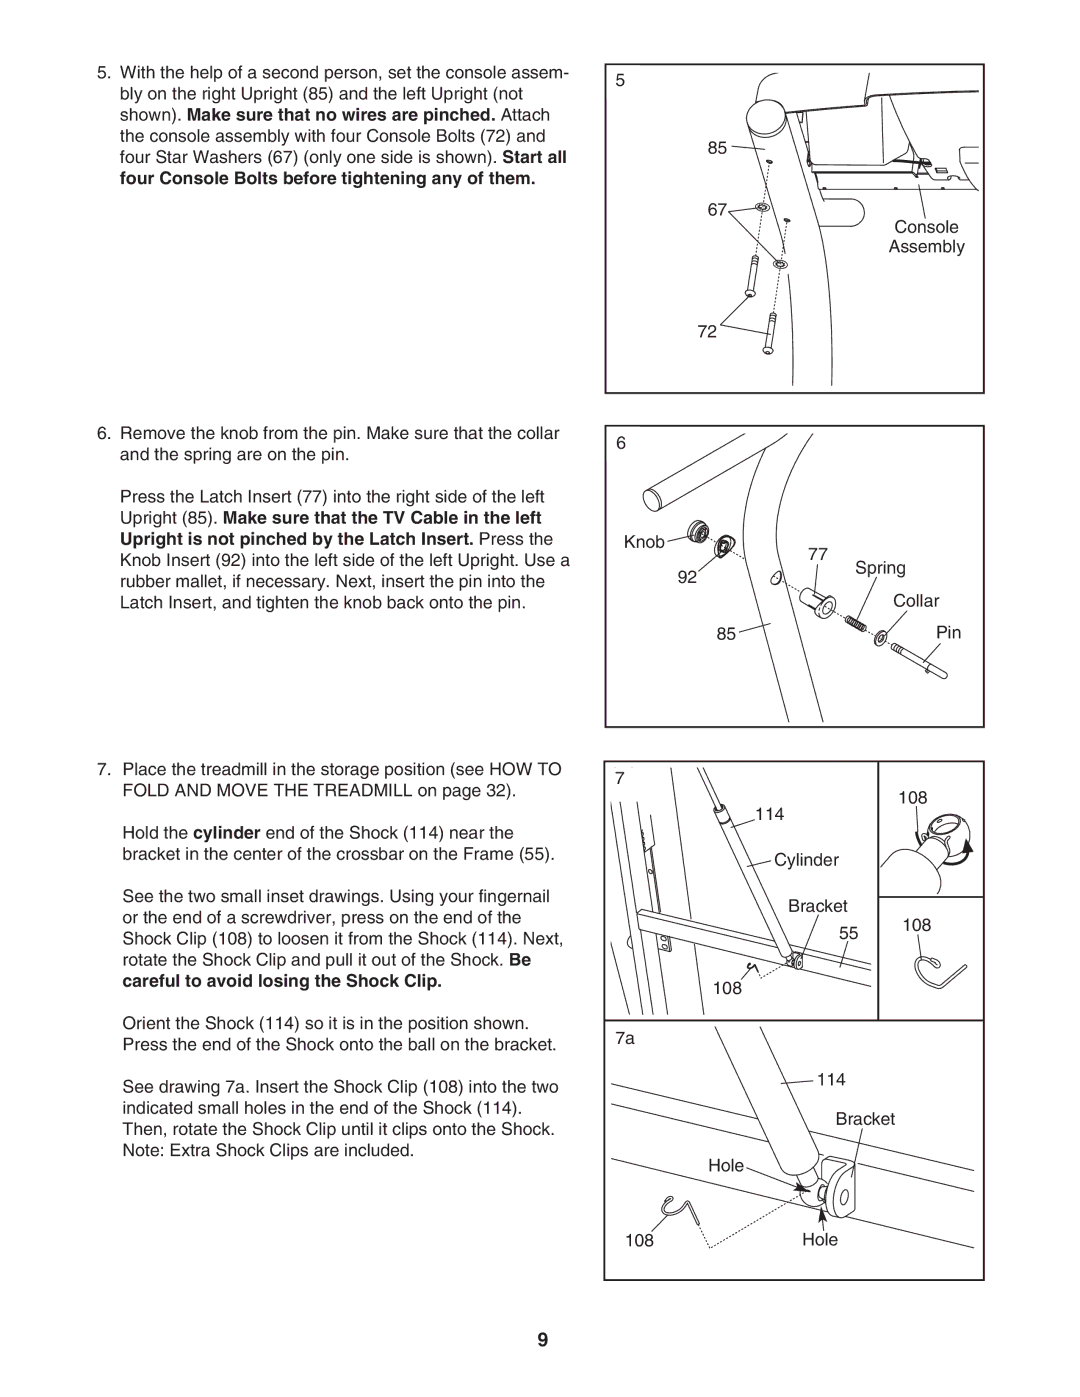
5.With the help of a second person, set the console assem- bly on the right Upright (85) and the left Upright (not shown). Make sure that no wires are pinched. Attach the console assembly with four Console Bolts (72) and four Star Washers (67) (only one side is shown). Start all four Console Bolts before tightening any of them.
6.Remove the knob from the pin. Make sure that the collar and the spring are on the pin.
Press the Latch Insert (77) into the right side of the left Upright (85). Make sure that the TV Cable in the left Upright is not pinched by the Latch Insert. Press the Knob Insert (92) into the left side of the left Upright. Use a rubber mallet, if necessary. Next, insert the pin into the Latch Insert, and tighten the knob back onto the pin.
7.Place the treadmill in the storage position (see HOW TO FOLD AND MOVE THE TREADMILL on page 32).
Hold the cylinder end of the Shock (114) near the bracket in the center of the crossbar on the Frame (55).
See the two small inset drawings. Using your fingernail or the end of a screwdriver, press on the end of the Shock Clip (108) to loosen it from the Shock (114). Next, rotate the Shock Clip and pull it out of the Shock. Be careful to avoid losing the Shock Clip.
Orient the Shock (114) so it is in the position shown. Press the end of the Shock onto the ball on the bracket.
See drawing 7a. Insert the Shock Clip (108) into the two indicated small holes in the end of the Shock (114). Then, rotate the Shock Clip until it clips onto the Shock. Note: Extra Shock Clips are included.
5 |
|
|
85 |
|
|
67 |
| Console |
|
| |
|
| Assembly |
72 |
|
|
6 |
|
|
Knob | 77 |
|
|
| |
92 | Spring | |
|
| |
|
| Collar |
85 |
| Pin |
7 |
| 108 |
| 114 | |
|
| |
| Cylinder |
|
| Bracket | 108 |
| 55 | |
|
| |
108 |
|
|
7a |
|
|
| 114 |
|
| Bracket | |
Hole |
|
|
108 | Hole |
|
9