Monitor Adjustment
Maximum Monitor Dimensions:
TRACKING
TRACKING
SECURITY
SCREW
Step 10.4
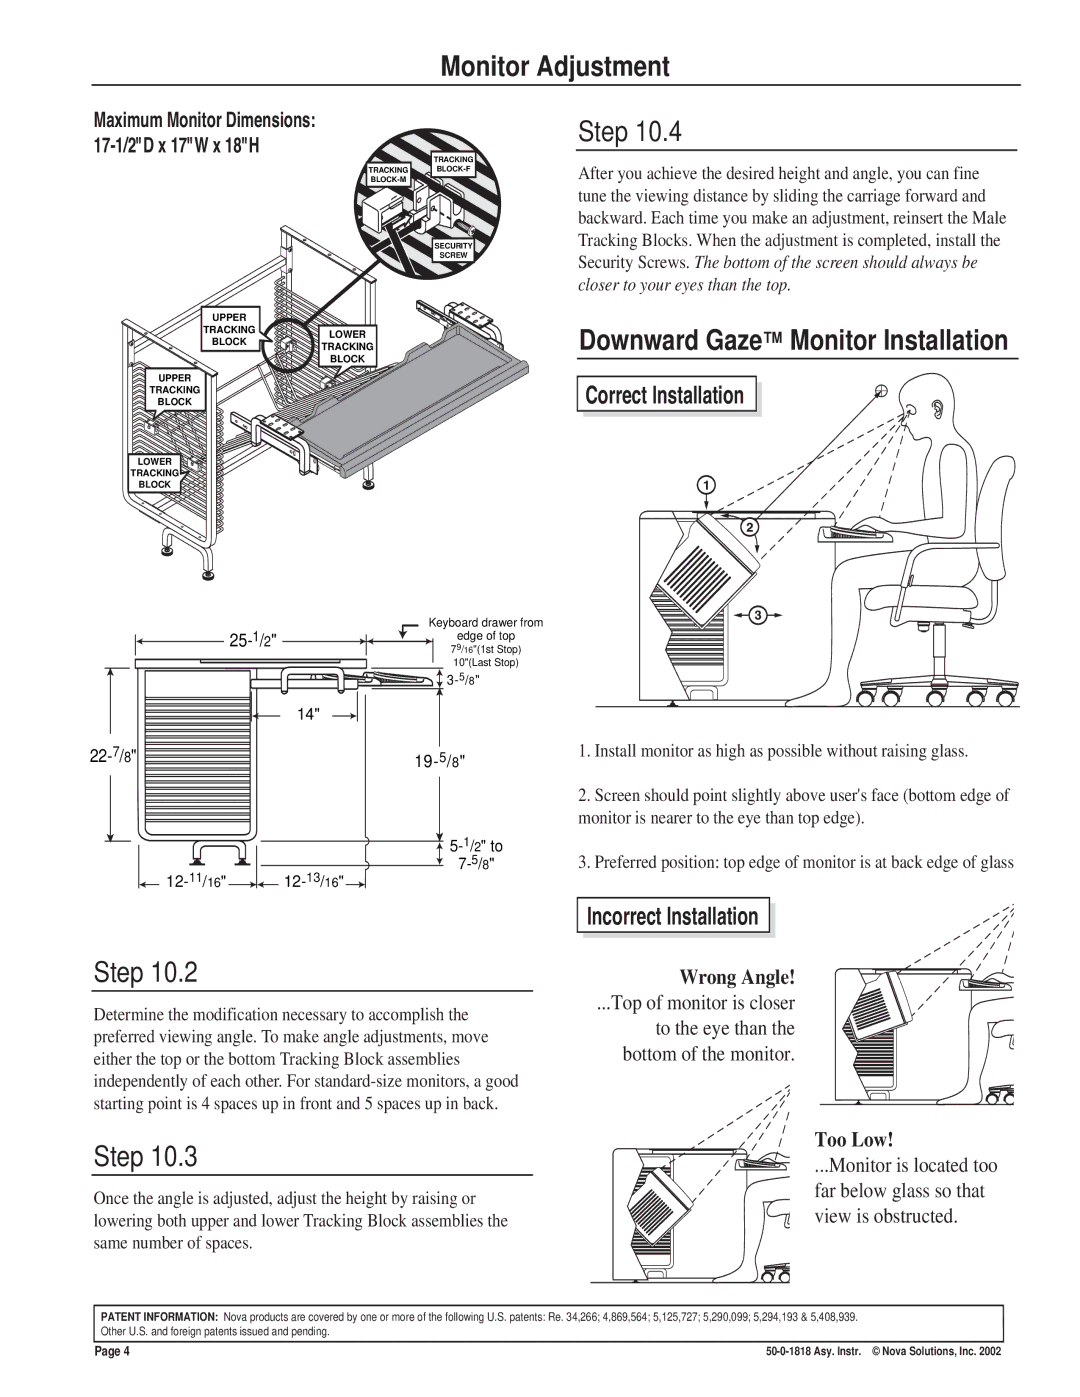
After you achieve the desired height and angle, you can fine tune the viewing distance by sliding the carriage forward and backward. Each time you make an adjustment, reinsert the Male Tracking Blocks. When the adjustment is completed, install the Security Screws. The bottom of the screen should always be closer to your eyes than the top.
UPPER
TRACKING
BLOCK
UPPER
TRACKING
BLOCK
LOWER |
TRACKING |
BLOCK |
LOWER |
TRACKING |
BLOCK |
Downward Gaze™ Monitor Installation
Correct Installation
|
|
| Keyboard drawer from | ||||
|
|
|
|
| edge of top | ||
|
|
|
|
| 79/16"(1st Stop) | ||
|
|
|
|
|
|
| 10"(Last Stop) |
| 14" |
|
|
19- | 5 | /8" | |
|
|
![]()
![]()
![]()
![]()
Step 10.2
Determine the modification necessary to accomplish the preferred viewing angle. To make angle adjustments, move either the top or the bottom Tracking Block assemblies independently of each other. For
Step 10.3
Once the angle is adjusted, adjust the height by raising or lowering both upper and lower Tracking Block assemblies the same number of spaces.
1.Install monitor as high as possible without raising glass.
2.Screen should point slightly above user's face (bottom edge of monitor is nearer to the eye than top edge).
3.Preferred position: top edge of monitor is at back edge of glass.
Incorrect Installation
Wrong Angle!
...Top of monitor is closer
to the eye than the bottom of the monitor.
Too Low!
...Monitor is located too far below glass so that view is obstructed.
PATENT INFORMATION: Nova products are covered by one or more of the following U.S. patents: Re. 34,266; 4,869,564; 5,125,727; 5,290,099; 5,294,193 & 5,408,939. Other U.S. and foreign patents issued and pending.
Page 4 |
