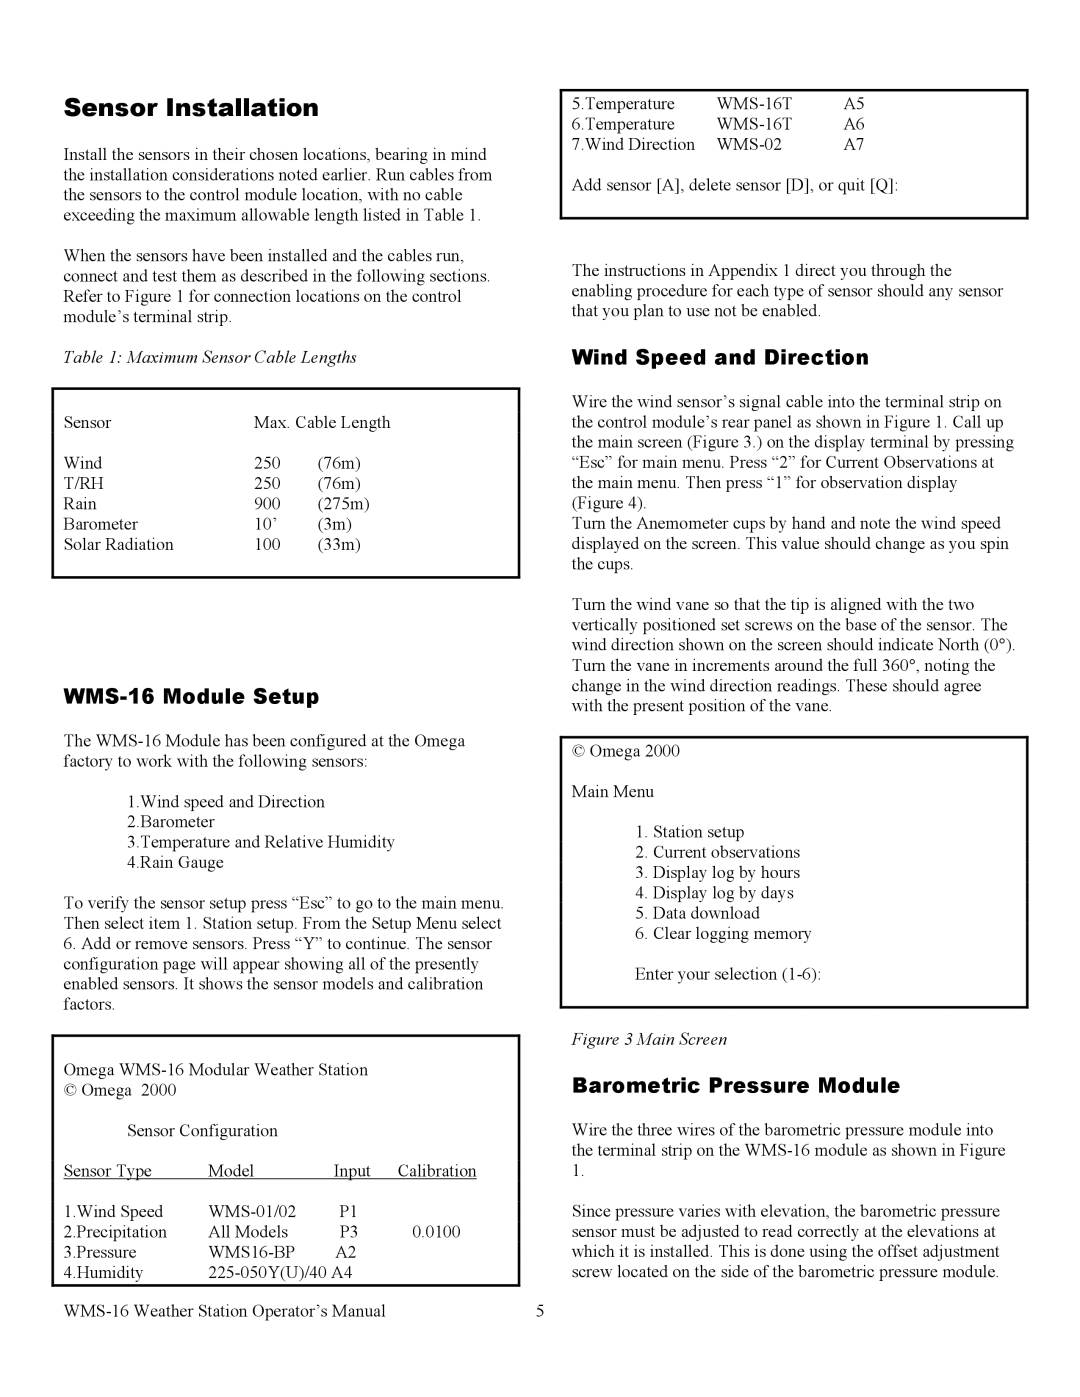
WMS-16 specifications
The Omega WMS-16 is an advanced weather monitoring system designed to provide accurate meteorological data for various applications, including agriculture, aviation, and environmental research. This device integrates cutting-edge technologies to offer comprehensive weather insights, making it a vital tool for professionals in diverse fields.One of the standout features of the Omega WMS-16 is its multi-sensor capability. The system includes sensors for measuring temperature, humidity, barometric pressure, wind speed and direction, and precipitation levels. This extensive range of measurements allows users to obtain a holistic view of current weather conditions, facilitating better decision-making.
Another key characteristic of the WMS-16 is its real-time data reporting. The device is equipped with a powerful data transmission system that sends information to a central server at regular intervals. This enables users to access up-to-date weather data from anywhere via a web interface or dedicated app, ensuring they are always informed about changing conditions.
The Omega WMS-16 features robust data logging capabilities, storing historical data for later analysis. This function is particularly beneficial for researchers and agronomists who need to track weather patterns over time to make informed agricultural decisions or assess environmental changes. The user-friendly interface allows easy access to past records and trends, enhancing usability.
For enhanced usability in various environments, the Omega WMS-16 boasts an IP65 rating, signifying its resistance to dust and water. This durability makes it suitable for both indoor and outdoor installations, assuring reliable performance under different weather conditions.
The WMS-16 employs advanced wireless communication technologies, ensuring seamless integration with existing systems. It supports protocols like Wi-Fi and Bluetooth, enabling users to connect the device to smart home systems, mobile devices, or local networks with ease.
In summary, the Omega WMS-16 is an all-encompassing weather monitoring solution that combines a range of sensors, real-time data transmission, and robust logging capabilities within a durable package. Its versatility and reliability make it an ideal choice for anyone needing precise meteorological data, enabling users to adapt effectively to any environmental challenges they may face. Whether for professional, agricultural, or research purposes, the WMS-16 provides the tools necessary for comprehensive weather analysis.