
A-933 specifications
The Onkyo A-933 is a high-performance integrated amplifier designed for audiophiles who demand superior sound quality and versatility from their audio equipment. With its classic design and modern technology, the A-933 stands out in the realm of home audio solutions.At the heart of the Onkyo A-933 is a powerful amplification section that delivers a robust 80 watts per channel at 4 ohms, ensuring clear and dynamic sound reproduction suitable for various listening environments. The A-933 employs a discrete output stage to provide low distortion and high current capability, making it perfect for driving a wide range of speakers, including those that may be more demanding in terms of power.
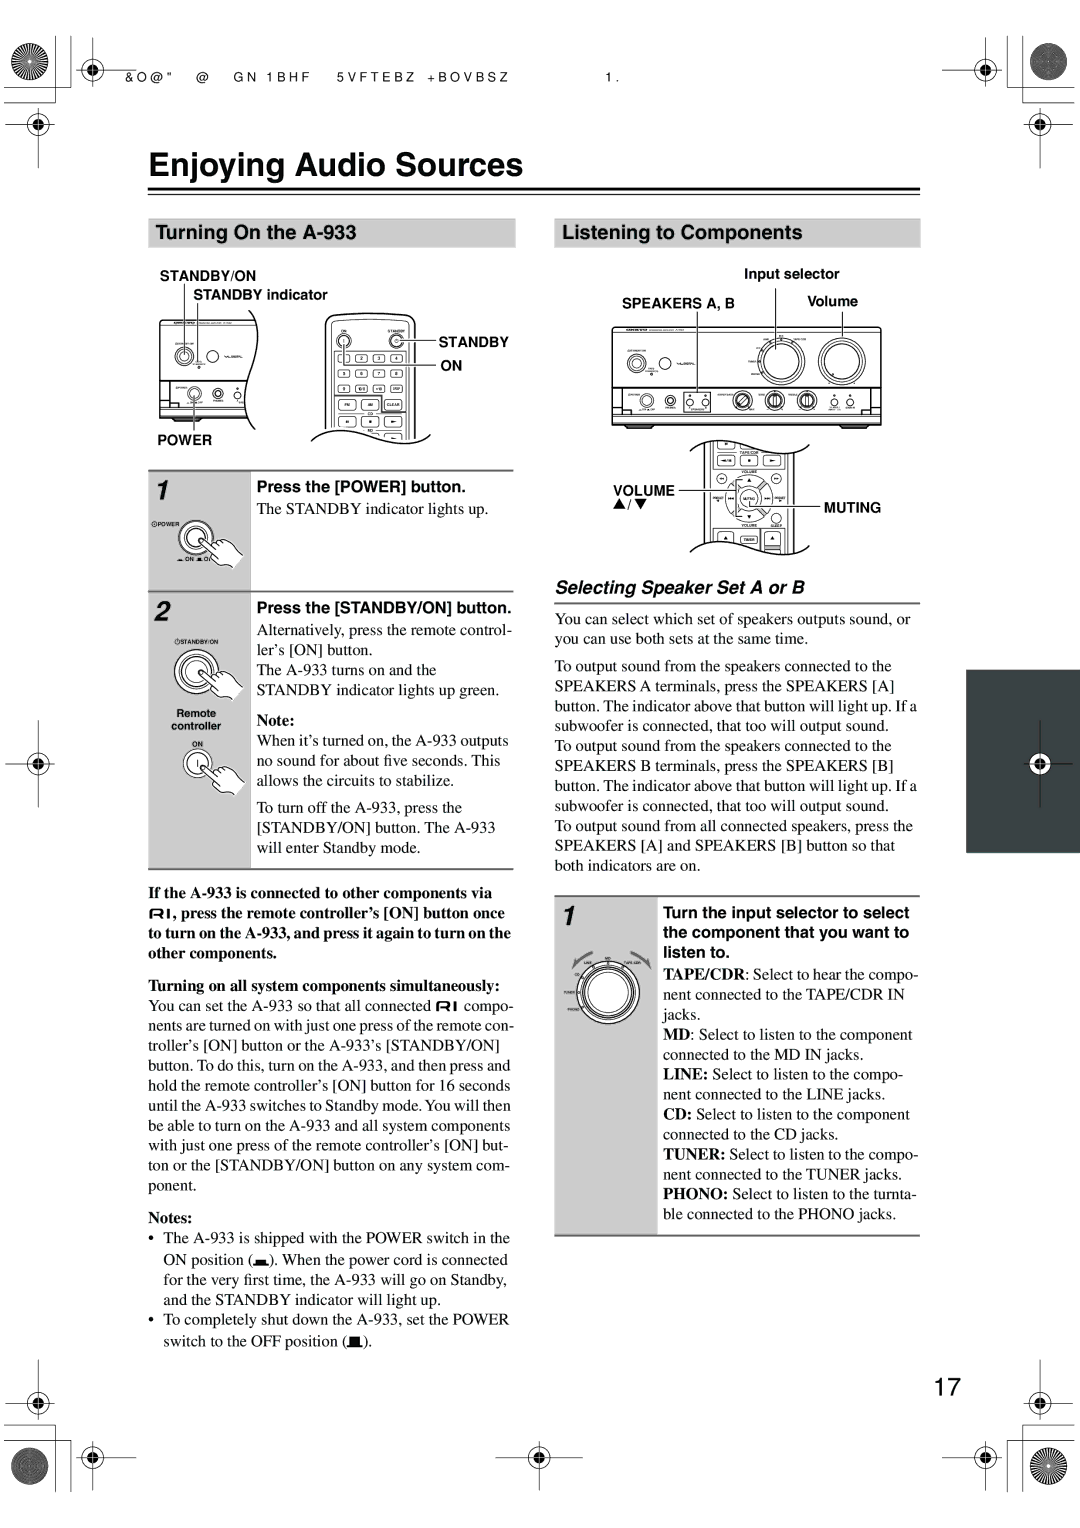
One of the key features of the A-933 is its comprehensive connectivity options. It offers multiple analog inputs, including dedicated phono input for turntables, allowing users to enjoy their vinyl collection seamlessly. Additionally, the amplifier includes a variety of digital inputs, including optical and coaxial connections, making it compatible with a range of digital sources like CD players, televisions, and streaming devices.
To further enhance sound quality, the A-933 incorporates Onkyo’s high-current amplification technology, which optimizes power delivery and minimizes distortion. The amplifier also features customizable sound settings, including tone controls for bass and treble, allowing users to tailor their listening experience to their personal preferences.
Durability and build quality are also significant characteristics of the Onkyo A-933. It features a robust chassis designed to minimize interference and vibration, ensuring pure sound reproduction. The front panel is equipped with an easy-to-read display and intuitive controls, making operation straightforward for users of all experience levels.
Moreover, the A-933 supports various audio formats, thanks to its built-in USB digital input for high-resolution audio playback. Users can connect their computers or mobile devices to enjoy studio-quality sound from their digital music libraries.
Overall, the Onkyo A-933 integrated amplifier combines superior performance, versatile connectivity, and user-friendly features. It stands as a solid choice for those seeking to elevate their home audio systems, providing a rich and immersive listening experience that is sure to satisfy even the most discerning audiophiles.