Making Connections
To accommodate a wide range of home entertainment systems, this player features numerous connection types for both audio and video. Please refer to the instructions on this and the following pages to determine the best possible type of connections for your system.
Before Connecting
•Refer to the instruction manuals supplied with any and all components that you plan to connect the DVD Player to.
•Be sure to turn off the power of all components to be connected and unplug them from the wall outlet before making any connections.
•Connect the DVD Player to the TV or AV component directly. If you connect the DVD Player to a VCR, TV/VCR combination, or video selector, the playback picture may be distorted as DVD Video images are copy protected.
•Please note that video connections to a TV or monitor are necessary because some discs require
•Connect the plugs securely.
Incomplete
![]() Inserted completely
Inserted completely
Connections to a TV
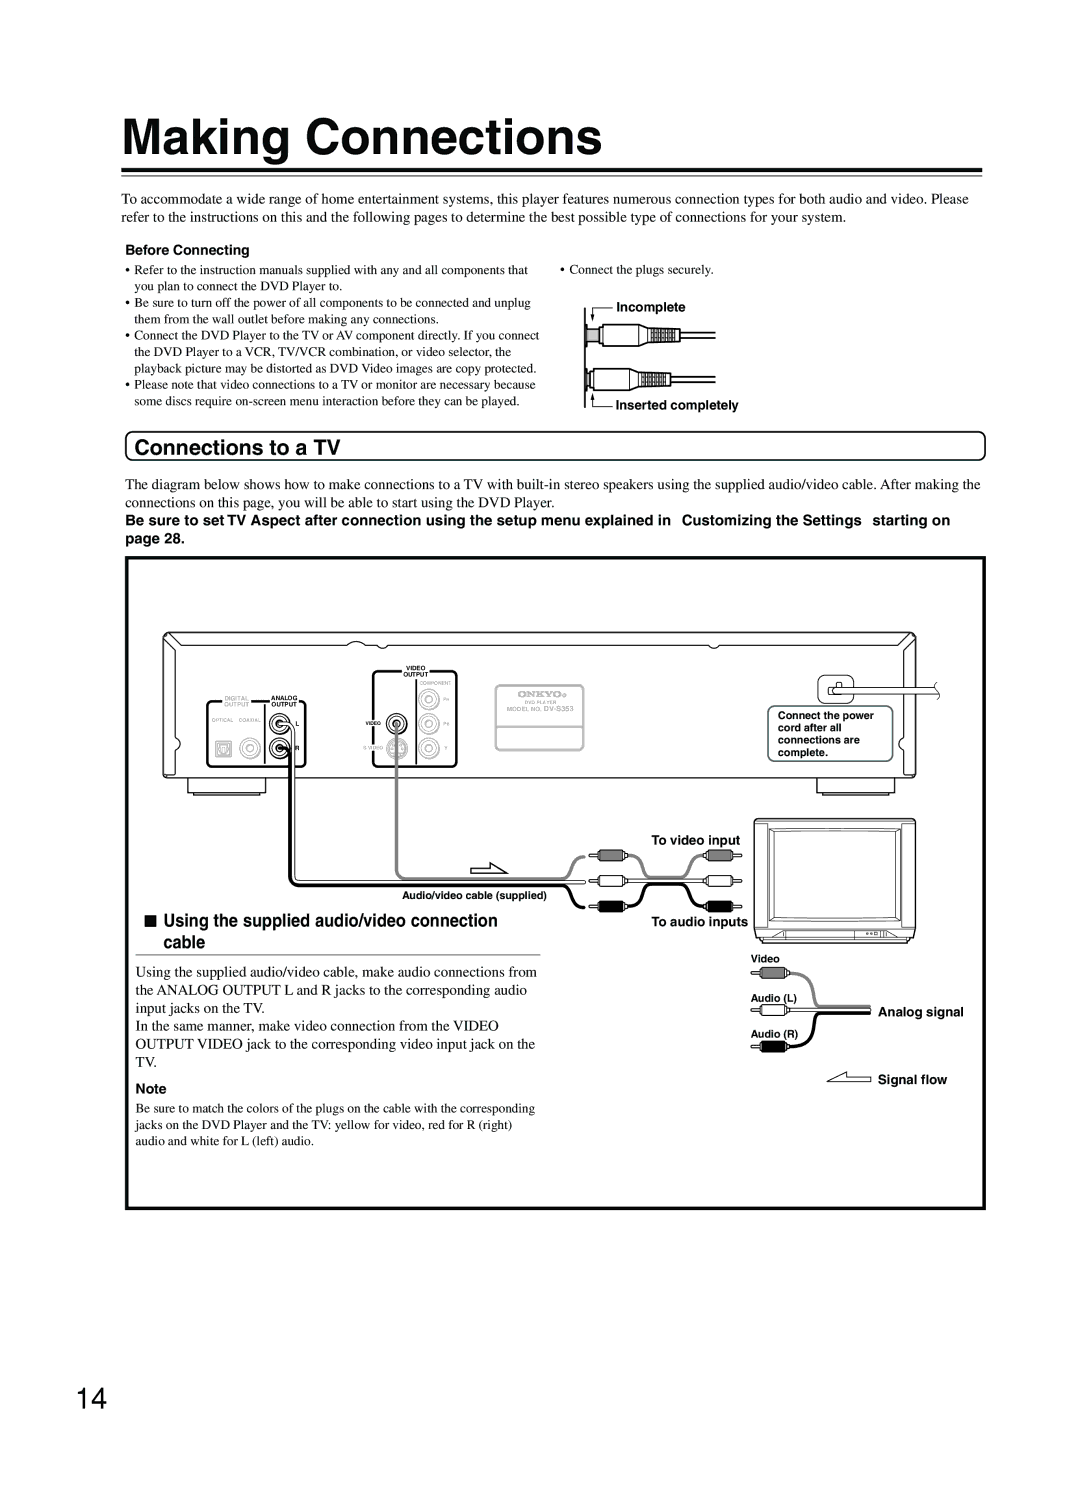
The diagram below shows how to make connections to a TV with
Be sure to set TV Aspect after connection using the setup menu explained in “Customizing the Settings” starting on page 28.
DIGITAL
OUTPUT
OPTICAL COAXIAL
|
| VIDEO |
| |
|
| OUTPUT |
| |
|
| COMPONENT |
| |
ANALOG |
| PR | DVD PLAYER | |
OUTPUT |
|
| ||
|
| MODEL NO. | ||
|
|
| ||
L | VIDEO | PB | Connect the power | |
cord after all | ||||
|
|
| ||
R | S VIDEO | Y | connections are | |
complete. | ||||
|
|
|
Audio/video cable (supplied)
 Using the supplied audio/video connection cable
To video input
To audio inputs
Video
Using the supplied audio/video cable, make audio connections from the ANALOG OUTPUT L and R jacks to the corresponding audio input jacks on the TV.
In the same manner, make video connection from the VIDEO OUTPUT VIDEO jack to the corresponding video input jack on the TV.
Note
Audio (L)
Analog signal
Audio (R)
 Signal flow
Be sure to match the colors of the plugs on the cable with the corresponding jacks on the DVD Player and the TV: yellow for video, red for R (right) audio and white for L (left) audio.
14