DX-C390 specifications
The Onkyo DX-C390 is a high-performance CD player that has garnered attention for its versatility, sound quality, and user-friendly features. It is designed to provide audiophiles and casual listeners alike with an exceptional audio experience.One of the standout features of the DX-C390 is its ability to support multiple disc formats. It is equipped with a five-disc carousel mechanism, allowing users to load up to five CDs for extended listening sessions without the need for constant disc swapping. This feature is particularly appealing for those who maintain a large music collection and enjoy various genres.
The DX-C390 is designed with advanced audio technology to deliver crystal-clear sound. It employs a high-quality 192 kHz/24-bit DAC that converts digital audio signals into precise analog sound, ensuring that every note and nuance is accurately reproduced. The player also features a direct digital output for connecting to external digital-to-analog converters, giving users the option to enhance their audio setup further.
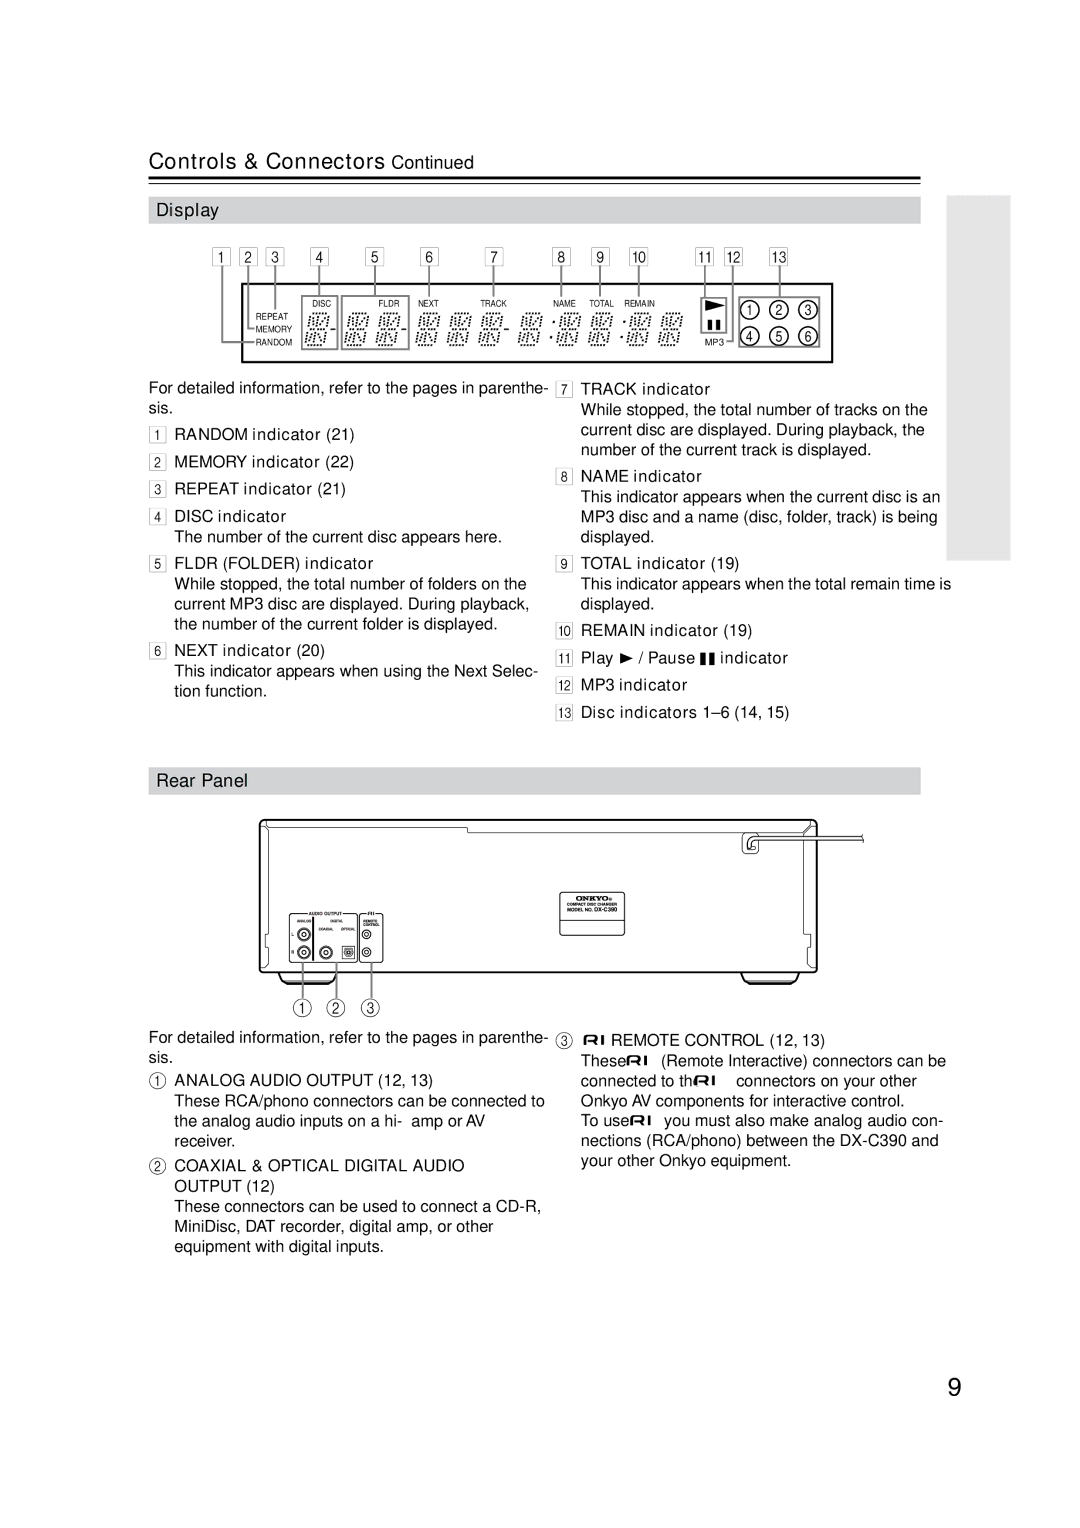
For convenience, the Onkyo DX-C390 comes with a user-friendly remote control that allows users to manage playback, select tracks, or change settings from a distance. Additionally, the player has a large LCD display, making it easy to navigate through your music library and view track information.
The build quality of the DX-C390 is robust, featuring a sturdy chassis designed to minimize vibration and external interference, which can affect sound quality. This design consideration speaks to Onkyo's commitment to delivering a superior audio experience.
In terms of connectivity, the DX-C390 offers analog audio outputs for connecting to traditional audio systems, as well as a digital optical output for modern setups. This versatility ensures compatibility with a wide range of audio equipment.
Furthermore, the CD player includes shuffle and repeat functions, adding an element of control over how you experience your music. Whether you prefer listening to a complete album or want the thrill of a shuffled playlist, the DX-C390 accommodates it all.
In conclusion, the Onkyo DX-C390 is an impressive component in any audio system, combining high-fidelity sound, ease of use, and robust features. It is an ideal choice for music enthusiasts looking to elevate their listening experience without compromising on quality or functionality.

