Recording a source
DISPLAY |
|
| STEREO | /DTS | DSP |
|
|
| SURROUND | MASTER VOLUME | |||
STANDBY/ON |
| LISTENING MODE |
|
|
|
|
STANDBY |
|
|
|
|
|
|
POWER |
|
|
|
|
|
|
ON OFF |
|
|
|
|
| DIMMER |
FM MODE | MEMORY | TUNING | PRESET |
| ||
SP SEL SW MODE DIGITAL INPUT |
| |||||
A SPEAKERS B
![]() CLEAR
CLEAR![]()
AUDIO
SELECTOR
DVD | VIDEO 1 | VIDEO 2 | FM | AM | TAPE | C D |
VCR
BASSTREBLE
AV RECEIVER
Input selector
To record the input source signal you are |
| VIDEO 1 |
| IN | R |
|
|
|
|
| FRONT |
currently watching or listening to |
|
|
|
| SURR |
|
| CD |
| OUT | R |
Recording of video and/or audio signals can be performed on the | L | VIDEO 2 |
|
|
|
components connected to the VIDEO 2 OUT and TAPE OUT |
|
|
| IN |
|
R |
|
|
|
| |
(audio only) jacks. |
|
|
| CENTER | |
| R | L | VIDEO | ||
|
| MULTI | |||
|
|
|
|
| CHANNEL |
1. Press an input selector button to select the |
|
|
|
|
|
input source to record. | 1, 5 |
|
| 1, 5 |
|
The input source is now selected and you may watch or listen | CD player |
| Video cassette | ||
to it as desired. The currently selected input source signal to |
| ||||
| recorder | ||||
|
|
|
| ||
the TAPE OUT and VIDEO 2 OUT outputs for recording.
2, 5
Video
camera
2.Start recording at the recording component as desired.
Notes:
•You can record analog audio, but not digital audio. Make sure that you have made a correct analog connection.
•If you change the input source during recording, you will record the signals from the newly selected input source.
•You cannot record the surround effects.
•You cannot record the source connected to the MULTI CHANNEL INPUT port.
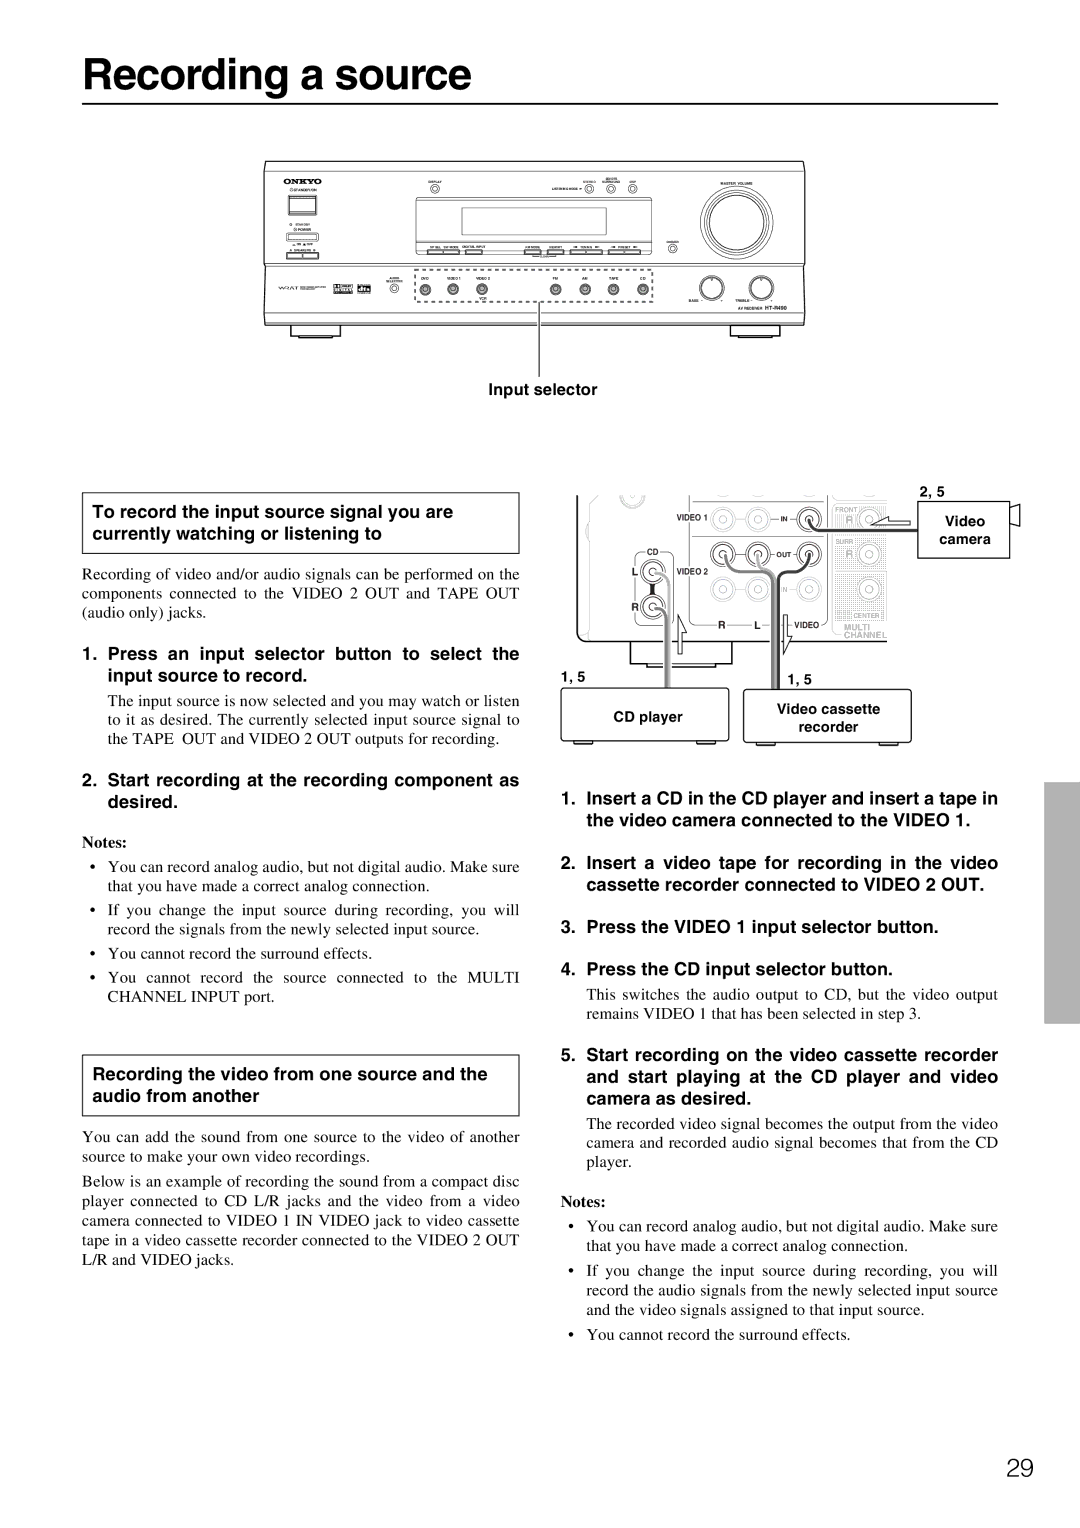
1.Insert a CD in the CD player and insert a tape in the video camera connected to the VIDEO 1.
2.Insert a video tape for recording in the video cassette recorder connected to VIDEO 2 OUT.
3.Press the VIDEO 1 input selector button.
4.Press the CD input selector button.
This switches the audio output to CD, but the video output remains VIDEO 1 that has been selected in step 3.
Recording the video from one source and the audio from another
You can add the sound from one source to the video of another source to make your own video recordings.
Below is an example of recording the sound from a compact disc player connected to CD L/R jacks and the video from a video camera connected to VIDEO 1 IN VIDEO jack to video cassette tape in a video cassette recorder connected to the VIDEO 2 OUT L/R and VIDEO jacks.
5.Start recording on the video cassette recorder and start playing at the CD player and video camera as desired.
The recorded video signal becomes the output from the video camera and recorded audio signal becomes that from the CD player.
Notes:
•You can record analog audio, but not digital audio. Make sure that you have made a correct analog connection.
•If you change the input source during recording, you will record the audio signals from the newly selected input source and the video signals assigned to that input source.
•You cannot record the surround effects.
29