HT-S7300
Always consider the environmental issues and follow
10 cm 4 at the rear. The rear edge of the shelf or
Board above the apparatus shall be set 10 cm
Away from the rear panel or wall, creating a flue-like
Precautions
Speaker Precautions
Package Contents
Contents
Features
SKW-770 Bass Reflex Powered Subwoofer
SKW-780 Bass Reflex Powered Subwoofer
SKF-680 L/R 2-Way Front Speakers
SKC-680 2-Way Center Speaker
Hdmi Thru indicator
TUNING, Preset 30 to 31, arrow
Front & Rear Panels
Front Panel
UREMOTE Control jack
Display
Rear Panel
Surr Back or Front High
Speaker Package
Subwoofer SKW-770/780
Front, Center, Surround and Surround Back Speakers
HTP-780 SKF-780, SKC-780, SKR-780, SKB-780
Keyhole slots
Speaker terminals
SKF-780 SKC-780
Remote Controller
Controlling the AV Receiver
Return button
Controlling the tuner
About Home Theater
Enjoying Home Theater
Connecting the AV Receiver
Attaching the Speaker Bases
Wall Mounting
Front, Surround and Surround Back Speakers
Using the Stoppers for a More Stable Platform
Using the Floor Pads for Subwoofer
SKC-780
SKF-680, SKR-680, SKB-680, SKC-680
Connecting Your Speakers
Speaker Configuration
Speaker Connection Precautions
Number of speakers
Connecting the Speaker Cables
Screw-type speaker terminals Strip 1/2 to 5/8 12 to 15 mm
To 5/812 to 15 mm
About AV Connections
Connected image with AV components
AV Cables and Jacks
Hdmi cable
Connecting Your Components with Hdmi
Jack Signal Components Assignable
Audio return channel ARC function
Connecting Your Components
How to record the video
Front Rear
Connecting Onkyo uComponents
System On/Auto Power On
Remote Control
Step
Connecting Antenna
Signal Selection
Which Connections Should I Use?
Video Connection Formats
Audio Connection Formats
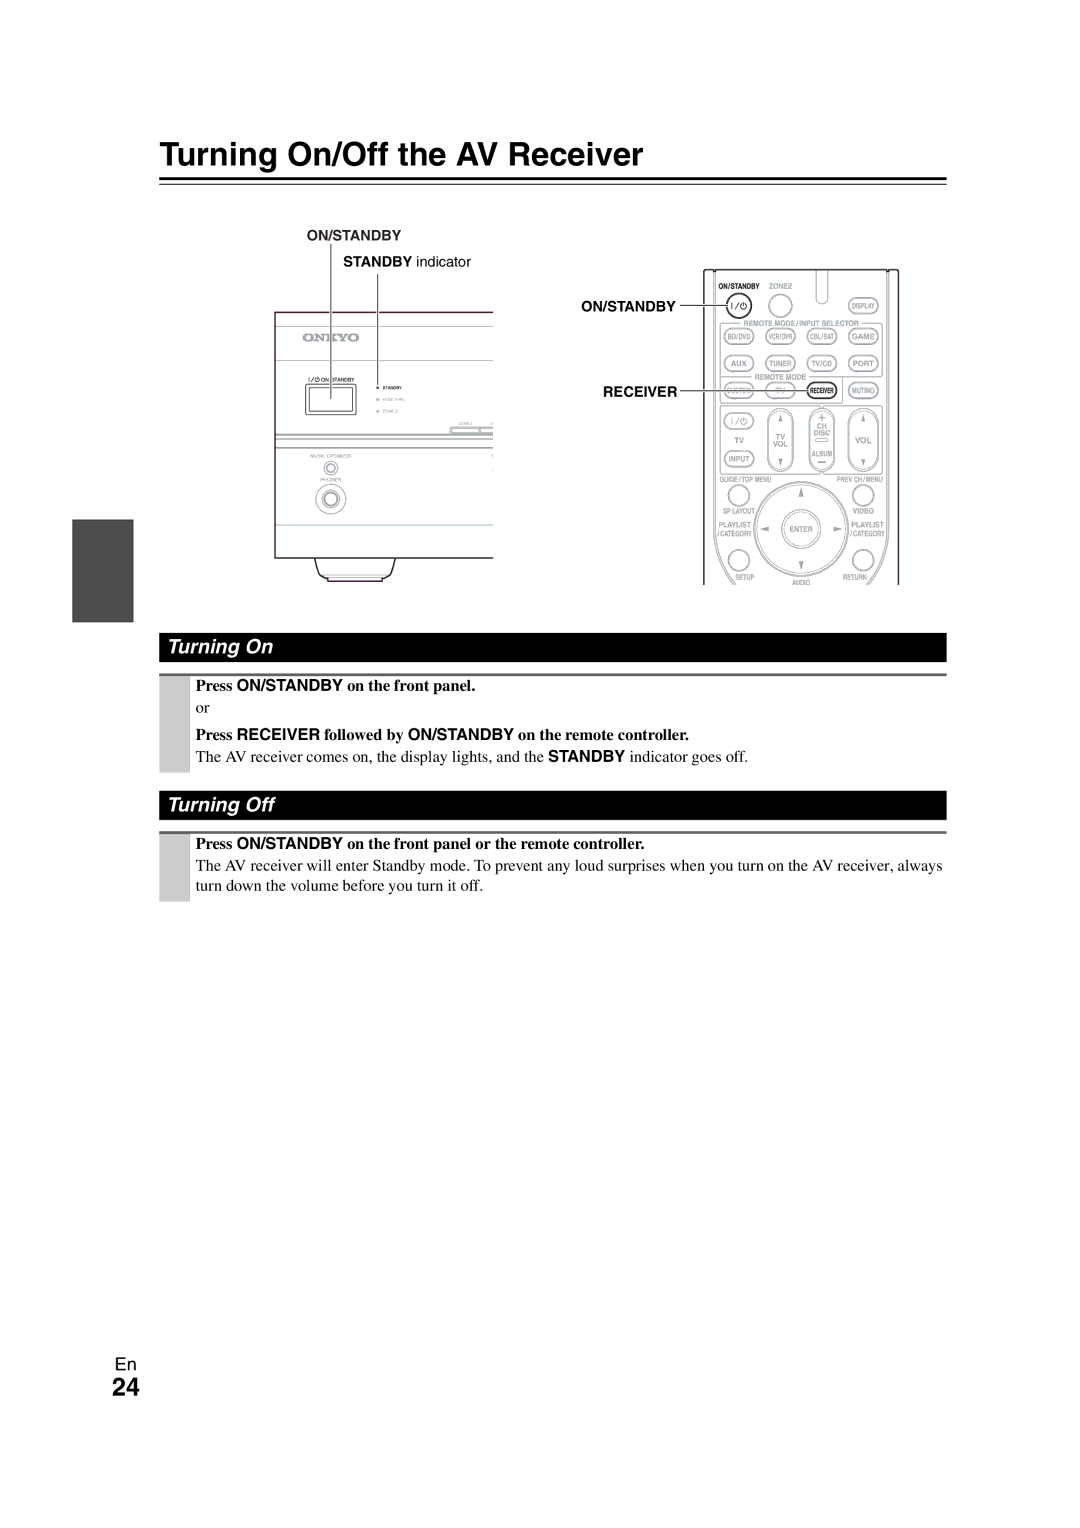
Turning On/Off the AV Receiver
Turning On
Turning Off
Selecting the Language Used for the Onscreen Setup Menus
Basic Operations
Playing the Connected Component
Displaying Source Information
Using the Music Optimizer
Setting the Display Brightness
Using the Sleep Timer
Using the Audio and Video Menus
Using Headphones
Changing the Input Display
Audyssey 2EQ Room Correction Speaker Setup
Using Audyssey 2EQ
Enter
Error Messages
Changing the Speaker Settings Manually
Using a Powered Subwoofer
Using the Tuner
Tuning into Radio Stations
Listening to the Radio
Listening to the Radio
Presetting FM/AM Stations
Selecting Presets
Deleting Presets
Mode
Recording
AV Recording
Using the Listening Modes
Listening Mode Buttons
Selecting Listening Modes
About Listening Modes
Explanatory Notes
Input Source
Speaker Layout
Listening Modes
Resolution Audio
Dolby Digital Plus *5
Dolby TrueHD
DTS-HD High
Onkyo-Original DSP Listening Modes
Unplugged
Advanced Setup
On-screen Setup Menus
Common Procedures in Setup Menu
Menu
Input/Output Assign
Monitor Out
Hdmi Input
BD/DVD, VCR/DVR, CBL/SAT, GAME, AUX, TV/CD, Port
Speaker Settings
Component Video Input
Digital Audio Input
Speaker Terminal Assign Front High/Zone2
Speaker Distance
Audio Adjust
Equalizer Settings
Level Calibration
Multiplex/Mono
Theater-Dimensional
Source Setup
Dynamic Volume
Audyssey
Dynamic EQ
IntelliVolume
Sync
Name Edit
Picture Adjust
Listening Mode Preset
DTS/DTS-ES/DTS-HD
Miscellaneous Hardware Setup
Volume Setup
OSD Setup
Remote ID
Power Control
Audio TV Out
Lip Sync
Hdmi Control Rihd
Lock Setup
Using the Audio Settings
Tone Control Settings
Audyssey Settings
Speaker Levels
Music Optimizer
Late Night
Setting the Incoming Digital Signal Fixed Mode
Audio Selector
Audio Selector
Connecting Zone
Connecting Your Zone 2 Speakers Directly to the AV receiver
Connecting Your Zone 2 Speakers to an Amp in Zone
Zone
Setting the Powered Zone Using Zone
Controlling Zone 2 from the AV receiver
Controlling Zone 2 with the Remote Controller
Adjusting the Volume for Zone
Operating with the remote controller
Muting Zone
Connecting an Onkyo Dock
Controlling iPod
Models sold are different depending on the region
Onkyo Dock Cable
Using the Onkyo Dock
UP-A1 Dock
Controlling Your iPod
RI Dock
Without the RI Control
With the RI Control
Available buttons
Preprogrammed Remote Control Codes
Looking up for Remote Control Code
Controlling Other Components
Entering Remote Control Codes
Remote Control Codes for Onkyo Components Connected via u
Remote Mode BD/DVD
TV/CD
Resetting Remote Mode Buttons
Resetting the Remote Controller
You can reset the remote controller to its default settings
Controlling Other Components
Components Buttons
Cassettetape deck
TV VOL q/w
CH + Disc +
Troubleshooting
Standby indicator flashes red
Can’t turn on the AV receiver
There’s no sound, or it’s very quiet
There’s no sound with a certain signal format
About DTS signals
Only the front speakers produce sound
Only the center speaker produces sound
Remote controller doesn’t work
There’s no picture
There’s no picture from a source connected to an Hdmi
On-screen menus don’t appear
AV receiver’s remote controller doesn’t control your iPod
Sound changes when I connect my headphones
There’s no sound
Can’t record
Video Attoff default
Video Attenuation
CBL/SAT, GAME, or AUX input
Important Note Regarding Video Playback
Specifications
AV receiver
Powered Subwoofer SKW-770
1ch Home Theater Speaker Package HTP-680
Front Speaker SKF-680
Center Speaker SKC-680
1ch Home Theater Speaker Package HTP-780
Dock for iPod UP-A1
About Hdmi
Supported Audio Formats
About Copyright Protection
Using an RIHD-compatible TV, Player, or Recorder
About p-compatible components
Operations that can be performed with p connection
How to connect and setup
Confirm the connecting and setting
Confirm the settings
Operate with the remote controller
Video Resolution Chart
Output
Output
Component Composite Input 1080p 1080i 720p 480p 480i
Onkyo Europe Electronics GmbH
Onkyo Europe Electronics GmbH UK Branch