IV. | Record Set, |
The operator will be able to choose how each of the remotely connected camera display will record on your local hard drive. You can set the time when you want them to record and how you want them to record or no recording at all.
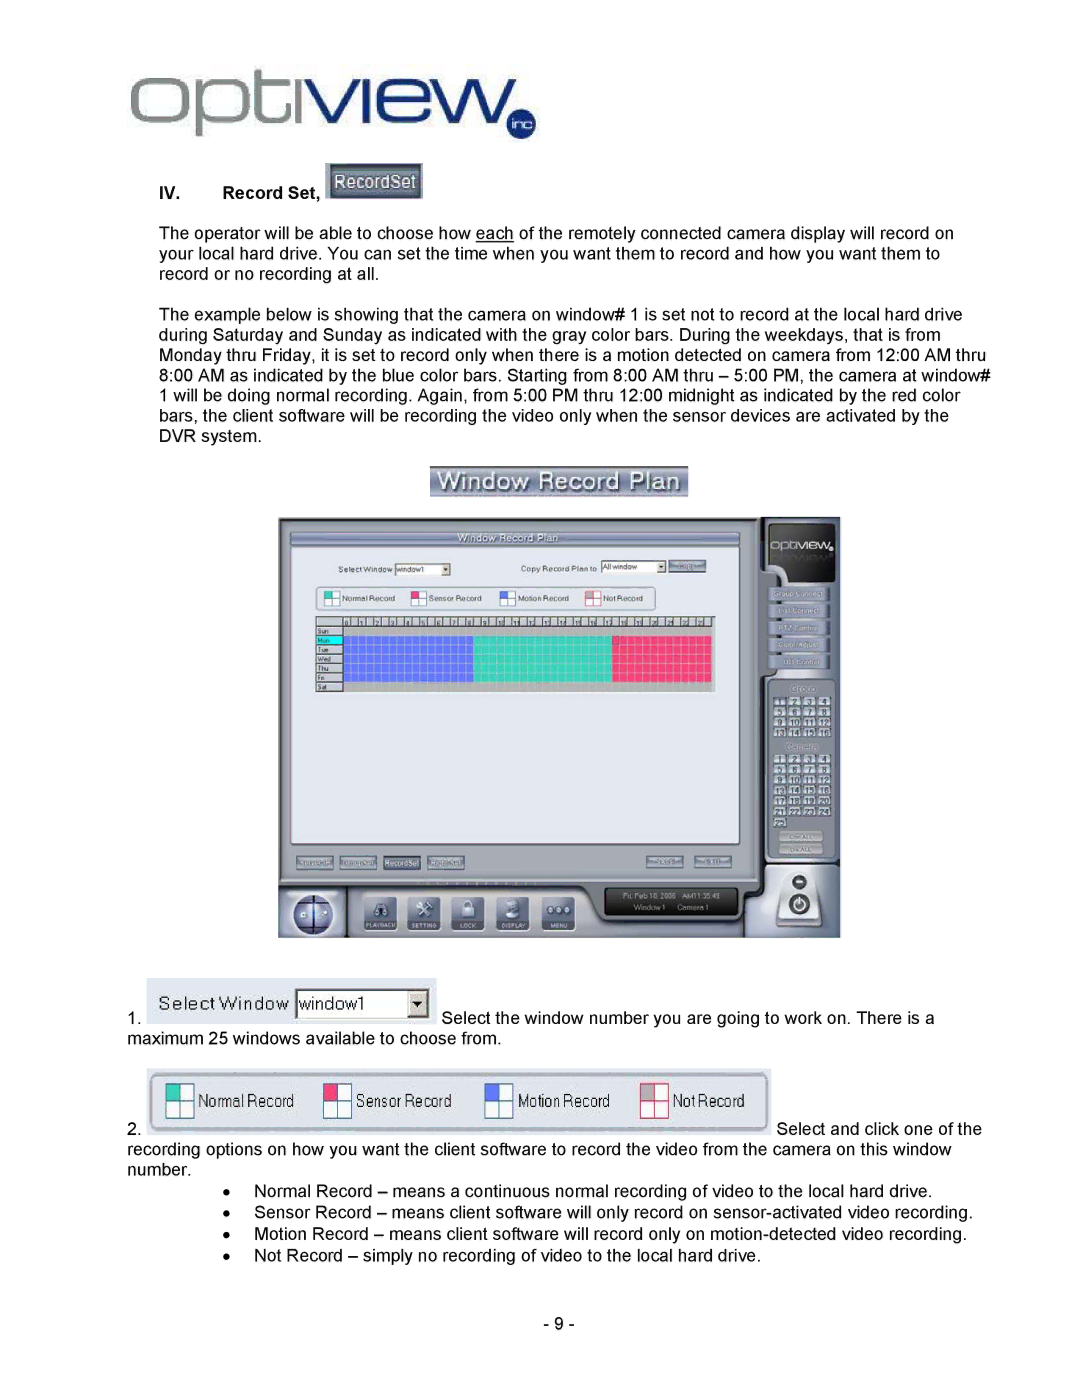
The example below is showing that the camera on window# 1 is set not to record at the local hard drive during Saturday and Sunday as indicated with the gray color bars. During the weekdays, that is from Monday thru Friday, it is set to record only when there is a motion detected on camera from 12:00 AM thru 8:00 AM as indicated by the blue color bars. Starting from 8:00 AM thru – 5:00 PM, the camera at window# 1 will be doing normal recording. Again, from 5:00 PM thru 12:00 midnight as indicated by the red color bars, the client software will be recording the video only when the sensor devices are activated by the DVR system.
1. ![]() Select the window number you are going to work on. There is a maximum 25 windows available to choose from.
Select the window number you are going to work on. There is a maximum 25 windows available to choose from.
2.  Select and click one of the recording options on how you want the client software to record the video from the camera on this window number.
•Normal Record – means a continuous normal recording of video to the local hard drive.
•Sensor Record – means client software will only record on
•Motion Record – means client software will record only on
•Not Record – simply no recording of video to the local hard drive.
-9 -