User’s Manual
Addendum: Adapter Plate
This attachment plate is designed to be installed onto a ceiling mounted projector. The location or orientation of the ceiling mount does not need to change.
Contents |
| Lens Plate | ||
1 | Lens Plate |
|
| |
1 | (Bag) Projector Attachment Parts |
|
| |
1 | Assembly Kit (Includes) | Ceiling Side (Top) |
| |
| 2 | Plate Hook Assemblies |
| |
|
|
| ||
| 1 Chain (6 ft) |
|
| |
| 4 | Chain Ends |
|
|
| 4 | Lens Mounting Assemblies |
|
|
| 4 | Sled Mounting Screws |
|
|
| 2 | Sled Safety Assemblies |
|
|
| 1 Hex Key |
|
| |
Required Tools and Equipment |
|
| ||
2 Ceiling Hooks (40 lbs Capacity Each) |
| |||
1 | Phillips Screwdriver |
|
| |
1 | Pair of Pliers |
|
| |
1 | Strong Pair of Scissors or Wire Cutters |
| ||
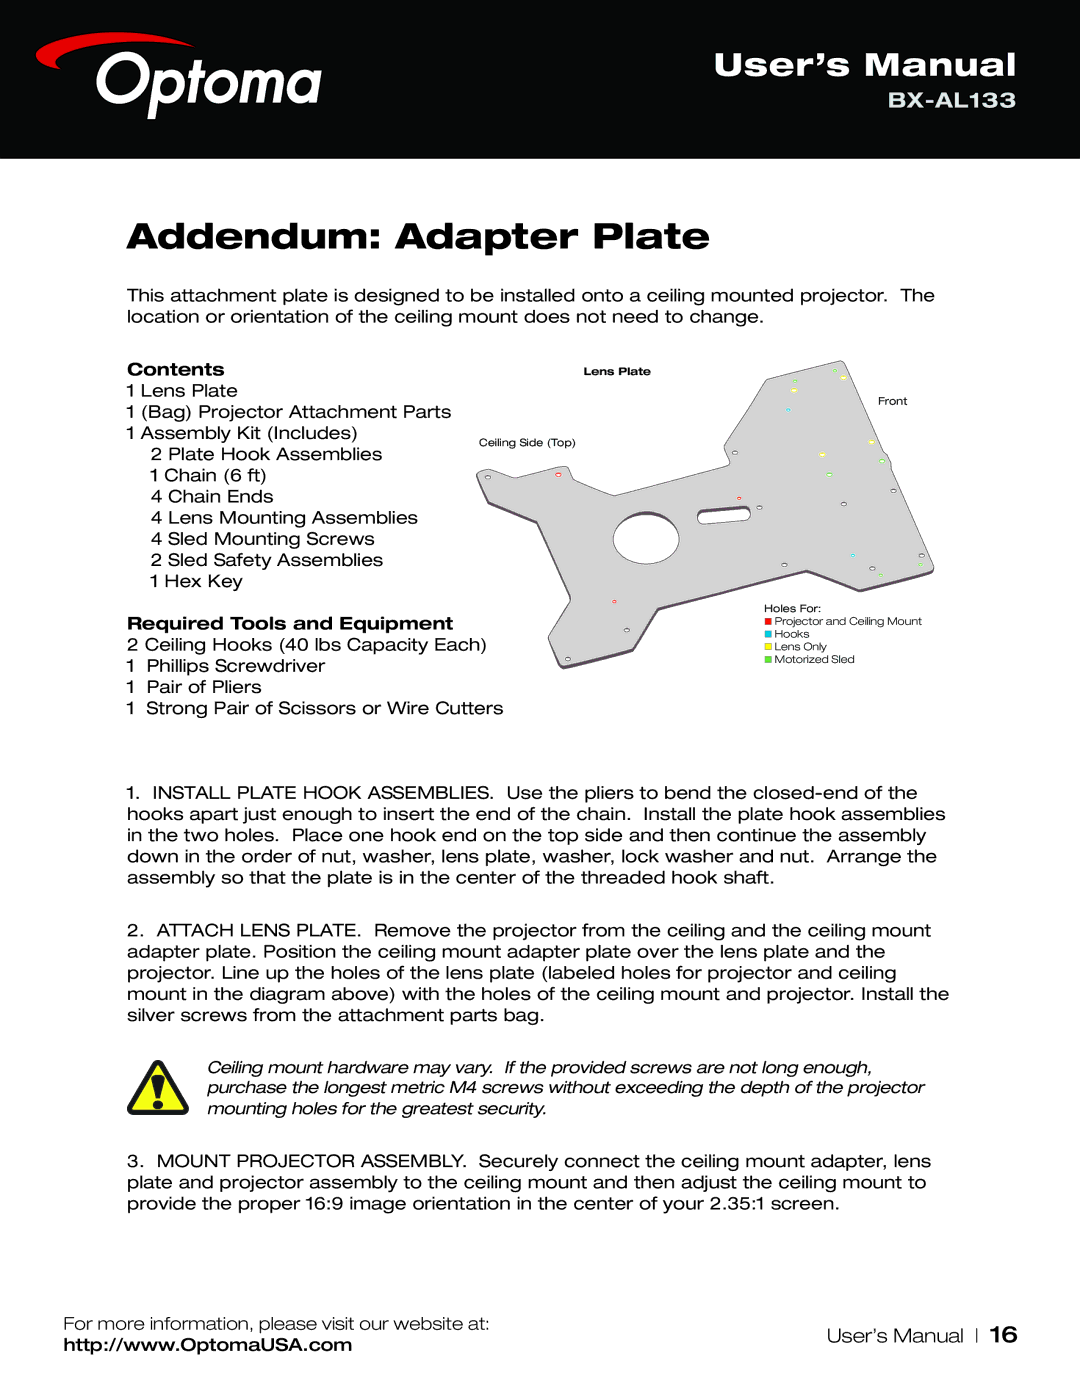
Front
Holes For:
![]() Projector and Ceiling Mount
Projector and Ceiling Mount
![]() Hooks
Hooks
![]() Lens Only
Lens Only
![]() Motorized Sled
Motorized Sled
1.INSTALL PLATE HOOK ASSEMBLIES. Use the pliers to bend the
2.ATTACH LENS PLATE. Remove the projector from the ceiling and the ceiling mount adapter plate. Position the ceiling mount adapter plate over the lens plate and the projector. Line up the holes of the lens plate (labeled holes for projector and ceiling mount in the diagram above) with the holes of the ceiling mount and projector. Install the silver screws from the attachment parts bag.
Ceiling mount hardware may vary. If the provided screws are not long enough, purchase the longest metric M4 screws without exceeding the depth of the projector mounting holes for the greatest security.
3.MOUNT PROJECTOR ASSEMBLY. Securely connect the ceiling mount adapter, lens plate and projector assembly to the ceiling mount and then adjust the ceiling mount to provide the proper 16:9 image orientation in the center of your 2.35:1 screen.
For more information, please visit our website at: | User’s Manual | 16 | |
http://www.OptomaUSA.com | |||
|
|