E N G L I S H
Getting Ready for Use
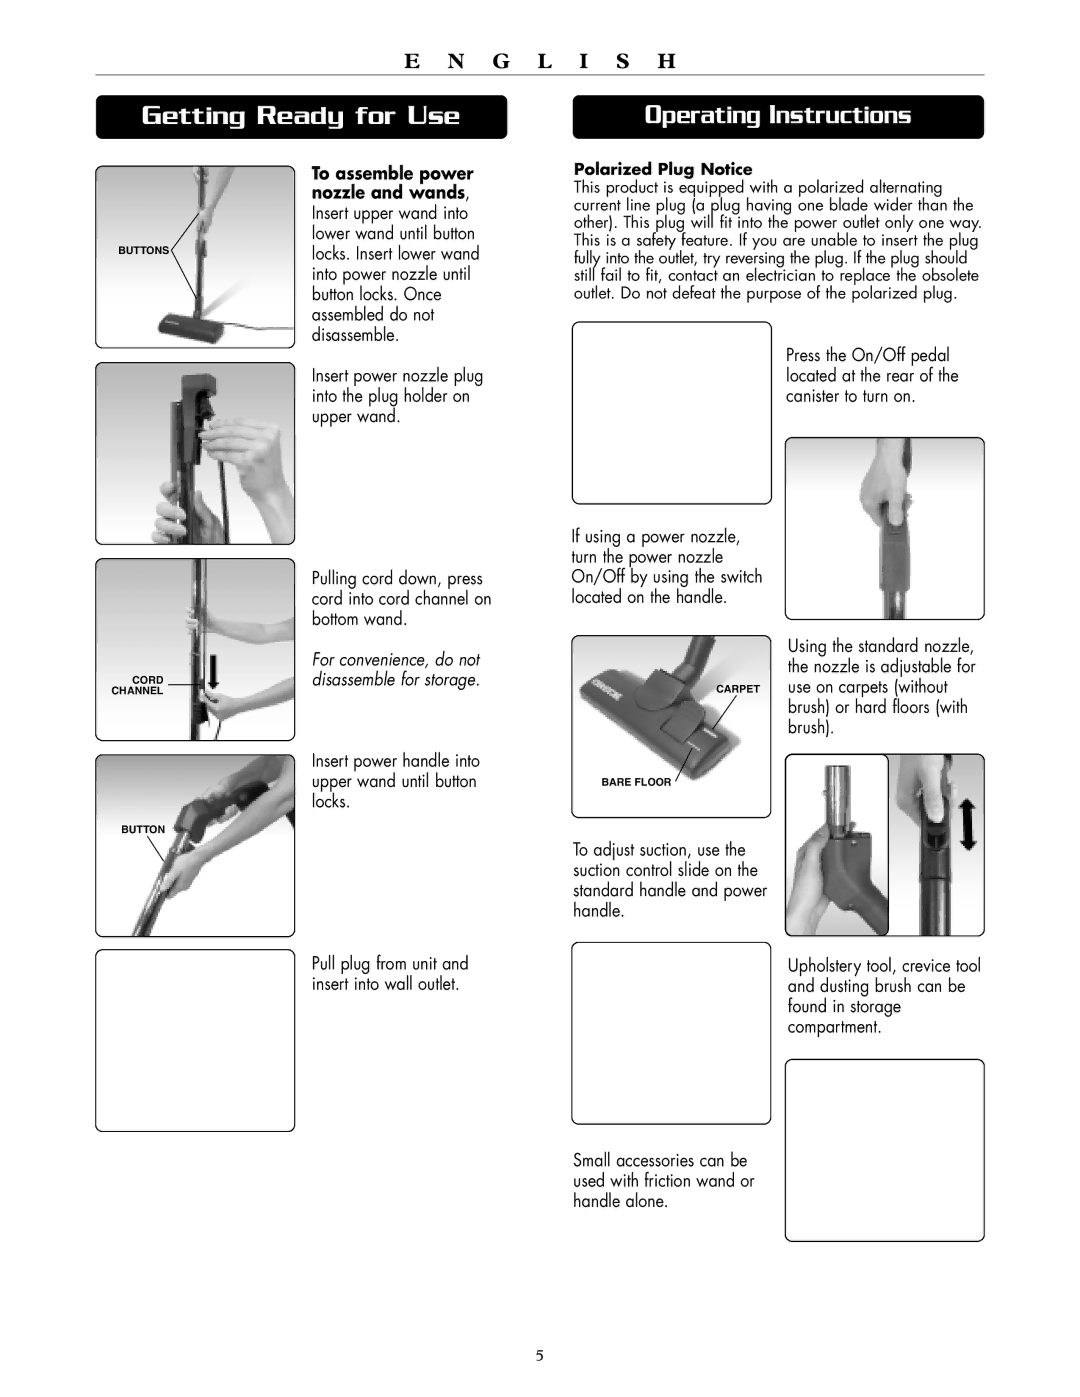
To assemble power nozzle and wands, Insert upper wand into lower wand until button
BUTTONSlocks. Insert lower wand into power nozzle until button locks. Once assembled do not disassemble.
Operating Instructions
Polarized Plug Notice
This product is equipped with a polarized alternating current line plug (a plug having one blade wider than the other). This plug will fit into the power outlet only one way. This is a safety feature. If you are unable to insert the plug fully into the outlet, try reversing the plug. If the plug should still fail to fit, contact an electrician to replace the obsolete outlet. Do not defeat the purpose of the polarized plug.
Insert power nozzle plug into the plug holder on upper wand.
Pulling cord down, press cord into cord channel on bottom wand.
For convenience, do not
CORDdisassemble for storage.
CHANNEL
Insert power handle into upper wand until button locks.
BUTTON
If using a power nozzle, turn the power nozzle On/Off by using the switch located on the handle.
CARPET
BARE FLOOR
Press the On/Off pedal located at the rear of the canister to turn on.
Using the standard nozzle, the nozzle is adjustable for use on carpets (without brush) or hard floors (with brush).
Pull plug from unit and insert into wall outlet.
To adjust suction, use the suction control slide on the standard handle and power handle.
Upholstery tool, crevice tool and dusting brush can be found in storage compartment.
Small accessories can be used with friction wand or handle alone.
5