GB BATTERY AND CHANNEL INSTALLATION:
REMOTE UNIT
The remote
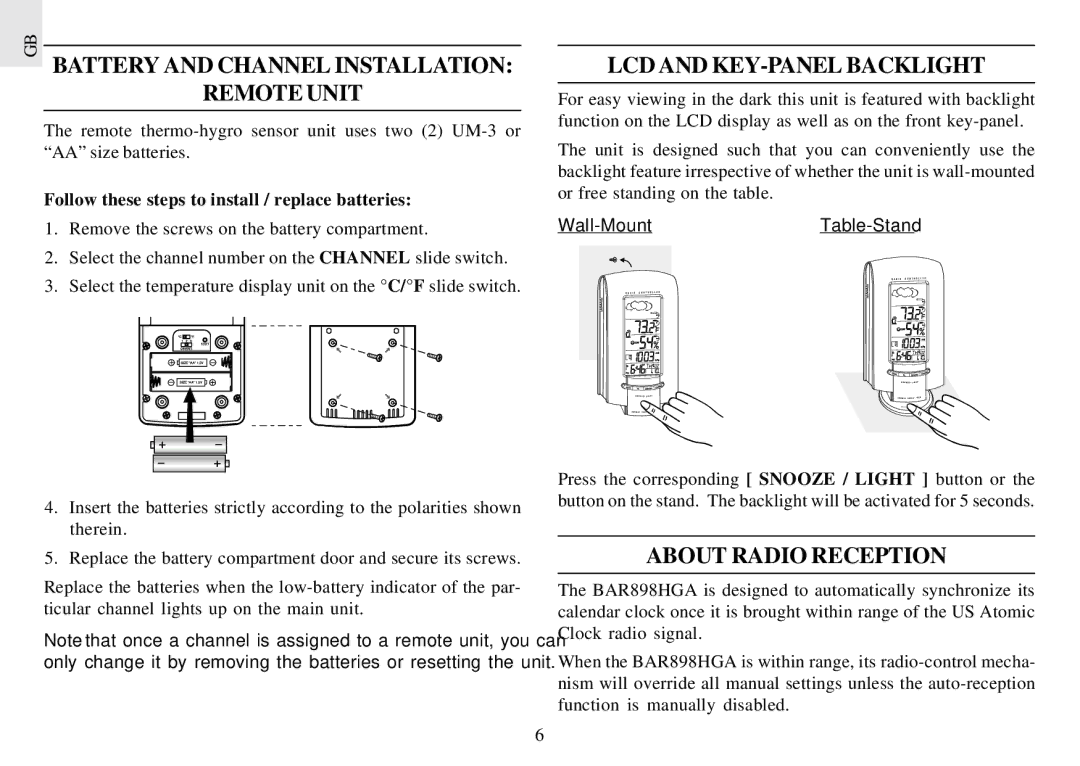
Follow these steps to install / replace batteries:
1.Remove the screws on the battery compartment.
2.Select the channel number on the CHANNEL slide switch.
3.Select the temperature display unit on the °C/°F slide switch.
4.Insert the batteries strictly according to the polarities shown therein.
5.Replace the battery compartment door and secure its screws.
Replace the batteries when the
Note that once a channel is assigned to a remote unit, you can only change it by removing the batteries or resetting the unit.
LCD AND KEY-PANEL BACKLIGHT
For easy viewing in the dark this unit is featured with backlight function on the LCD display as well as on the front
The unit is designed such that you can conveniently use the backlight feature irrespective of whether the unit is
|
|
Press the corresponding [ SNOOZE / LIGHT ] button or the button on the stand. The backlight will be activated for 5 seconds.
ABOUT RADIO RECEPTION
The BAR898HGA is designed to automatically synchronize its calendar clock once it is brought within range of the US Atomic Clock radio signal.
When the BAR898HGA is within range, its
6