IWA-80051 specifications
The Oregon Scientific IWA-80051 is a state-of-the-art weather station that combines innovative technology with a user-friendly interface, making it an ideal choice for both weather enthusiasts and everyday users. This advanced device offers a plethora of features designed to provide accurate weather information and enhance your understanding of the climate around you.At the heart of the IWA-80051 is its high-precision sensor system, which measures vital atmospheric parameters such as temperature, humidity, barometric pressure, and wind speed. With its ability to detect both indoor and outdoor conditions, this weather station allows users to monitor their home's climate and outdoor weather concurrently. The sensor suite is designed for reliability and precision, providing real-time data updates to ensure users are always informed.
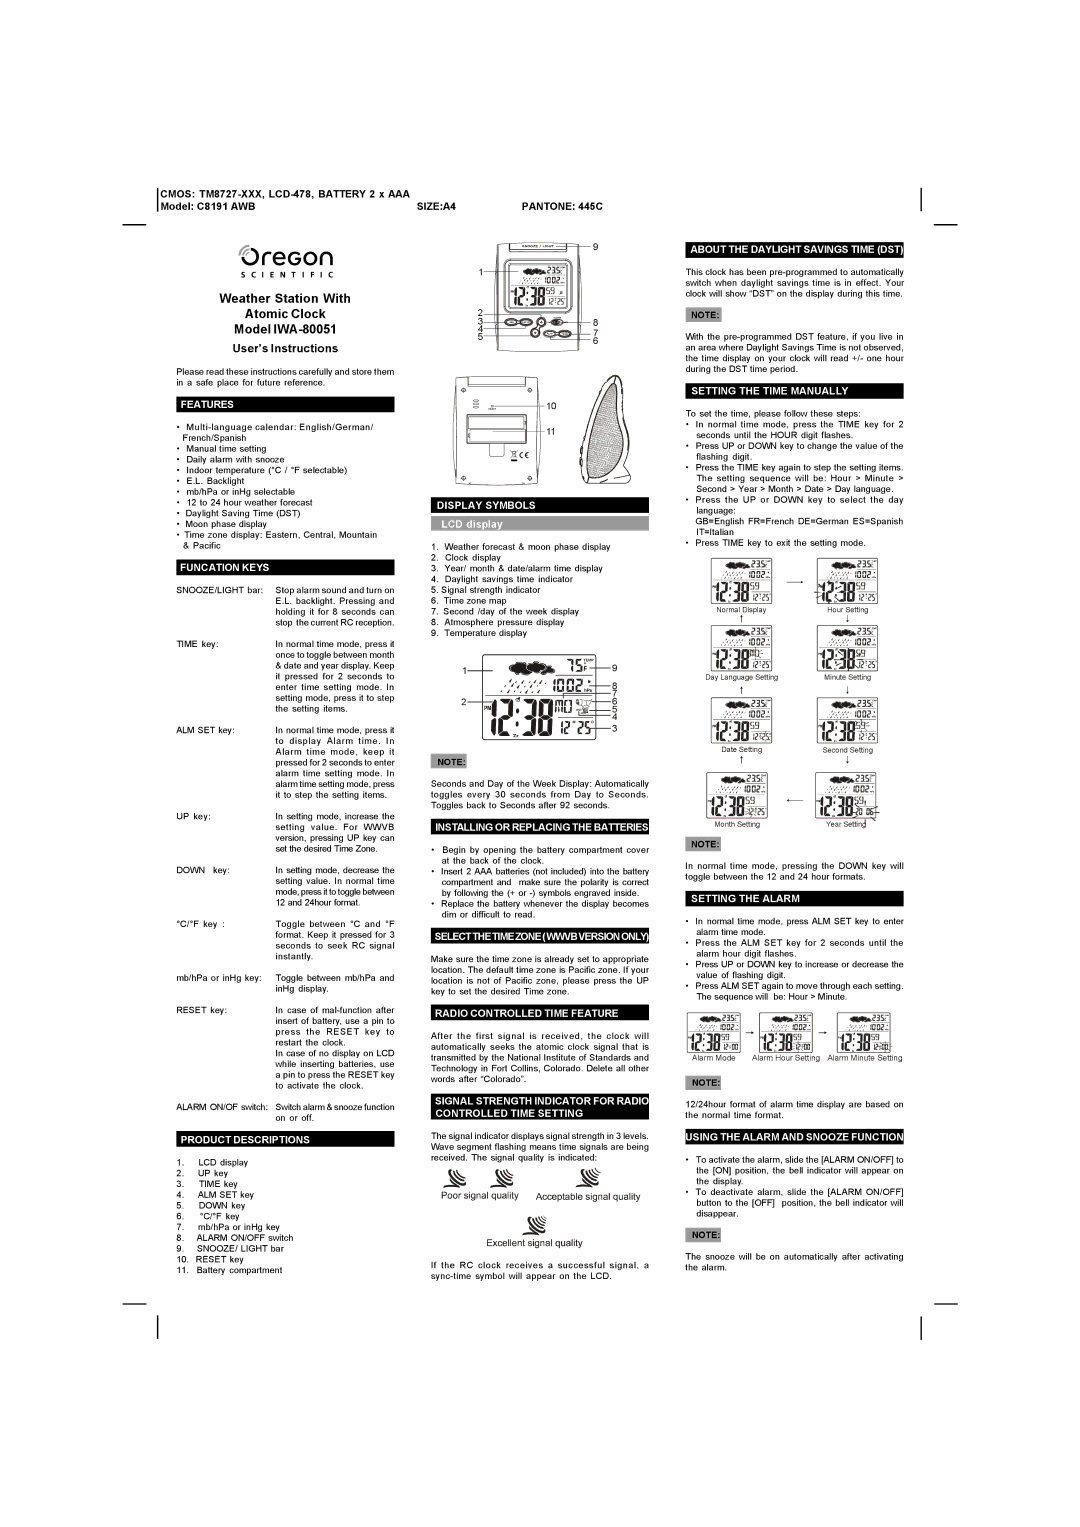
One of the standout features of the IWA-80051 is its expansive LCD display. This screen is not only easy to read but also provides a wealth of information at a glance. Users can view current weather conditions, forecasts, and historical data, enabling them to make informed decisions based on comprehensive insights. The display is also customizable, allowing users to choose which parameters they wish to see prominently.
In addition to its impressive monitoring capabilities, the IWA-80051 includes a wireless connection feature. This allows the weather station to connect with other devices or applications, making it easier than ever to track weather trends and patterns over time. The integration of advanced technologies ensures that users receive accurate and up-to-date information, which is particularly useful for planning outdoor activities or making gardening decisions.
Furthermore, the IWA-80051 is equipped with weather forecasting capabilities. This feature utilizes sophisticated algorithms to predict upcoming weather conditions based on changing atmospheric data. Users can receive alerts and warnings for impending weather events, helping them stay prepared for sudden changes in climate.
Its sleek and modern design makes the Oregon Scientific IWA-80051 an attractive addition to any home. Easy to install and operate, it is suitable for users of all ages. The device's durable construction ensures longevity, providing reliable weather information for years to come.
Overall, the Oregon Scientific IWA-80051 is a robust weather station that integrates advanced technology with practical features. Whether you're a dedicated weather watcher or simply want to stay informed about your local climate, the IWA-80051 delivers an exceptional combination of performance and ease of use.