Next, you’ll need to install the altitude encoder board assem- bly. To do so, please refer to the separate instruction manual for the IntelliScope Computerized Object Locator.
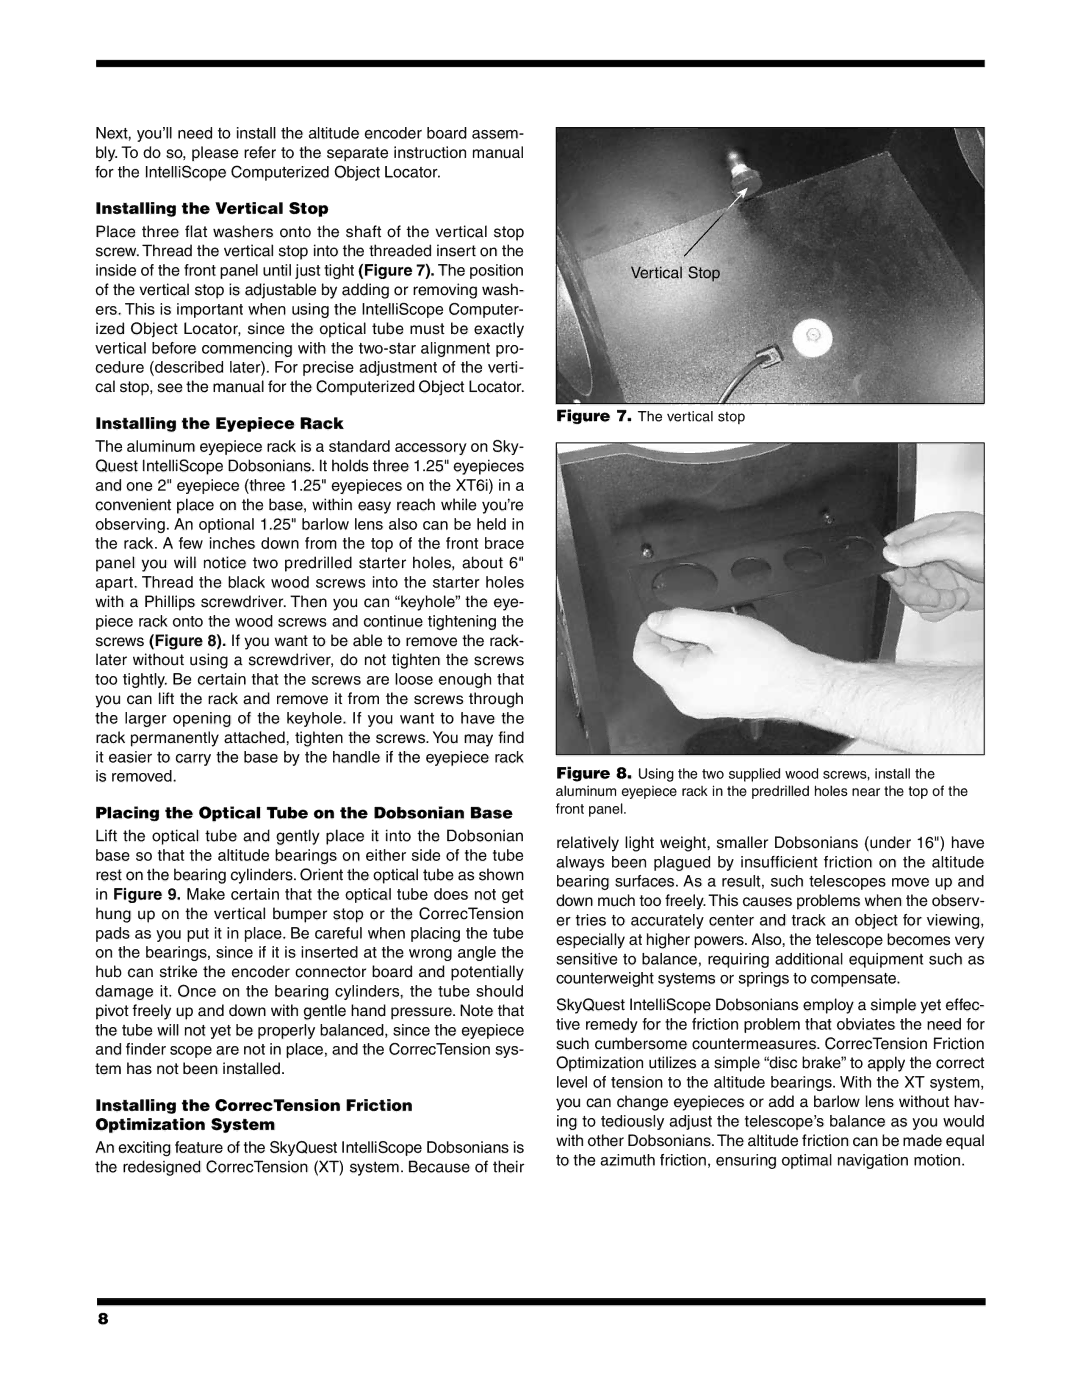
Installing the Vertical Stop
Place three flat washers onto the shaft of the vertical stop screw. Thread the vertical stop into the threaded insert on the inside of the front panel until just tight (Figure 7). The position of the vertical stop is adjustable by adding or removing wash- ers. This is important when using the IntelliScope Computer- ized Object Locator, since the optical tube must be exactly vertical before commencing with the
Installing the Eyepiece Rack
The aluminum eyepiece rack is a standard accessory on Sky- Quest IntelliScope Dobsonians. It holds three 1.25" eyepieces and one 2" eyepiece (three 1.25" eyepieces on the XT6i) in a convenient place on the base, within easy reach while you’re observing. An optional 1.25" barlow lens also can be held in the rack. A few inches down from the top of the front brace panel you will notice two predrilled starter holes, about 6" apart. Thread the black wood screws into the starter holes with a Phillips screwdriver. Then you can “keyhole” the eye- piece rack onto the wood screws and continue tightening the screws (Figure 8). If you want to be able to remove the rack- later without using a screwdriver, do not tighten the screws too tightly. Be certain that the screws are loose enough that you can lift the rack and remove it from the screws through the larger opening of the keyhole. If you want to have the rack permanently attached, tighten the screws. You may find it easier to carry the base by the handle if the eyepiece rack is removed.
Placing the Optical Tube on the Dobsonian Base
Lift the optical tube and gently place it into the Dobsonian base so that the altitude bearings on either side of the tube rest on the bearing cylinders. Orient the optical tube as shown in Figure 9. Make certain that the optical tube does not get hung up on the vertical bumper stop or the CorrecTension pads as you put it in place. Be careful when placing the tube on the bearings, since if it is inserted at the wrong angle the hub can strike the encoder connector board and potentially damage it. Once on the bearing cylinders, the tube should pivot freely up and down with gentle hand pressure. Note that the tube will not yet be properly balanced, since the eyepiece and finder scope are not in place, and the CorrecTension sys- tem has not been installed.
Installing the CorrecTension Friction
Optimization System
An exciting feature of the SkyQuest IntelliScope Dobsonians is the redesigned CorrecTension (XT) system. Because of their
Vertical Stop
Figure 7. The vertical stop
Figure 8. Using the two supplied wood screws, install the aluminum eyepiece rack in the predrilled holes near the top of the front panel.
relatively light weight, smaller Dobsonians (under 16") have always been plagued by insufficient friction on the altitude bearing surfaces. As a result, such telescopes move up and down much too freely. This causes problems when the observ- er tries to accurately center and track an object for viewing, especially at higher powers. Also, the telescope becomes very sensitive to balance, requiring additional equipment such as counterweight systems or springs to compensate.
SkyQuest IntelliScope Dobsonians employ a simple yet effec- tive remedy for the friction problem that obviates the need for such cumbersome countermeasures. CorrecTension Friction Optimization utilizes a simple “disc brake” to apply the correct level of tension to the altitude bearings. With the XT system, you can change eyepieces or add a barlow lens without hav- ing to tediously adjust the telescope’s balance as you would with other Dobsonians.The altitude friction can be made equal to the azimuth friction, ensuring optimal navigation motion.
8