The SkyView Pro 8 EQ has a focal length of 1000mm, which when used with the supplied 25mm eyepiece yields:
1000mm = 40x 25mm
The magnification provided by the 10mm eyepiece is:
1000mm = 100x 10mm
The maximum attainable magnification for a telescope is directly related to how much light it can gather. The larger the aperture, the more magnification is possible. In general a fig- ure of 50x per inch of aperture is the maximum attainable for most telescopes. Your SkyView Pro 8 EQ has an aperture of 8 inches, so the maximum magnification would be about 400x. This level of magnification assumes you have ideal conditions for viewing.
Keep in mind that as you increase magnification, the bright- ness of the object viewed will decrease; this is an inherent principle of the laws of physics and cannot be avoided. If mag- nification is doubled, an image appears four times dimmer. If magnification is tripled, image brightness is reduced by a fac- tor of nine!
Start by centering the object being viewed in the 25mm eye- piece. Then you may want to increase the magnification to get a closer view. If the object is
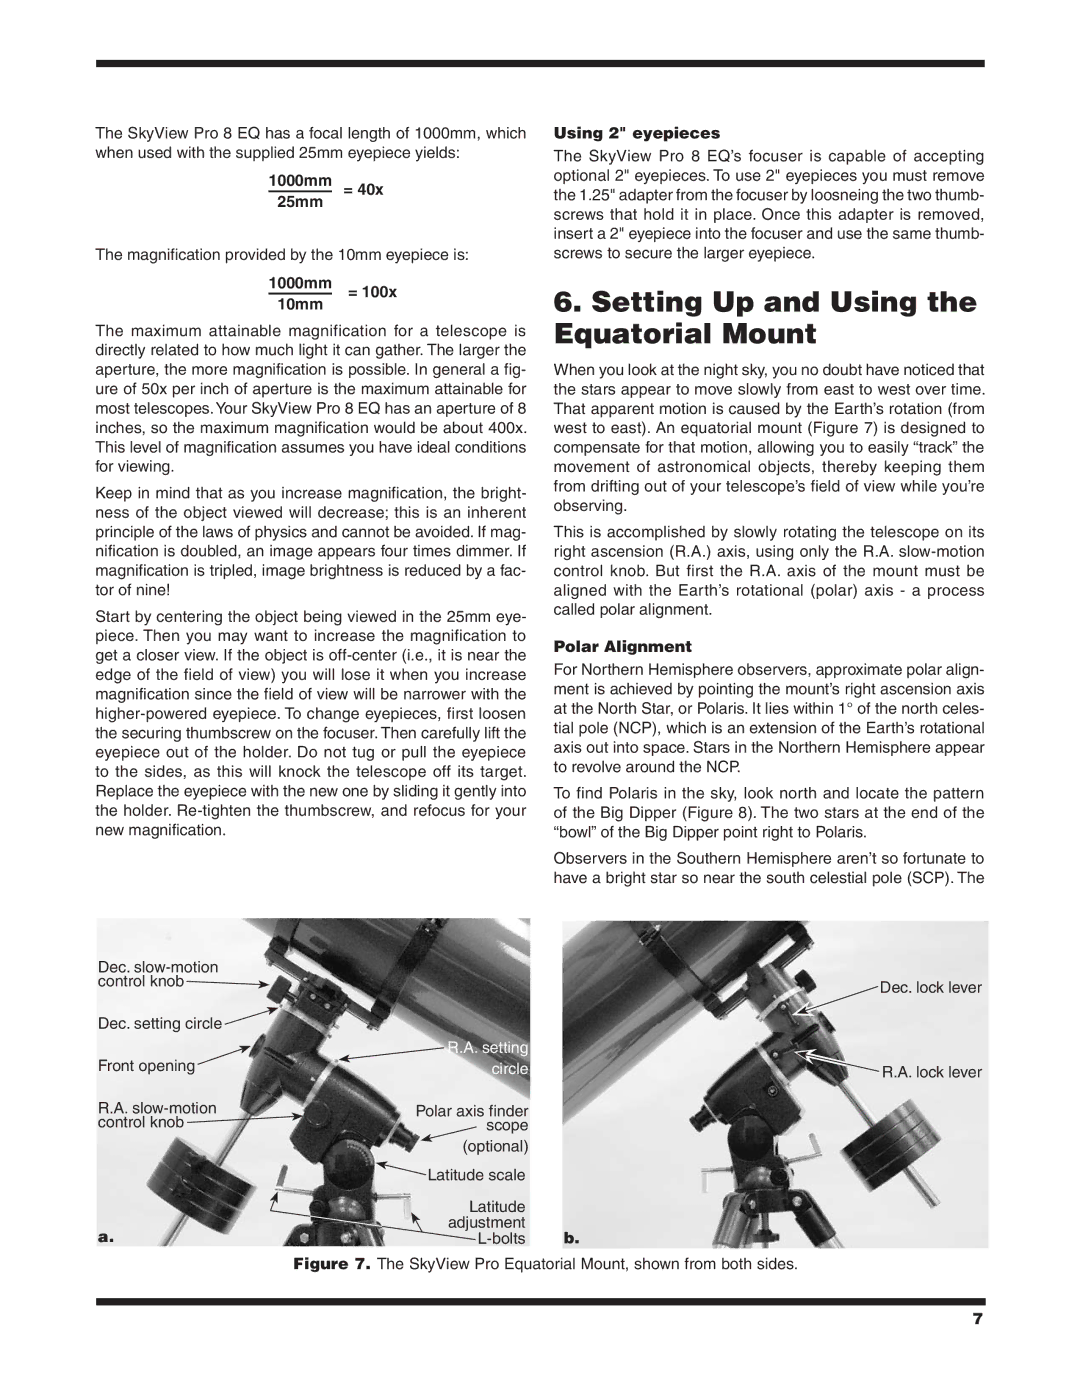
Dec. ![]()
Dec. setting circle |
|
Front opening | R.A. setting |
circle | |
R.A. | Polar axis finder |
control knob | scope |
| (optional) |
| Latitude scale |
| Latitude |
a. | adjustment |
Using 2" eyepieces
The SkyView Pro 8 EQ’s focuser is capable of accepting optional 2" eyepieces. To use 2" eyepieces you must remove the 1.25" adapter from the focuser by loosneing the two thumb- screws that hold it in place. Once this adapter is removed, insert a 2" eyepiece into the focuser and use the same thumb- screws to secure the larger eyepiece.
6.Setting Up and Using the Equatorial Mount
When you look at the night sky, you no doubt have noticed that the stars appear to move slowly from east to west over time. That apparent motion is caused by the Earth’s rotation (from west to east). An equatorial mount (Figure 7) is designed to compensate for that motion, allowing you to easily “track” the movement of astronomical objects, thereby keeping them from drifting out of your telescope’s field of view while you’re observing.
This is accomplished by slowly rotating the telescope on its right ascension (R.A.) axis, using only the R.A.
Polar Alignment
For Northern Hemisphere observers, approximate polar align- ment is achieved by pointing the mount’s right ascension axis at the North Star, or Polaris. It lies within 1° of the north celes- tial pole (NCP), which is an extension of the Earth’s rotational axis out into space. Stars in the Northern Hemisphere appear to revolve around the NCP.
To find Polaris in the sky, look north and locate the pattern of the Big Dipper (Figure 8). The two stars at the end of the “bowl” of the Big Dipper point right to Polaris.
Observers in the Southern Hemisphere aren’t so fortunate to have a bright star so near the south celestial pole (SCP). The
Dec. lock lever
![]() R.A. lock lever
R.A. lock lever
b.
Figure 7. The SkyView Pro Equatorial Mount, shown from both sides.
7