2" Adapter
| Thumb screws | |
Coarse |
| |
focus | Coarse focus | |
knob | ||
knob | ||
|
Focus lock thumb screw
Drawtube |
|
tensioning set | Fine focus |
screw | knob |
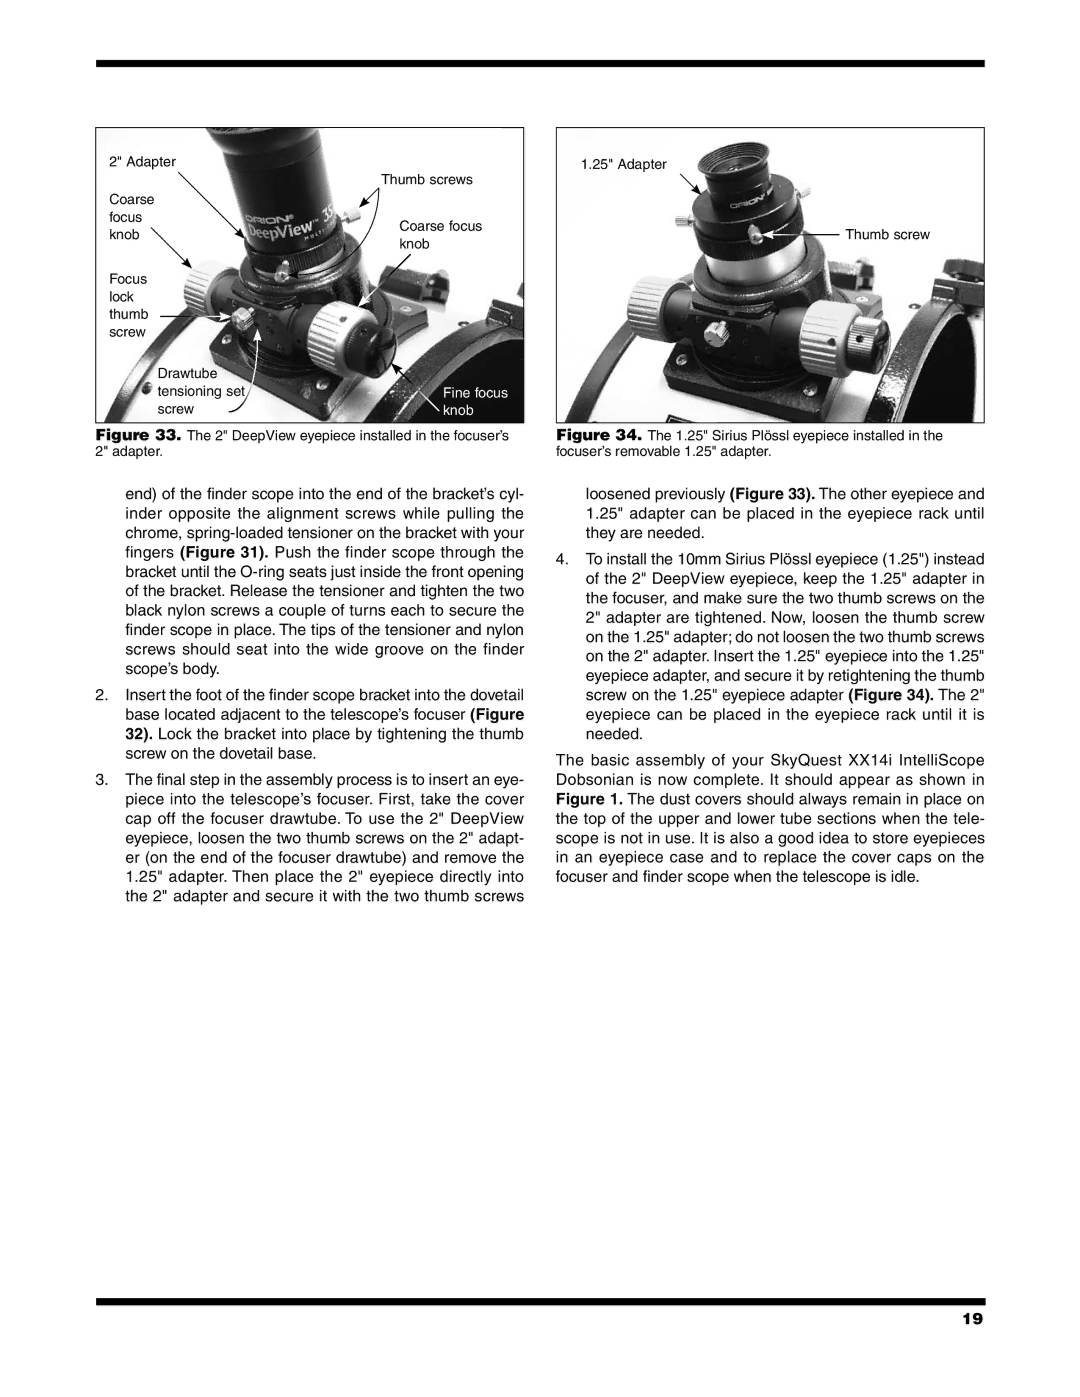
Figure 33. The 2" DeepView eyepiece installed in the focuser’s 2" adapter.
1.25" Adapter
 Thumb screw
Figure 34. The 1.25" Sirius Plössl eyepiece installed in the focuser’s removable 1.25" adapter.
end) of the finder scope into the end of the bracket’s cyl- inder opposite the alignment screws while pulling the chrome,
2.Insert the foot of the finder scope bracket into the dovetail base located adjacent to the telescope’s focuser (Figure 32). Lock the bracket into place by tightening the thumb screw on the dovetail base.
3.The final step in the assembly process is to insert an eye- piece into the telescope’s focuser. First, take the cover cap off the focuser drawtube. To use the 2" DeepView eyepiece, loosen the two thumb screws on the 2" adapt- er (on the end of the focuser drawtube) and remove the 1.25" adapter. Then place the 2" eyepiece directly into the 2" adapter and secure it with the two thumb screws
loosened previously (Figure 33). The other eyepiece and 1.25" adapter can be placed in the eyepiece rack until they are needed.
4.To install the 10mm Sirius Plössl eyepiece (1.25") instead of the 2" DeepView eyepiece, keep the 1.25" adapter in the focuser, and make sure the two thumb screws on the 2" adapter are tightened. Now, loosen the thumb screw on the 1.25" adapter; do not loosen the two thumb screws on the 2" adapter. Insert the 1.25" eyepiece into the 1.25" eyepiece adapter, and secure it by retightening the thumb screw on the 1.25" eyepiece adapter (Figure 34). The 2" eyepiece can be placed in the eyepiece rack until it is needed.
The basic assembly of your SkyQuest XX14i IntelliScope Dobsonian is now complete. It should appear as shown in Figure 1. The dust covers should always remain in place on the top of the upper and lower tube sections when the tele- scope is not in use. It is also a good idea to store eyepieces in an eyepiece case and to replace the cover caps on the focuser and finder scope when the telescope is idle.
19
