
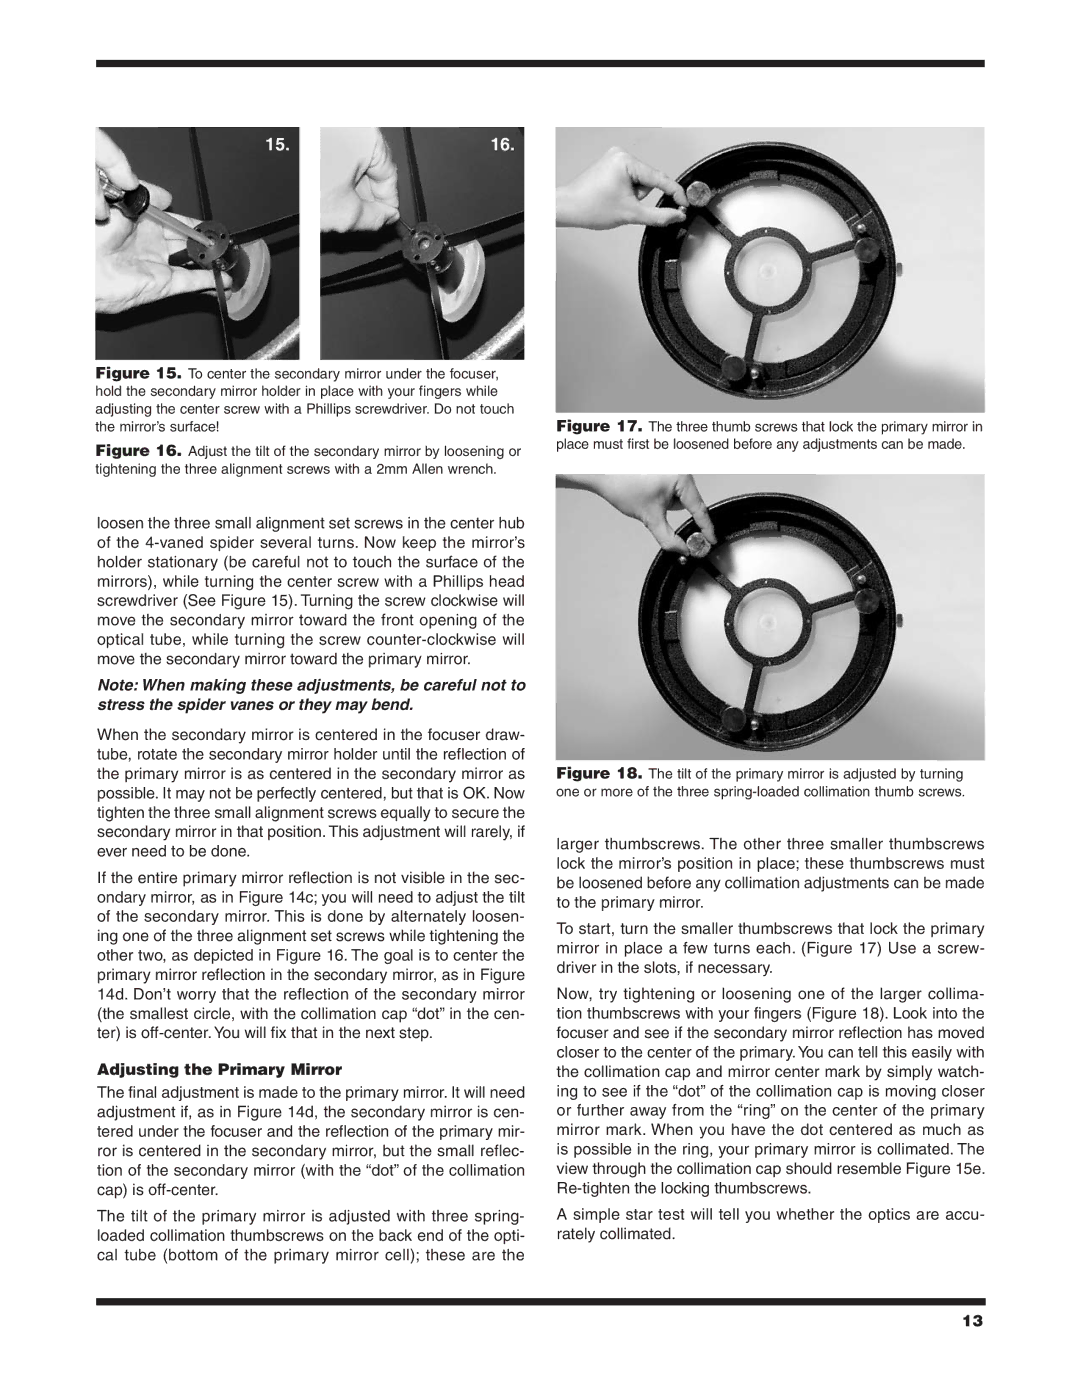
9874 specifications
Orion 9874 is a state-of-the-art device that has gained attention in the tech community for its outstanding features and robust performance. This cutting-edge gadget is designed to meet the needs of both casual users and professionals, making it a versatile addition to any tech enthusiast’s arsenal.One of the main features of the Orion 9874 is its sleek and modern design, which combines aesthetics with functionality. The device boasts a vibrant, high-resolution display that offers stunning visuals, making it perfect for watching videos, playing games, or browsing the web. The touchscreen interface is highly responsive, ensuring a smooth and intuitive user experience.
The Orion 9874 is powered by advanced processing technology, featuring a multi-core processor that delivers exceptional speed and efficiency. This powerful chipset enables seamless multitasking, allowing users to run multiple applications without experiencing lag. Whether you are editing videos, engaging in graphic design, or simply browsing the internet, the Orion 9874 can handle it all with ease.
In terms of connectivity, the device is equipped with the latest wireless technologies, including Wi-Fi 6 and Bluetooth 5.0. These features ensure fast internet speeds and reliable connections with other devices. The inclusion of multiple USB ports and HDMI output also provides users with various options for expanding functionality and connecting to external displays and peripherals.
Security is a priority for Orion, and the 9874 incorporates advanced security measures. It includes biometric authentication options such as facial recognition and fingerprint sensors, ensuring that your data remains safe and secure. Additionally, the device comes with robust encryption features that protect sensitive information from unauthorized access.
Battery life is another standout aspect of the Orion 9874. With an energy-efficient design, this device can last throughout the day on a single charge, making it ideal for users who are often on the go. Fast-charging capabilities also allow users to quickly recharge the battery, minimizing downtime.
In conclusion, the Orion 9874 is a remarkable device that combines elegance with high-end performance. With its stunning display, powerful processor, advanced connectivity options, and strong security features, it is a perfect choice for anyone needing a reliable and efficient gadget. Whether for work or play, the Orion 9874 is designed to enhance your digital experience in every way possible.