Figure 2. To remove the rear end ring, unthread the six screws that connect it to the tube.
Box #3: Primary Mirror and Cell
Qty. Description
1Primary mirror
1Mirror cell
3Collimation knobs
3Nylon washers
3Springs
2. Assembly
Now that you have unpacked the boxes and familiarized yourself with all the parts in front of you, it’s time to begin assembly.
Assembly of the Optical Tube
In order to prevent damage to the primary mirror in ship- ment, it is shipped in its cell separately from the optical tube. To install the mirror cell into the optical tube, the rear end ring attached to the optical tube must first be removed. This
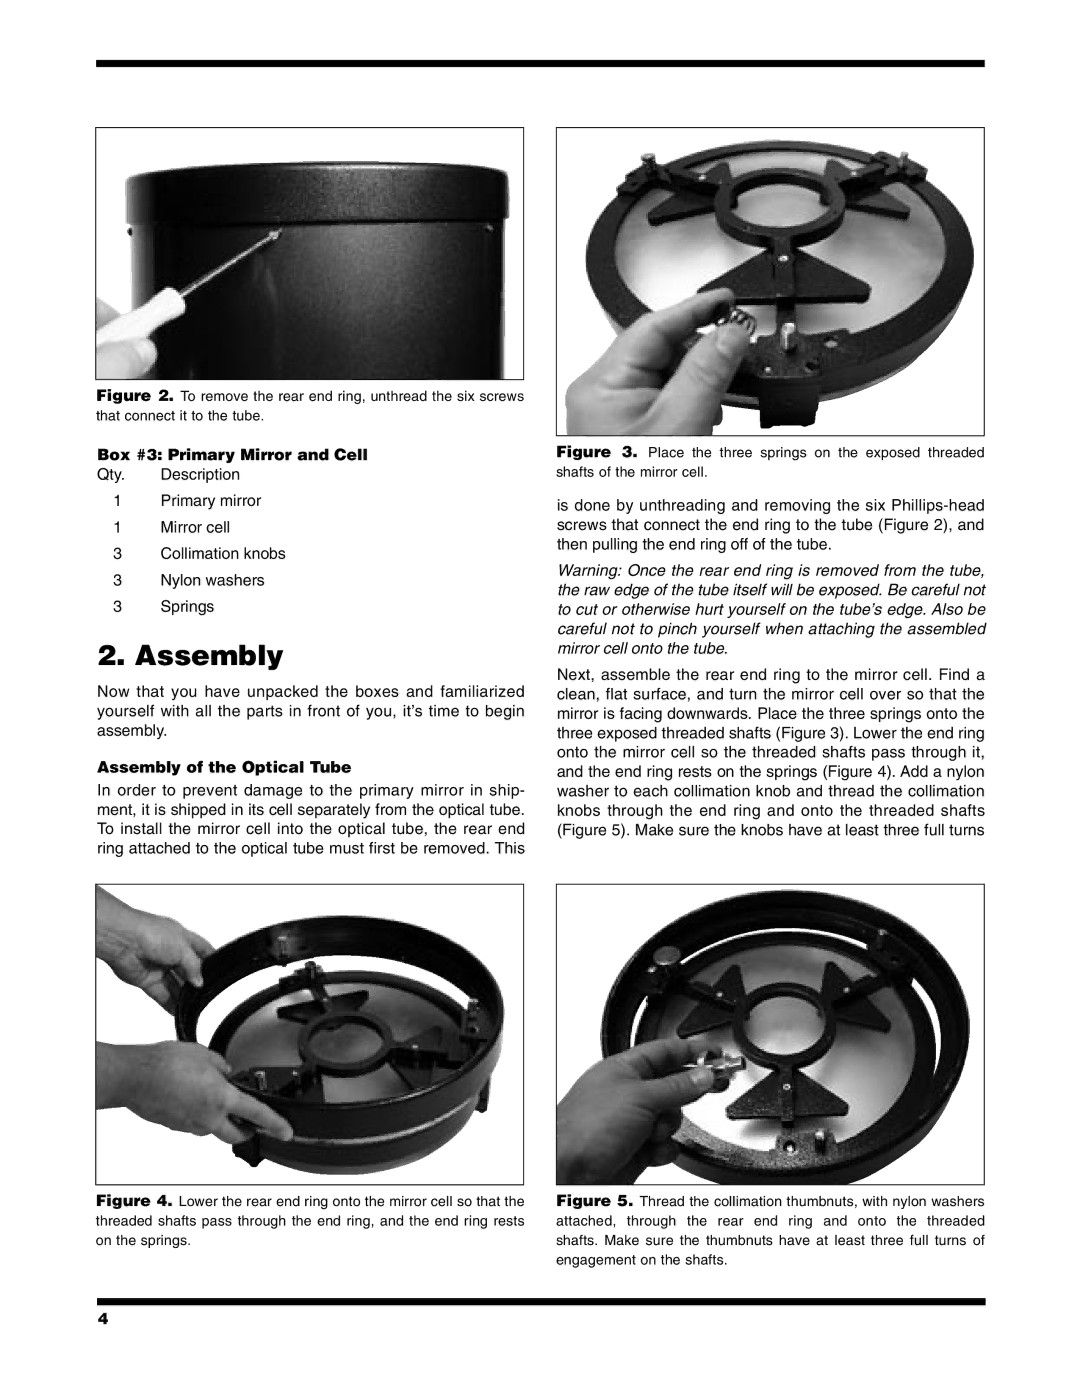
Figure 3. Place the three springs on the exposed threaded shafts of the mirror cell.
is done by unthreading and removing the six
Warning: Once the rear end ring is removed from the tube, the raw edge of the tube itself will be exposed. Be careful not to cut or otherwise hurt yourself on the tube’s edge. Also be careful not to pinch yourself when attaching the assembled mirror cell onto the tube.
Next, assemble the rear end ring to the mirror cell. Find a clean, flat surface, and turn the mirror cell over so that the mirror is facing downwards. Place the three springs onto the three exposed threaded shafts (Figure 3). Lower the end ring onto the mirror cell so the threaded shafts pass through it, and the end ring rests on the springs (Figure 4). Add a nylon washer to each collimation knob and thread the collimation knobs through the end ring and onto the threaded shafts (Figure 5). Make sure the knobs have at least three full turns
Figure 4. Lower the rear end ring onto the mirror cell so that the threaded shafts pass through the end ring, and the end ring rests on the springs.
Figure 5. Thread the collimation thumbnuts, with nylon washers attached, through the rear end ring and onto the threaded shafts. Make sure the thumbnuts have at least three full turns of engagement on the shafts.
4