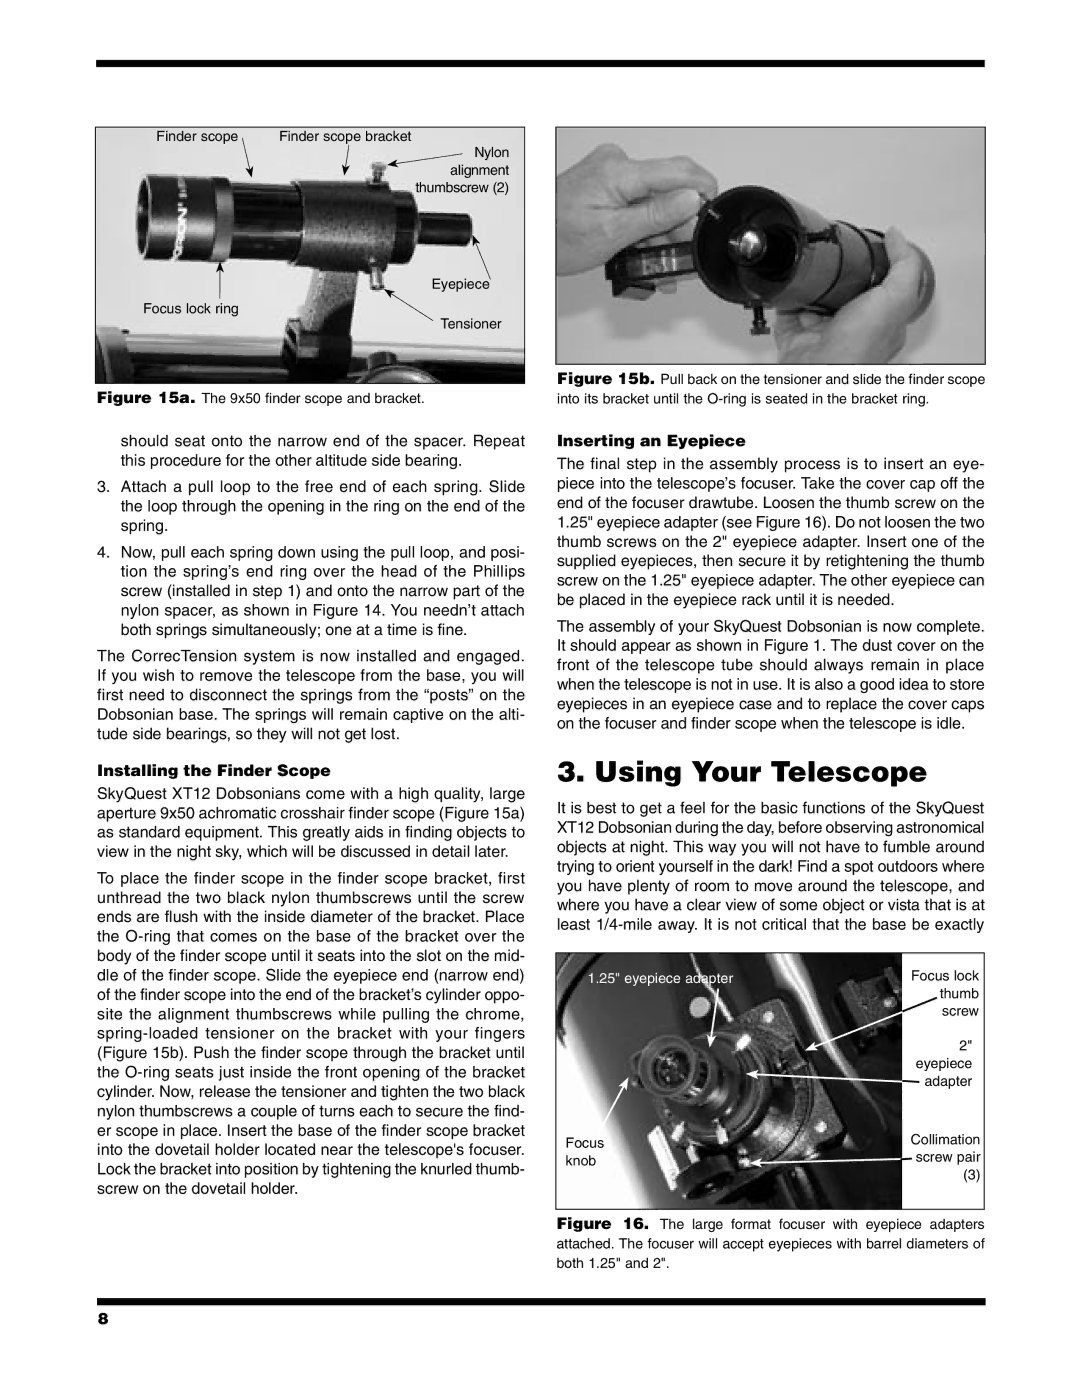
Finder scope | Finder scope bracket |
Nylon alignment thumbscrew (2)
Eyepiece
Focus lock ring
Tensioner
Figure 15a. The 9x50 finder scope and bracket.
should seat onto the narrow end of the spacer. Repeat this procedure for the other altitude side bearing.
3.Attach a pull loop to the free end of each spring. Slide the loop through the opening in the ring on the end of the spring.
4.Now, pull each spring down using the pull loop, and posi- tion the spring’s end ring over the head of the Phillips screw (installed in step 1) and onto the narrow part of the nylon spacer, as shown in Figure 14. You needn’t attach both springs simultaneously; one at a time is fine.
The CorrecTension system is now installed and engaged. If you wish to remove the telescope from the base, you will first need to disconnect the springs from the “posts” on the Dobsonian base. The springs will remain captive on the alti- tude side bearings, so they will not get lost.
Installing the Finder Scope
SkyQuest XT12 Dobsonians come with a high quality, large aperture 9x50 achromatic crosshair finder scope (Figure 15a) as standard equipment. This greatly aids in finding objects to view in the night sky, which will be discussed in detail later.
To place the finder scope in the finder scope bracket, first unthread the two black nylon thumbscrews until the screw ends are flush with the inside diameter of the bracket. Place the
Figure 15b. Pull back on the tensioner and slide the finder scope into its bracket until the O-ring is seated in the bracket ring.
Inserting an Eyepiece
The final step in the assembly process is to insert an eye- piece into the telescope’s focuser. Take the cover cap off the end of the focuser drawtube. Loosen the thumb screw on the 1.25" eyepiece adapter (see Figure 16). Do not loosen the two thumb screws on the 2" eyepiece adapter. Insert one of the supplied eyepieces, then secure it by retightening the thumb screw on the 1.25" eyepiece adapter. The other eyepiece can be placed in the eyepiece rack until it is needed.
The assembly of your SkyQuest Dobsonian is now complete. It should appear as shown in Figure 1. The dust cover on the front of the telescope tube should always remain in place when the telescope is not in use. It is also a good idea to store eyepieces in an eyepiece case and to replace the cover caps on the focuser and finder scope when the telescope is idle.
3. Using Your Telescope
It is best to get a feel for the basic functions of the SkyQuest XT12 Dobsonian during the day, before observing astronomical objects at night. This way you will not have to fumble around trying to orient yourself in the dark! Find a spot outdoors where you have plenty of room to move around the telescope, and where you have a clear view of some object or vista that is at least
1.25" eyepiece adapter | Focus lock | |
thumb | ||
| ||
| screw | |
| 2" | |
| eyepiece | |
| adapter |
Focus | Collimation | |
screw pair | ||
knob | ||
(3) | ||
|
Figure 16. The large format focuser with eyepiece adapters attached. The focuser will accept eyepieces with barrel diameters of both 1.25" and 2".
8