Figure 21. Locate the area of tube that is bulging out and preventing it from seating in the end ring. Press on the bulge to force the tube into the end ring.
Figure 22. Thread the counterweights onto the counterweight mounting bolts until each counterweight is tight against the metal plate. Install two counterweights on each mounting bolt.
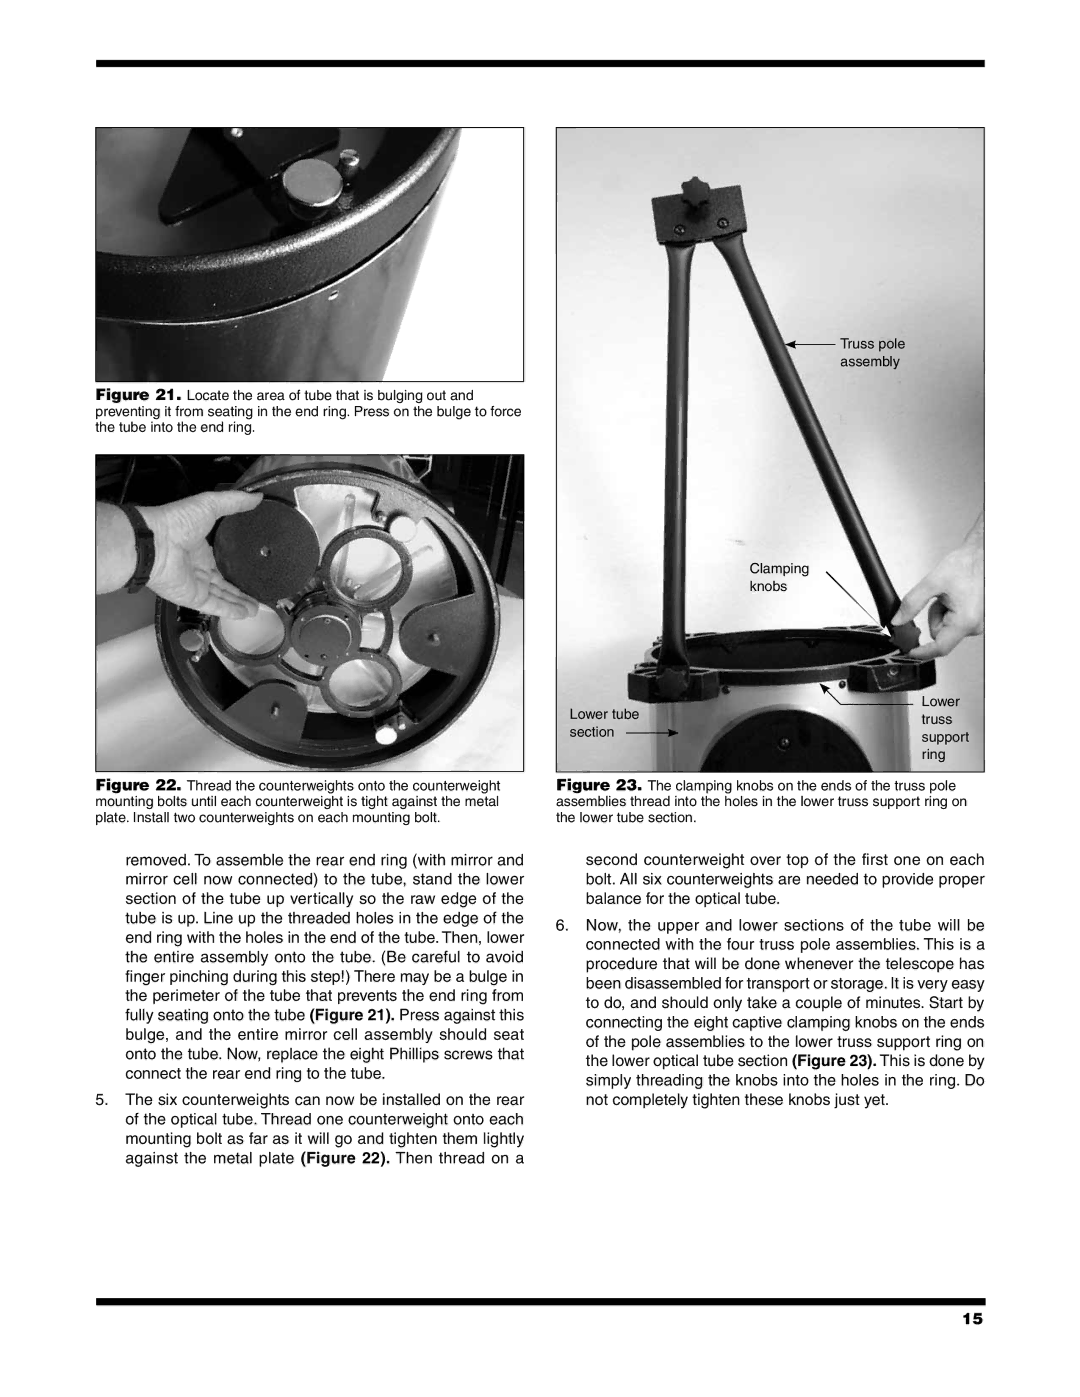
 Truss pole assembly
Clamping knobs
Lower tube | Lower | ||
truss | |||
section |
| ||
| support | ||
| |||
|
| ||
|
| ring | |
Figure 23. The clamping knobs on the ends of the truss pole assemblies thread into the holes in the lower truss support ring on the lower tube section.
removed. To assemble the rear end ring (with mirror and mirror cell now connected) to the tube, stand the lower section of the tube up vertically so the raw edge of the tube is up. Line up the threaded holes in the edge of the end ring with the holes in the end of the tube. Then, lower the entire assembly onto the tube. (Be careful to avoid finger pinching during this step!) There may be a bulge in the perimeter of the tube that prevents the end ring from fully seating onto the tube (Figure 21). Press against this bulge, and the entire mirror cell assembly should seat onto the tube. Now, replace the eight Phillips screws that connect the rear end ring to the tube.
5.The six counterweights can now be installed on the rear of the optical tube. Thread one counterweight onto each mounting bolt as far as it will go and tighten them lightly against the metal plate (Figure 22). Then thread on a
second counterweight over top of the first one on each bolt. All six counterweights are needed to provide proper balance for the optical tube.
6.Now, the upper and lower sections of the tube will be connected with the four truss pole assemblies. This is a procedure that will be done whenever the telescope has been disassembled for transport or storage. It is very easy to do, and should only take a couple of minutes. Start by connecting the eight captive clamping knobs on the ends of the pole assemblies to the lower truss support ring on the lower optical tube section (Figure 23). This is done by simply threading the knobs into the holes in the ring. Do not completely tighten these knobs just yet.
15