Figure 37. This image shows the XX14i properly set up for collimation. Note the white paper placed across from the focuser and the horizontal orientation of the optical tube. Ideally, the telescope should be pointing at a light-colored wall.
and causing damage if something comes loose while you are making adjustments. Place a sheet of white paper inside the optical tube directly opposite the focuser. The paper will provide a bright “background” when viewing into the focuser. When properly set up for collimation, your telescope should resemble Figure 37.
Aligning the Secondary Mirror
To adjust the secondary mirror collimation, you will need a Phillips screwdriver and a 2mm hex key, or Allen wrench.
You will need to check, and adjust if necessary, four aspects of the secondary mirror’s alignment:
1.The secondary mirror’s axial position
2.The secondary mirror’s radial position
3.The secondary mirror’s rotational position
4.The secondary mirror’s tilt
The first three will probably only need to be checked and (pos- sibly) adjusted once. Thereafter, it is usually only the second- ary mirror’s tilt that will need to be adjusted occasionally.
Adjusting the Secondary Mirror’s Axial Position
With the collimating cap in place, look through the hole in the cap at the secondary (diagonal) mirror. Ignore the reflections for the time being. The secondary mirror itself should be cen- tered in the focuser drawtube. If it is
To do so, use the 2mm hex key to loosen the three small alignment set screws in the center hub of the
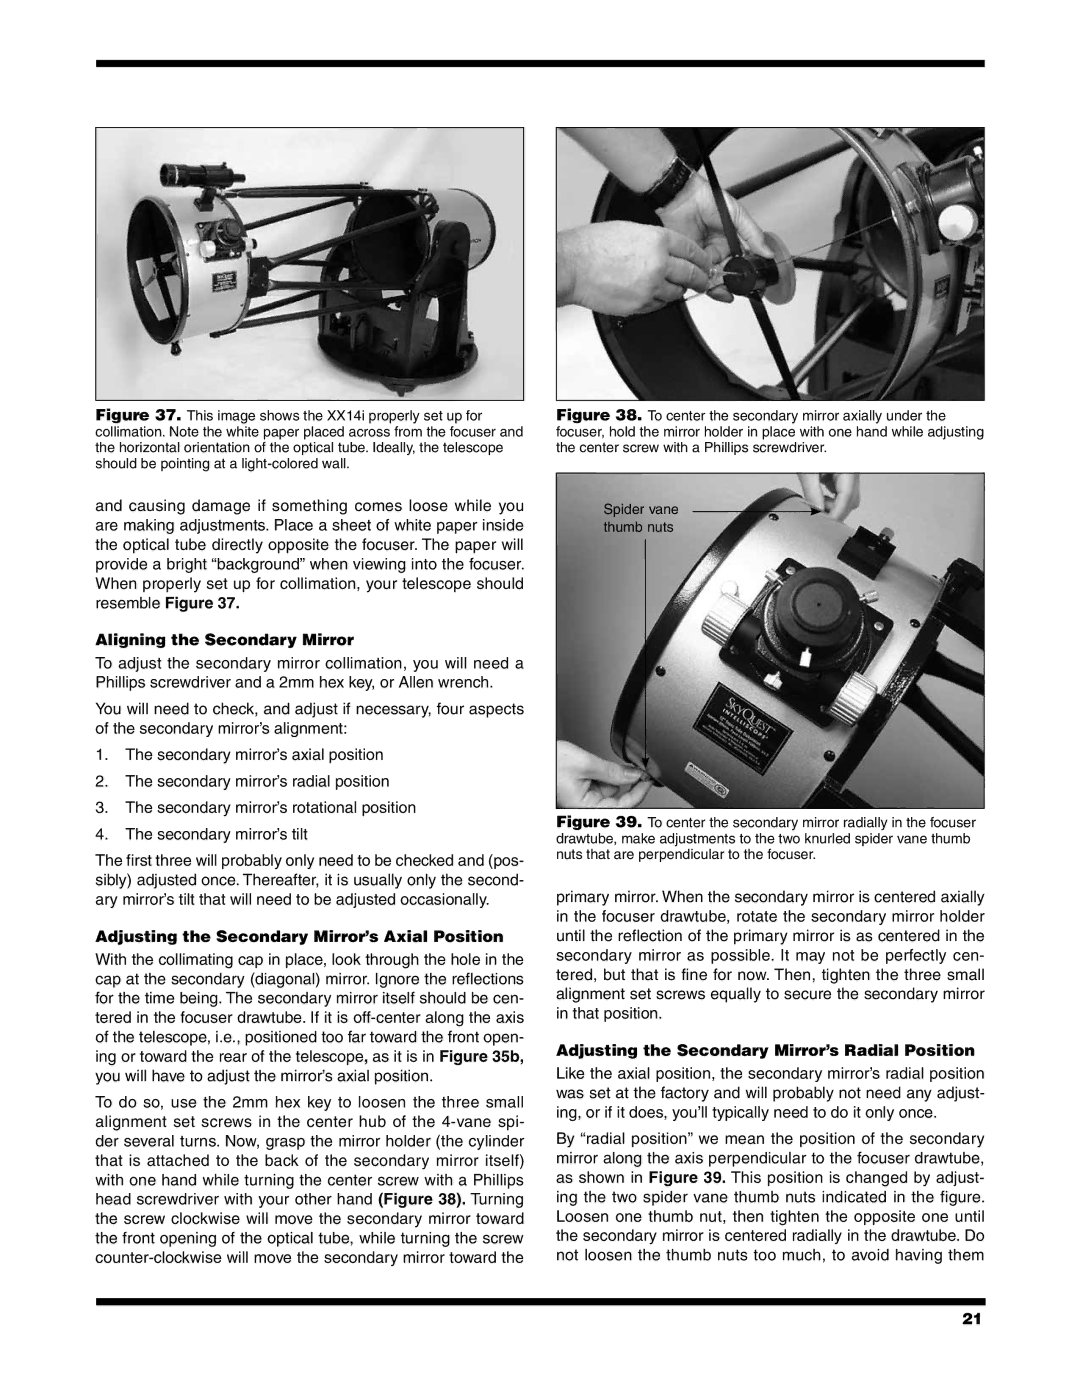
Figure 38. To center the secondary mirror axially under the focuser, hold the mirror holder in place with one hand while adjusting the center screw with a Phillips screwdriver.
Spider vane thumb nuts
Figure 39. To center the secondary mirror radially in the focuser drawtube, make adjustments to the two knurled spider vane thumb nuts that are perpendicular to the focuser.
primary mirror. When the secondary mirror is centered axially in the focuser drawtube, rotate the secondary mirror holder until the reflection of the primary mirror is as centered in the secondary mirror as possible. It may not be perfectly cen- tered, but that is fine for now. Then, tighten the three small alignment set screws equally to secure the secondary mirror in that position.
Adjusting the Secondary Mirror’s Radial Position
Like the axial position, the secondary mirror’s radial position was set at the factory and will probably not need any adjust- ing, or if it does, you’ll typically need to do it only once.
By “radial position” we mean the position of the secondary mirror along the axis perpendicular to the focuser drawtube, as shown in Figure 39. This position is changed by adjust- ing the two spider vane thumb nuts indicated in the figure. Loosen one thumb nut, then tighten the opposite one until the secondary mirror is centered radially in the drawtube. Do not loosen the thumb nuts too much, to avoid having them
21