Chapter 2 - Installation:
This chapter will explain how to install the iPAC-GM3 interface using the GM3H and the GM3HXM harnesses. Some installations require you to make wiring connections. To eliminate the risk of an electrical short, we recommend removing the negative terminal from the vehicles battery prior to installation.If you do not feel comfortable making these connections, we suggest you seek professional installation.
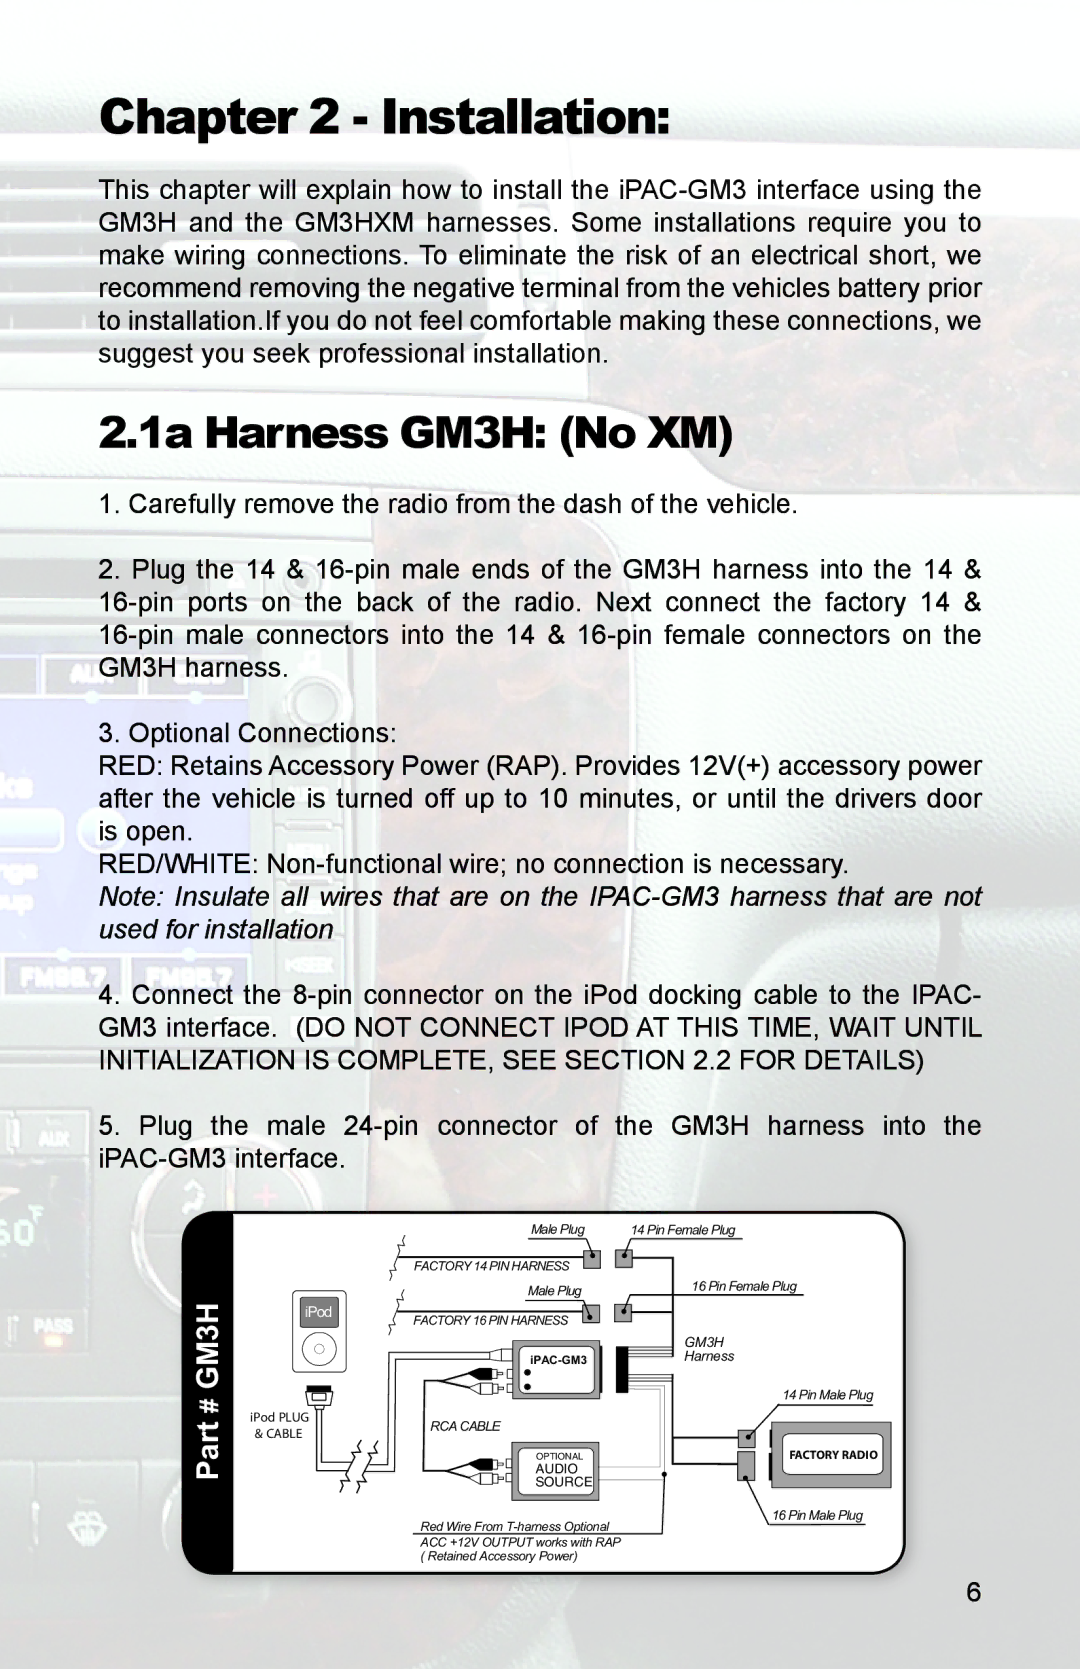
2.1a Harness GM3H: (No XM)
1.Carefully remove the radio from the dash of the vehicle.
2.Plug the 14 & 16-pin male ends of the GM3H harness into the 14 &
16-pin ports on the back of the radio. Next connect the factory 14 & 16-pin male connectors into the 14 & 16-pin female connectors on the GM3H harness.
3.Optional Connections:
RED: Retains Accessory Power (RAP). Provides 12V(+) accessory power after the vehicle is turned off up to 10 minutes, or until the drivers door is open.
RED/WHITE: Non-functional wire; no connection is necessary.
Note: Insulate all wires that are on the IPAC-GM3 harness that are not used for installation
4.Connect the 8-pin connector on the iPod docking cable to the IPAC- GM3 interface. (DO NOT CONNECT IPOD AT THIS TIME, WAIT UNTIL INITIALIZATION IS COMPLETE, SEE SECTION 2.2 FOR DETAILS)
5.Plug the male 24-pin connector of the GM3H harness into the iPAC-GM3 interface.
Male Plug | 14 Pin Female Plug |
FACTORY 14 PIN HARNESS
Part # GM3H
Male Plug
FACTORY 16 PIN HARNESS
iPAC-GM3
RCA CABLE
OPTIONAL
AUDIO
SOURCE
Red Wire From T-harness Optional ACC +12V OUTPUT works with RAP ( Retained Accessory Power)
16 Pin Female Plug
GM3H
Harness
14 Pin Male Plug
FACTORY RADIO
16 Pin Male Plug