|
|
|
|
| Adjusting the Picture | ||
Adjusting the picture |
|
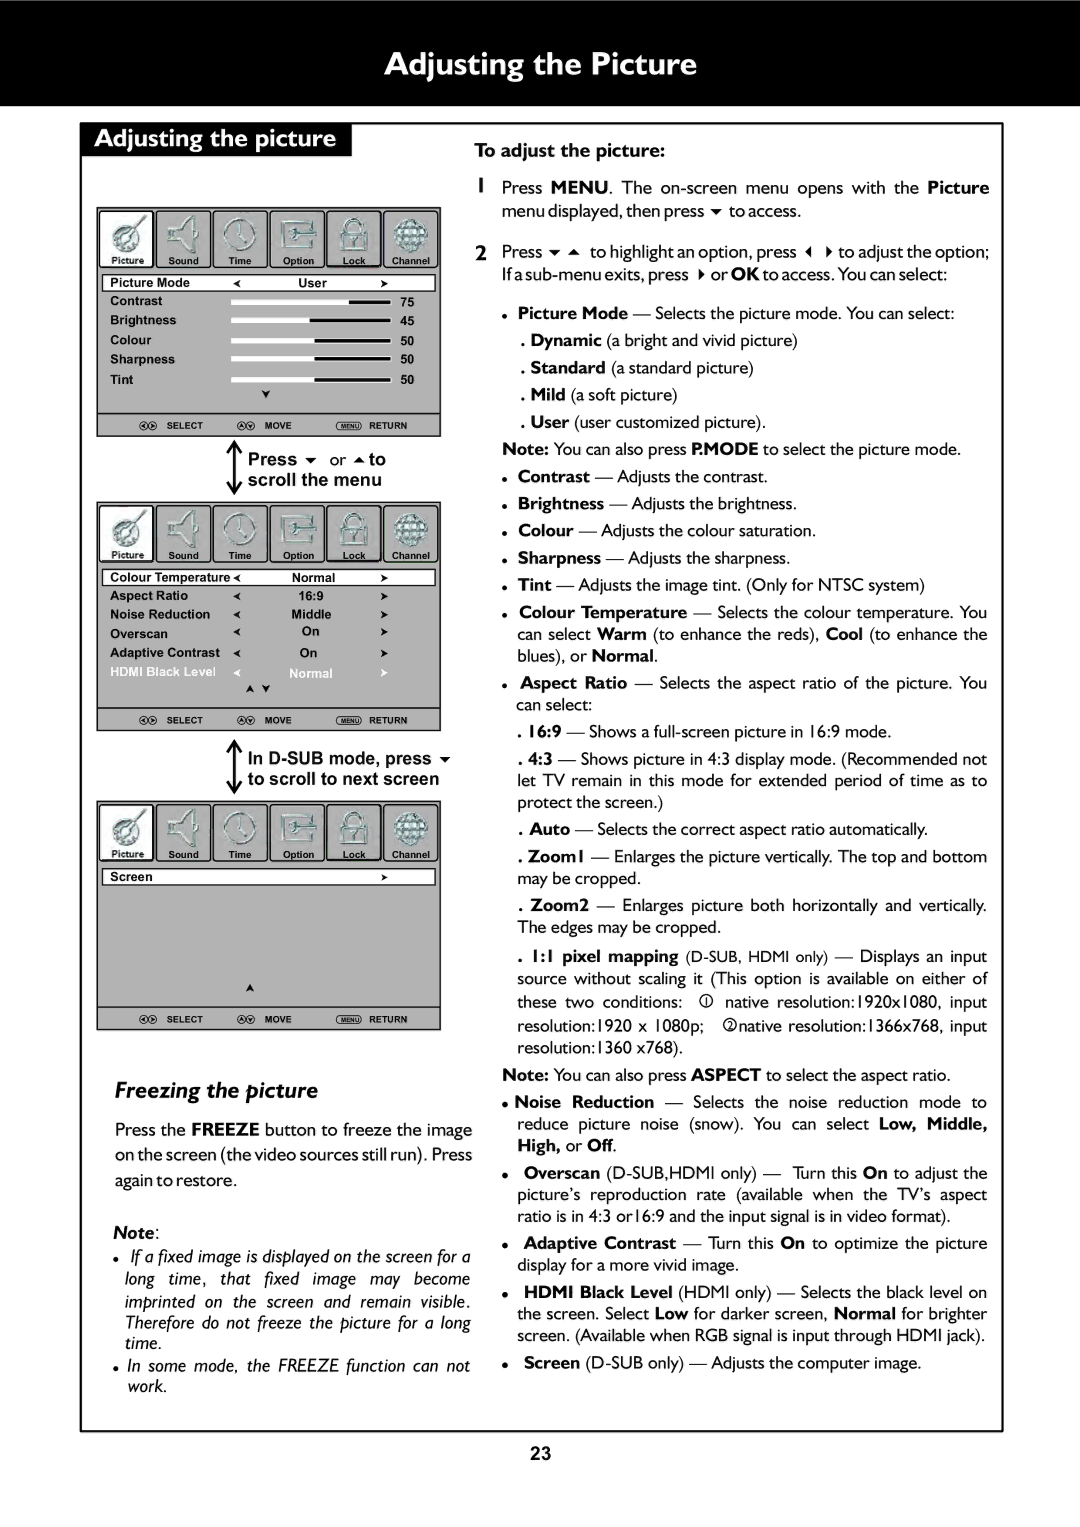
| To adjust the picture: | ||||
|
|
|
|
|
| ||
|
|
|
|
|
| 1 Press MENU. The | |
|
|
|
|
|
|
| menu displayed, then press 6to access. |
Picture | Sound | Time | Option | Lock | Channel | 2 | Press 65to highlight an option, press 34to adjust the option; |
Picture Mode |
| User |
|
|
| If a | |
|
|
|
|
| |||
Contrast |
|
|
|
| 75 |
| ! Picture Mode — Selects the picture mode. You can select: |
Brightness |
|
|
| 45 |
| ||
|
|
|
| . Dynamic (a bright and vivid picture) | |||
Colour |
|
|
|
| 50 |
| |
Sharpness |
|
|
| 50 |
| . Standard (a standard picture) | |
Tint |
|
|
|
| 50 |
| |
|
|
|
|
| . Mild (a soft picture) | ||
|
|
|
|
|
|
| |
| SELECT |
| MOVE | MENU | RETURN |
| . User (user customized picture). |
|
| Press 6or 5to |
| Note: You can also press P.MODE to select the picture mode. | |||
|
| scroll the menu |
| ! Contrast — Adjusts the contrast. | |||
!Brightness — Adjusts the brightness.
!Colour — Adjusts the colour saturation.
| Picture | Sound | Time | Option | Lock | Channel | ! | Sharpness — Adjusts the sharpness. | |||
| Colour Temperature | Normal |
|
|
|
| ! | Tint — Adjusts the image tint. (Only for NTSC system) | |||
| Aspect Ratio |
| 16:9 |
|
|
|
| ||||
|
|
|
|
|
|
| Colour Temperature — Selects the colour temperature. You | ||||
| Noise Reduction |
| Middle |
|
|
|
| ! | |||
| Overscan |
| On |
|
|
|
|
| can select Warm (to enhance the reds), Cool (to enhance the | ||
| Adaptive Contrast |
| On |
|
|
|
|
| blues), or Normal. |
| |
| HDMI Black Level |
| Normal |
|
|
|
| ! Aspect Ratio — Selects the aspect ratio of the picture. You | |||
|
|
|
|
|
|
|
|
| |||
|
|
|
|
|
|
|
|
|
| can select: |
|
|
| SELECT |
| MOVE | MENU | RETURN |
|
| |||
|
|
|
| . 16:9 — Shows a | |||||||
|
|
|
|
|
|
|
|
|
| ||
|
|
|
|
|
|
|
|
|
| ||
|
|
| In | ||||||||
|
|
| to scroll to next screen |
| let TV remain in this mode for extended period of time as to | ||||||
|
|
|
|
|
|
|
|
|
| protect the screen.) |
|
|
|
|
|
|
|
|
|
|
|
| |
|
|
|
|
|
|
|
|
|
| . Auto — Selects the correct aspect ratio automatically. | |
| Picture | Sound | Time | Option | Lock | Channel |
|
| . Zoom1 — Enlarges the picture vertically. The top and bottom | ||
| Screen |
|
|
|
|
|
|
|
| may be cropped. |
|
|
|
|
|
|
|
|
|
|
| . Zoom2 — Enlarges picture both horizontally and vertically. | |
|
|
|
|
|
|
|
|
|
| The edges may be cropped. |
|
|
|
|
|
|
|
|
|
|
| . 1:1 pixel mapping | |
|
|
|
|
|
|
|
|
|
| source without scaling it (This option is available on either of | |
|
|
|
|
|
|
|
|
|
| these two conditions: 1 | native resolution:1920x1080, input |
|
| SELECT |
| MOVE | MENU | RETURN |
|
| resolution:1920 x 1080p; | 2 native resolution:1366x768, input | |
|
|
|
|
|
|
|
|
|
| ||
|
|
|
|
|
|
|
|
|
| ||
|
|
|
|
|
|
|
|
|
| resolution:1360 x768). |
|
| Freezing the picture |
|
|
|
| Note: You can also press ASPECT to select the aspect ratio. | |||||
|
|
|
|
| ! | Noise Reduction — Selects the noise reduction mode to | |||||
|
|
|
|
|
|
|
|
| |||
| Press the FREEZE button to freeze the image |
| reduce picture noise (snow). You can select Low, Middle, | ||||||||
| on the screen (the video sources still run). Press |
| High, or Off. |
| |||||||
|
| Overscan | |||||||||
| again to restore. |
|
|
|
|
| ! | ||||
|
|
|
|
|
|
|
|
|
| picture’s reproduction rate (available when the TV’s aspect | |
| Note: |
|
|
|
|
|
|
|
| ratio is in 4:3 or16:9 and the input signal is in video format). | |
|
|
|
|
|
|
|
| ! | Adaptive Contrast — Turn this On to optimize the picture | ||
| ! If a fixed image is displayed on the screen for a | ||||||||||
|
| display for a more vivid image. | |||||||||
| long time, that fixed image may become |
| |||||||||
| ! HDMI Black Level (HDMI only) — Selects the black level on | ||||||||||
| imprinted on the screen and remain visible. | ||||||||||
|
| the screen. Select Low for darker screen, Normal for brighter | |||||||||
| Therefore do not freeze the picture for a long |
| |||||||||
|
| screen. (Available when RGB signal is input through HDMI jack). | |||||||||
| time. |
|
|
|
|
|
|
|
| ||
|
|
|
|
|
|
|
|
| Screen | ||
| ! In some mode, the FREEZE function can not | ! | |||||||||
| work. |
|
|
|
|
|
|
|
|
| |
23