– Initial Settings –
Tuner Setting
Setting channels automatically
—Auto Channel Set
Perform Auto Channel Set only if channels have not been set correctly by the Plug&Play setting.
Playback
Basic Playback
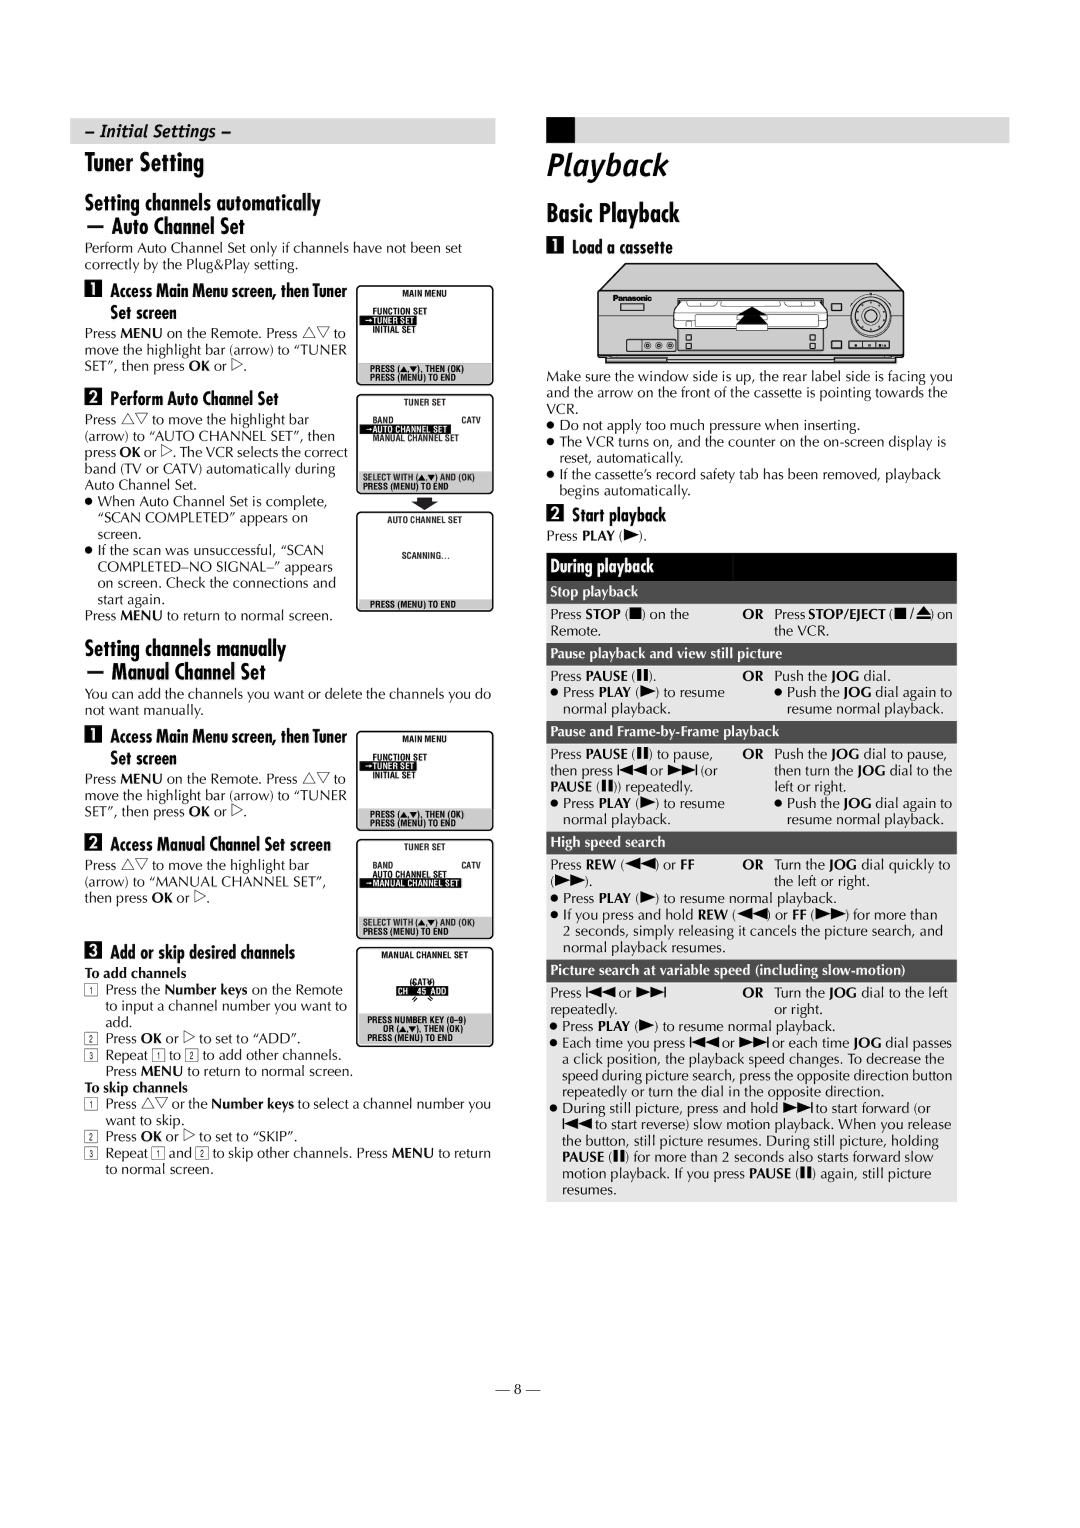
ALoad a cassette
AAccess Main Menu screen, then Tuner
Set screen
Press MENU on the Remote. Press rtto move the highlight bar (arrow) to “TUNER SET”, then press OK or e.
BPerform Auto Channel Set
Press rtto move the highlight bar (arrow) to “AUTO CHANNEL SET”, then press OK or e. The VCR selects the correct band (TV or CATV) automatically during Auto Channel Set.
●When Auto Channel Set is complete, “SCAN COMPLETED” appears on screen.
●If the scan was unsuccessful, “SCAN
Press MENU to return to normal screen.
MAIN MENU
FUNCTION SET
 TUNER SET
INITIAL SET
PRESS ( ,![]() ), THEN (OK)
), THEN (OK)
PRESS (MENU) TO END
TUNER SET
BANDCATV
![]() AUTO CHANNEL SET MANUAL CHANNEL SET
AUTO CHANNEL SET MANUAL CHANNEL SET
SELECT WITH ( ,![]() ) AND (OK)
) AND (OK)
PRESS (MENU) TO END
AUTO CHANNEL SET
SCANNING...
PRESS (MENU) TO END
Make sure the window side is up, the rear label side is facing you and the arrow on the front of the cassette is pointing towards the VCR.
●Do not apply too much pressure when inserting.
●The VCR turns on, and the counter on the
●If the cassette’s record safety tab has been removed, playback begins automatically.
BStart playback
Press PLAY (4).
During playback
Stop playback
Press STOP (8) on the | OR Press STOP/EJECT (0) on |
Remote. | the VCR. |
Setting channels manually
— Manual Channel Set
You can add the channels you want or delete the channels you do not want manually.
A Access Main Menu screen, then Tuner |
| MAIN MENU | |||
Set screen | TUNER SET |
|
|
| |
| FUNCTION SET | ||||
|
|
|
|
|
|
Press MENU on the Remote. Press rtto | INITIAL SET |
|
|
| |
|
|
|
|
| |
move the highlight bar (arrow) to “TUNER |
|
|
|
|
|
SET”, then press OK or e. |
|
|
|
|
|
PRESS ( , | ), THEN (OK) | ||||
| PRESS (MENU) TO END | ||||
B Access Manual Channel Set screen |
| TUNER SET | |||
Press rtto move the highlight bar | BAND |
|
| CATV | |
(arrow) to “MANUAL CHANNEL SET”, | AUTO CHANNEL SET | ||||
MANUAL CHANNEL SET |
| ||||
then press OK or e. |
|
|
|
|
|
|
|
|
| ||
| SELECT WITH ( , ) AND (OK) | ||||
| PRESS (MENU) TO END | ||||
C Add or skip desired channels | MANUAL CHANNEL SET | ||||
To add channels |
| (CATV) | |||
A Press the Number keys on the Remote |
| ||||
| CH | 45 ADD |
| ||
to input a channel number you want to |
|
|
|
|
|
add. | OR ( , | ), THEN (OK) | |||
| PRESS NUMBER KEY | ||||
B Press OK or eto set to “ADD”. | PRESS (MENU) TO END | ||||
CRepeat A to B to add other channels. Press MENU to return to normal screen.
To skip channels
APress rtor the Number keys to select a channel number you want to skip.
BPress OK or eto set to “SKIP”.
CRepeat A and B to skip other channels. Press MENU to return to normal screen.
— 8 —
Pause playback and view still picture | |
Press PAUSE (9). | OR Push the JOG dial. |
● Press PLAY (4) to resume | ● Push the JOG dial again to |
normal playback. | resume normal playback. |
Pause and | |
Press PAUSE (9) to pause, | OR Push the JOG dial to pause, |
then press 2or 6(or | then turn the JOG dial to the |
PAUSE (9)) repeatedly. | left or right. |
● Press PLAY (4) to resume | ● Push the JOG dial again to |
normal playback. | resume normal playback. |
High speed search |
|
Press REW (3) or FF | OR Turn the JOG dial quickly to |
(5). | the left or right. |
● Press PLAY (4) to resume normal playback.
● If you press and hold REW (3) or FF (5) for more than 2 seconds, simply releasing it cancels the picture search, and normal playback resumes.
Picture search at variable speed (including slow-motion)
Press 2or 6 | OR Turn the JOG dial to the left |
repeatedly. | or right. |
●Press PLAY (4) to resume normal playback.
●Each time you press 2or 6or each time JOG dial passes a click position, the playback speed changes. To decrease the speed during picture search, press the opposite direction button repeatedly or turn the dial in the opposite direction.
●During still picture, press and hold 6to start forward (or 2to start reverse) slow motion playback. When you release the button, still picture resumes. During still picture, holding PAUSE (9) for more than 2 seconds also starts forward slow motion playback. If you press PAUSE (9) again, still picture resumes.