Adjusting the White Balance/Black Balance
3 Place the white pattern over a location with the same conditions as the light source illumi- nating the subject and zoom up to project white on the screen.
A white object (white cloth, white wall) near the subject can also be used. The white area required is as shown below.
1/4 or more of the screen width
White cloth
1/4 or more of the screen height Note{
Take care not to allow
4 Adjust the iris of the lens.
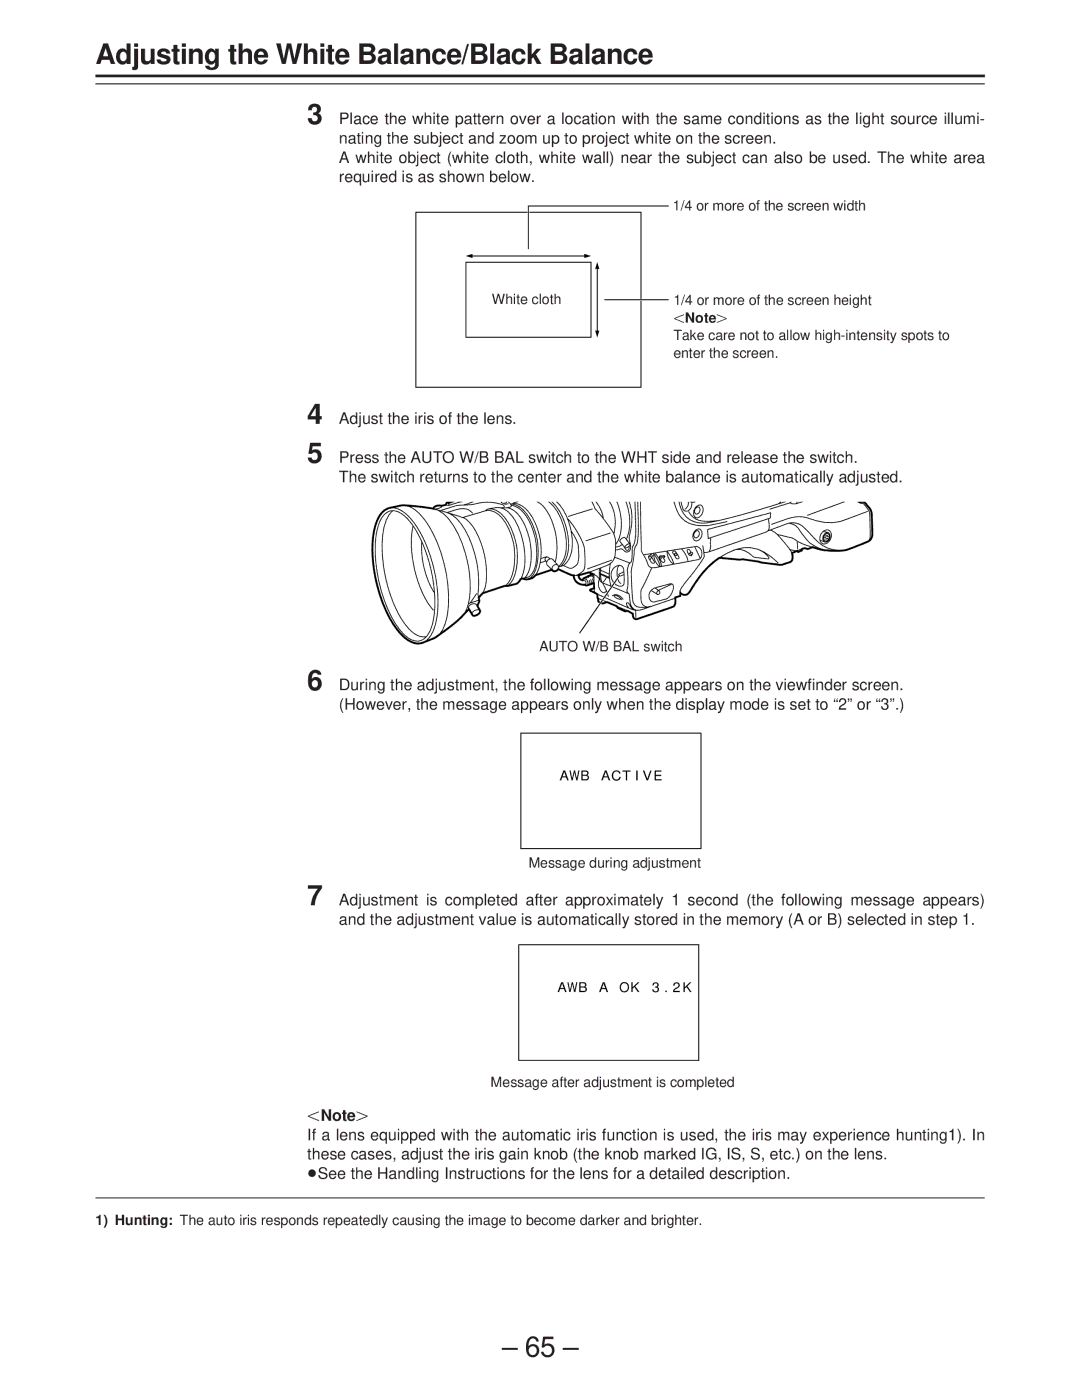
5 Press the AUTO W/B BAL switch to the WHT side and release the switch.
The switch returns to the center and the white balance is automatically adjusted.
AUTO W/B BAL switch
6 During the adjustment, the following message appears on the viewfinder screen. (However, the message appears only when the display mode is set to “2” or “3”.)
AWB ACT I VE
Message during adjustment
7 Adjustment is completed after approximately 1 second (the following message appears) and the adjustment value is automatically stored in the memory (A or B) selected in step 1.
AWB A OK 3 . 2 K
Message after adjustment is completed
Note{
If a lens equipped with the automatic iris function is used, the iris may experience hunting1). In these cases, adjust the iris gain knob (the knob marked IG, IS, S, etc.) on the lens.
ÁSee the Handling Instructions for the lens for a detailed description.
1)Hunting: The auto iris responds repeatedly causing the image to become darker and brighter.
– 65 –