ADJUSTMENTS AND MAINTENANCE
■Adjustment
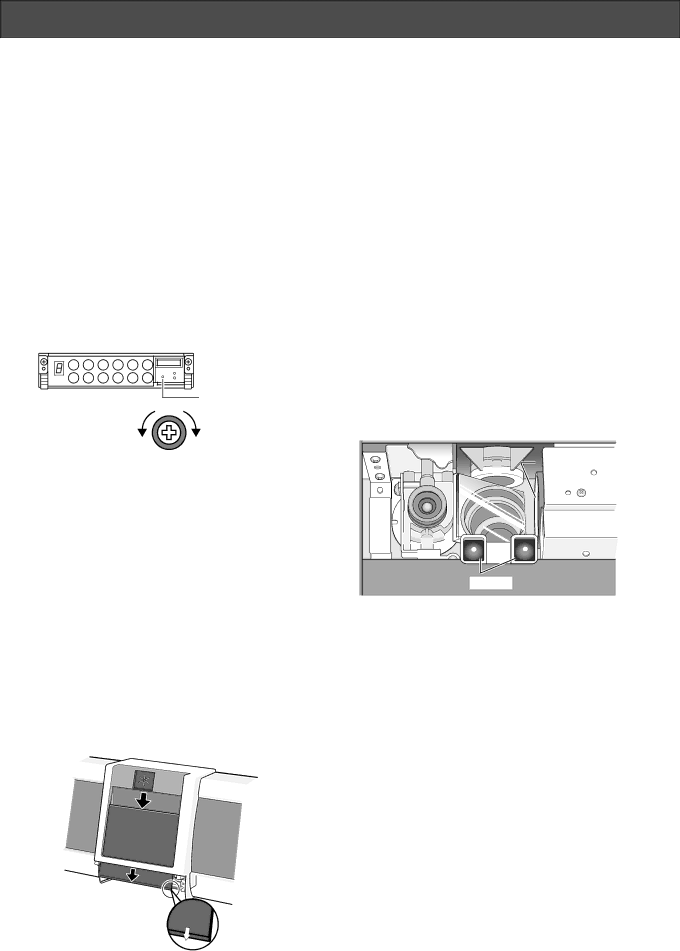
●Adjusting the Buzzer Level
Adjust the buzzer level, which informs you of recognition results, as follows.
1.Open the cover of the numeric keyboard.
2.Insert a Phillips precision screwdriver into the buzzer- level adjustment hole.
3.Turn the screwdriver to the right or left to adjust the buzzer level.
To the right: The volume will go up.
To the left: The volume will go down.
1 | 2 | 3 | 4 | 5 | CANCEL |
6 | 7 | 8 | 9 | 0 | ENTER |
|
|
|
|
| |
|
|
|
|
| adjustment hole |
Volume down | Volume up |
■Maintenance
●Replacing the Front Panel
When the supplied front panel has been damaged, you can replace it to a new one.
1.Remove the numeric keyboard. (Refer to p.12.)
2.Remove the front panel, and then replace it to a new one.
You can take the panel away by sliding down.
During the replacement, wear gloves on your hand to keep the new panel clean.
3.When finished, connect the control cable to the numeric keyboard.
●Cleaning the Inside of the Camera Unit
There are a mirror, proximity sensor, and two cameras inside the unit. The cameras will be used for capturing a face and irises. If dust is sticking to the cameras, it may cause malfunction. Clean the inside of the camera unit as follows.
1.Remove the numeric keyboard and the front panel. (Refer to p.12 and this page.)
2.Blow dust away from the mirror, sensor, Camera 1 and Camera 2 by using a blower, etc.
If dust still sticks after blowing, wipe away the appli- ances gently with an eyeglass cleaner or a
3.After finished, attach the front panel and numeric key- board to the unit.
Mirror | Camera 2 |
| |
Camera 1 |
|
Sensor |
|
Notes: |
|
•Keep your hands away from the mirror, Camera 1 and Camera 2. If you touch them directly, it may cause malfunction due to smudges.
•Do not clean the camera unit with a
•Clean the camera unit with delicate care. Force may damage the appliance, which may cause trouble.
Make sure the panel’s correct side.
Bottom
15
