Parts and their functions
@ 5 7 6
Y/G | VIDEO |
| IN |
PB/BOUT
:
;
PR/R | SDI 1 |
|
IN |
| |
SYNC | SDI 2 | < |
| IN |
CONTROL | SWITCHED |
OUT | |
POWER |
|
GPI |
|
=
>
DC IN
?
@ A 8 9
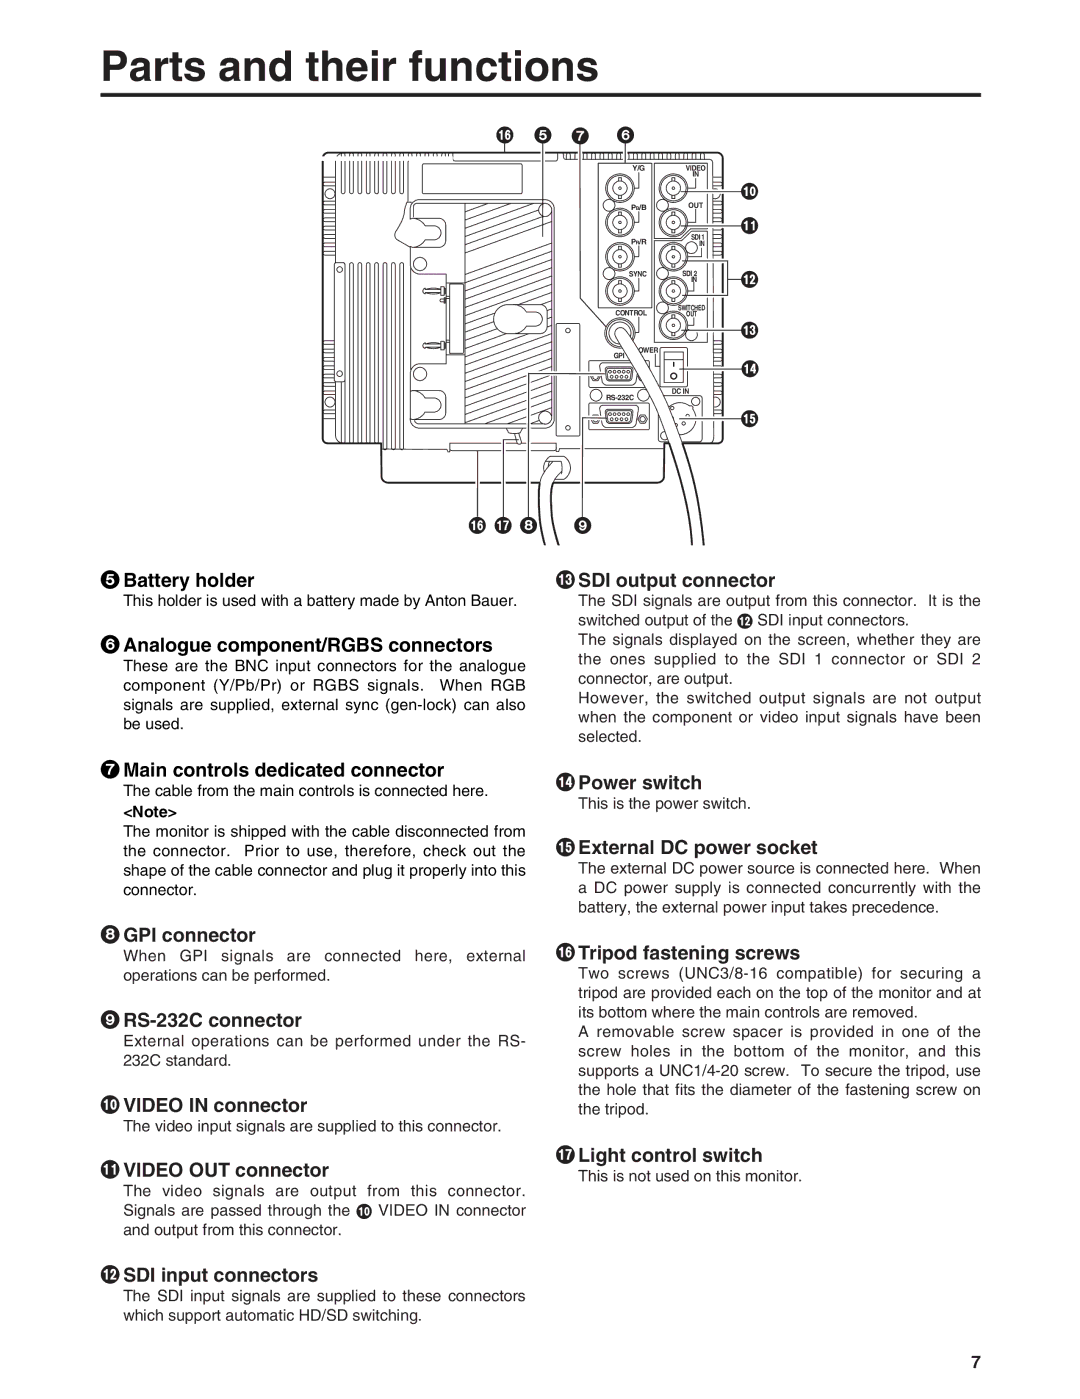
5Battery holder
This holder is used with a battery made by Anton Bauer.
6Analogue component/RGBS connectors
These are the BNC input connectors for the analogue component (Y/Pb/Pr) or RGBS signals. When RGB signals are supplied, external sync
=SDI output connector
The SDI signals are output from this connector. It is the switched output of the < SDI input connectors.
The signals displayed on the screen, whether they are the ones supplied to the SDI 1 connector or SDI 2 connector, are output.
However, the switched output signals are not output when the component or video input signals have been selected.
7Main controls dedicated connector
The cable from the main controls is connected here.
<Note>
The monitor is shipped with the cable disconnected from the connector. Prior to use, therefore, check out the shape of the cable connector and plug it properly into this connector.
8GPI connector
When GPI signals are connected here, external operations can be performed.
9RS-232C connector
External operations can be performed under the RS- 232C standard.
:VIDEO IN connector
The video input signals are supplied to this connector.
;VIDEO OUT connector
The video signals are output from this connector. Signals are passed through the : VIDEO IN connector and output from this connector.
>Power switch
This is the power switch.
?External DC power socket
The external DC power source is connected here. When a DC power supply is connected concurrently with the battery, the external power input takes precedence.
@Tripod fastening screws
Two screws
A removable screw spacer is provided in one of the screw holes in the bottom of the monitor, and this supports a
ALight control switch
This is not used on this monitor.
<SDI input connectors
The SDI input signals are supplied to these connectors which support automatic HD/SD switching.
7