Parts and their functions
1
2 3 4
1Tally lamps
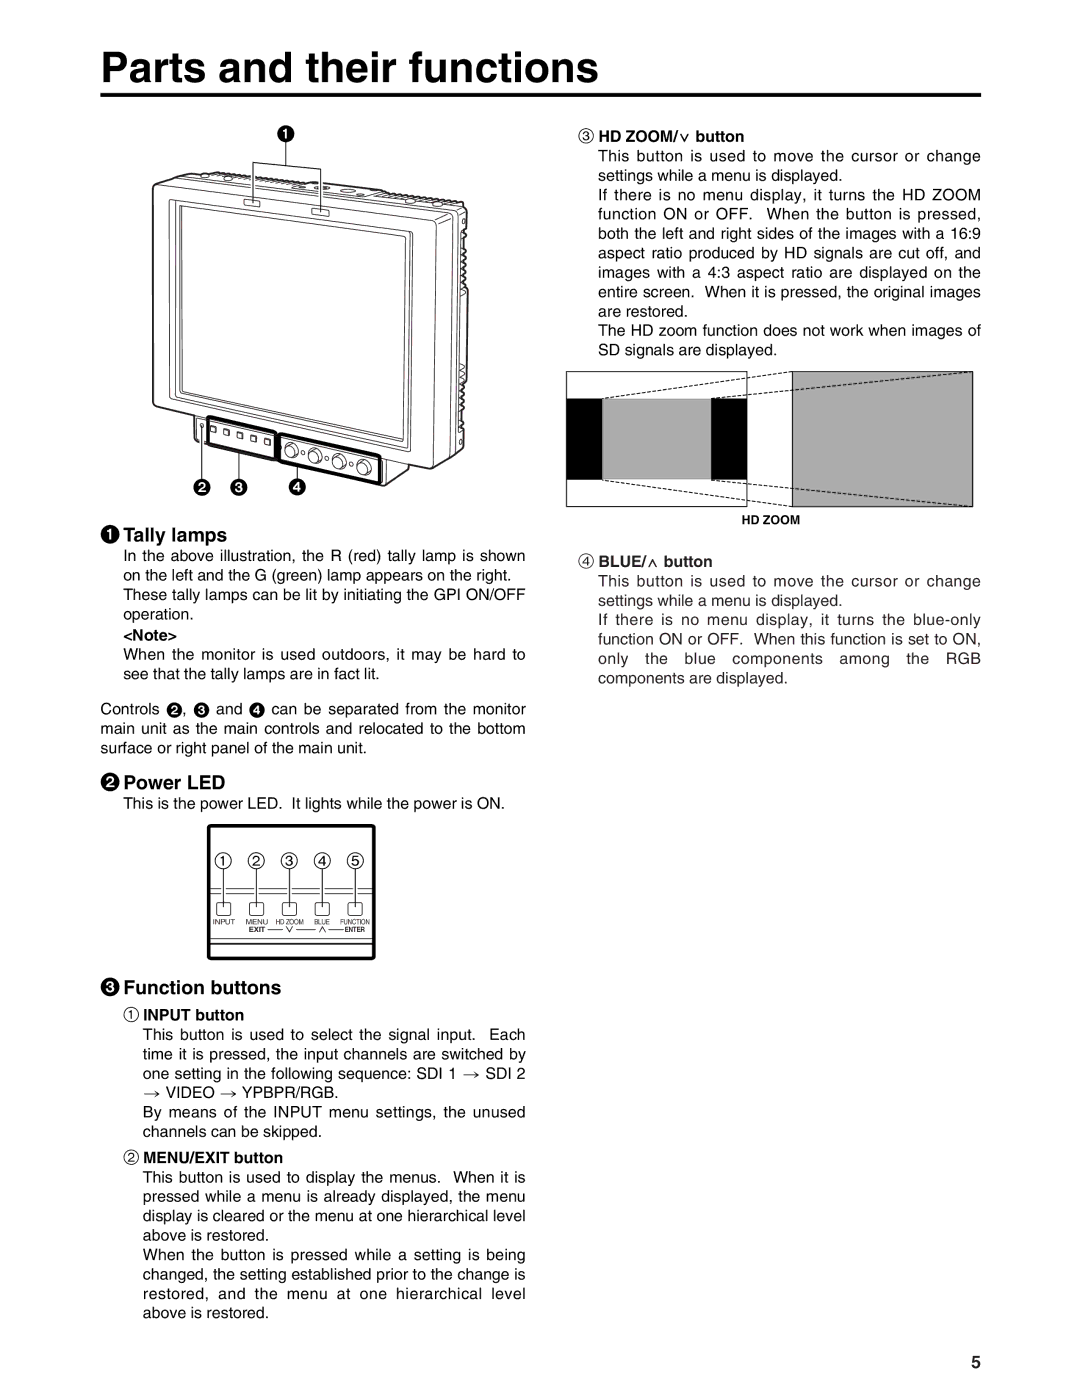
In the above illustration, the R (red) tally lamp is shown on the left and the G (green) lamp appears on the right. These tally lamps can be lit by initiating the GPI ON/OFF operation.
<Note>
When the monitor is used outdoors, it may be hard to see that the tally lamps are in fact lit.
Controls 2, 3 and 4 can be separated from the monitor main unit as the main controls and relocated to the bottom surface or right panel of the main unit.
2Power LED
This is the power LED. It lights while the power is ON.
1 2 3 4 5
INPUT MENU HD ZOOM BLUE FUNCTION
EXIT ![]()
![]()
![]()
![]()
![]() ENTER
ENTER
3Function buttons
1INPUT button
This button is used to select the signal input. Each
time it is pressed, the input channels are switched by one setting in the following sequence: SDI 1 > SDI 2 > VIDEO > YPBPR/RGB.
By means of the INPUT menu settings, the unused channels can be skipped.
2MENU/EXIT button
This button is used to display the menus. When it is pressed while a menu is already displayed, the menu display is cleared or the menu at one hierarchical level above is restored.
When the button is pressed while a setting is being changed, the setting established prior to the change is restored, and the menu at one hierarchical level above is restored.
3HD ZOOM/X button
This button is used to move the cursor or change settings while a menu is displayed.
If there is no menu display, it turns the HD ZOOM function ON or OFF. When the button is pressed, both the left and right sides of the images with a 16:9 aspect ratio produced by HD signals are cut off, and images with a 4:3 aspect ratio are displayed on the entire screen. When it is pressed, the original images are restored.
The HD zoom function does not work when images of SD signals are displayed.
HD ZOOM
4BLUE/W button
This button is used to move the cursor or change settings while a menu is displayed.
If there is no menu display, it turns the
5
