CQ-DF302W specifications
The Panasonic CQ-DF302W is a remarkable addition to the world of car audio systems, designed to enhance the quality of sound while providing an array of functionalities that cater to modern audio needs. This model combines advanced features with user-friendly operation, making it an attractive choice for audiophiles and casual listeners alike.One of the standout characteristics of the CQ-DF302W is its sleek design, which is both aesthetically pleasing and functional. The unit features a clear display that is easy to read, even in bright sunlight, with illuminated buttons that enhance usability during nighttime driving. Its ergonomic layout allows for quick access to essential functions, ensuring that drivers can maintain focus on the road while adjusting settings.
In terms of audio performance, the CQ-DF302W is equipped with a high-quality built-in amplifier that delivers powerful sound output. The system supports multiple audio formats, including MP3, WMA, and WAV files, ensuring compatibility with a wide range of digital music sources. Additionally, the incorporation of a 4-channel output allows for an immersive listening experience, enabling users to connect various speakers for enhanced sound staging.
The CQ-DF302W also features a built-in FM/AM tuner with excellent reception capabilities, allowing users to enjoy their favorite radio stations with clarity. For users who prefer direct playback from other devices, the unit includes an AUX input, enabling seamless connectivity to smartphones, tablets, and other portable audio sources.
One of the notable technologies integrated into the CQ-DF302W is the Digital Signal Processing (DSP), which optimizes audio performance by adjusting the equalization to suit different types of music and audio environments. This ensures that users experience rich and balanced sound, regardless of the genre being played.
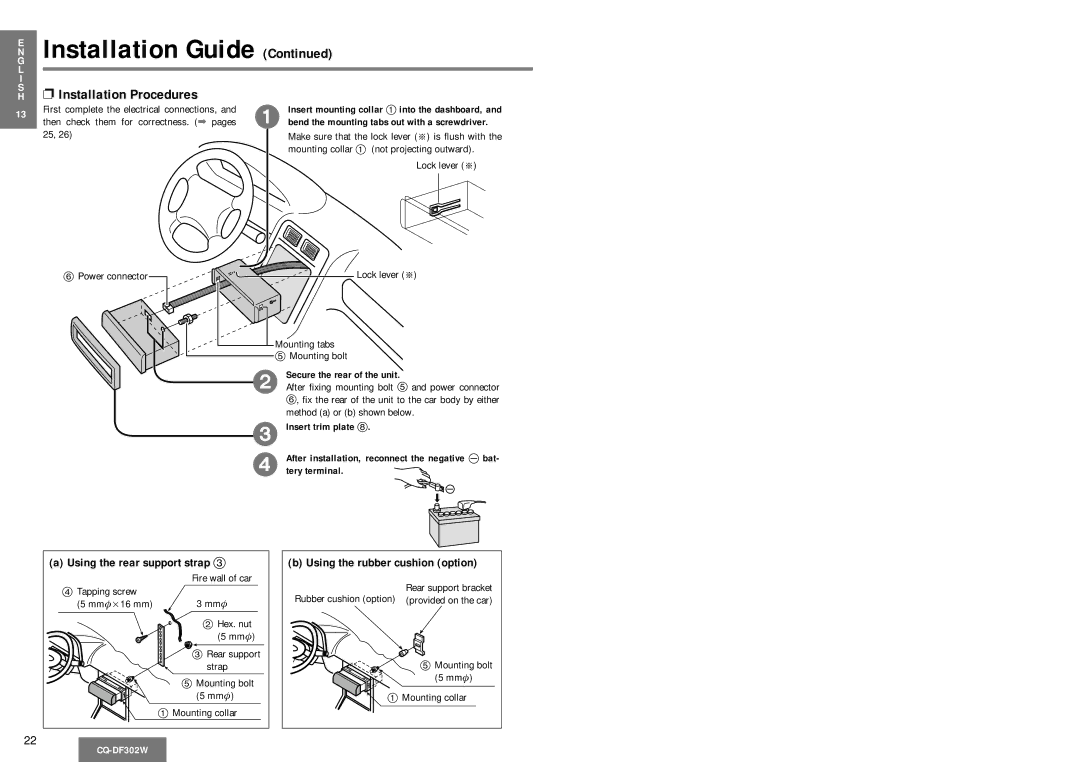
Furthermore, the CQ-DF302W is designed with durability in mind. Its robust construction ensures resistance to vibrations and temperature fluctuations, making it suitable for various automotive environments. The unit's easy installation process further enhances its appeal, as it can be integrated into a wide range of vehicles without hassle.
In summary, the Panasonic CQ-DF302W stands out due to its blend of advanced audio technologies, user-friendly features, and durable design. With its powerful sound performance, versatile connectivity options, and thoughtful engineering, this car audio system is well-equipped to elevate the driving experience, making it a popular choice among music enthusiasts.