E
N
G
L
I
S
H
15
Installation Guide continued
To Remove the Unit
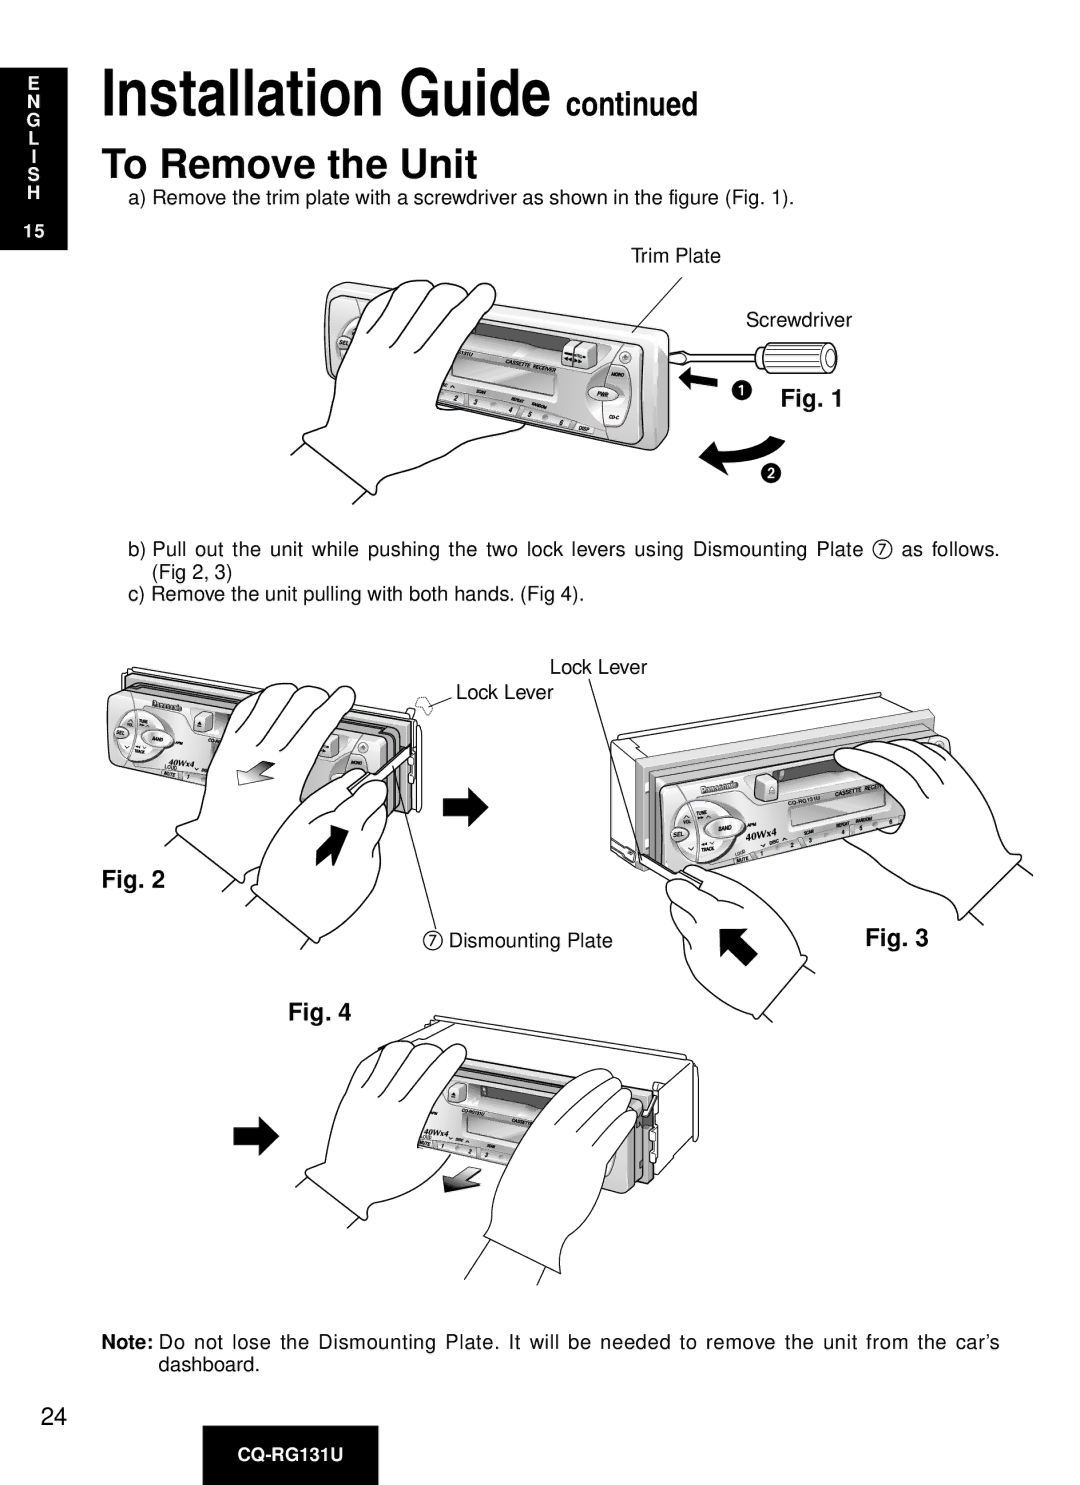
a)Remove the trim plate with a screwdriver as shown in the figure (Fig. 1).
Trim Plate
Screwdriver
![]()
![]() PRG
PRG![]()
LOUD
Fig. 1
b)Pull out the unit while pushing the two lock levers using Dismounting Plate (Fig 2, 3)
c)Remove the unit pulling with both hands. (Fig 4).
as follows.
LOUD
Fig. 2
![]()
![]() PRG
PRG![]()
Lock Lever
Lock Lever
![]()
![]()
![]()
![]() a
a
LOUD
![]()
![]() PRG
PRG
Fig. 4
a
Dismounting Plate | Fig. 3 |
![]()
![]() PRG
PRG![]()
LOUD
Note: Do not lose the Dismounting Plate. It will be needed to remove the unit from the car’s dashboard.
24
