2. Secure the rear of the unit.
a) Check the electrical connection by referring to this operating instructions.
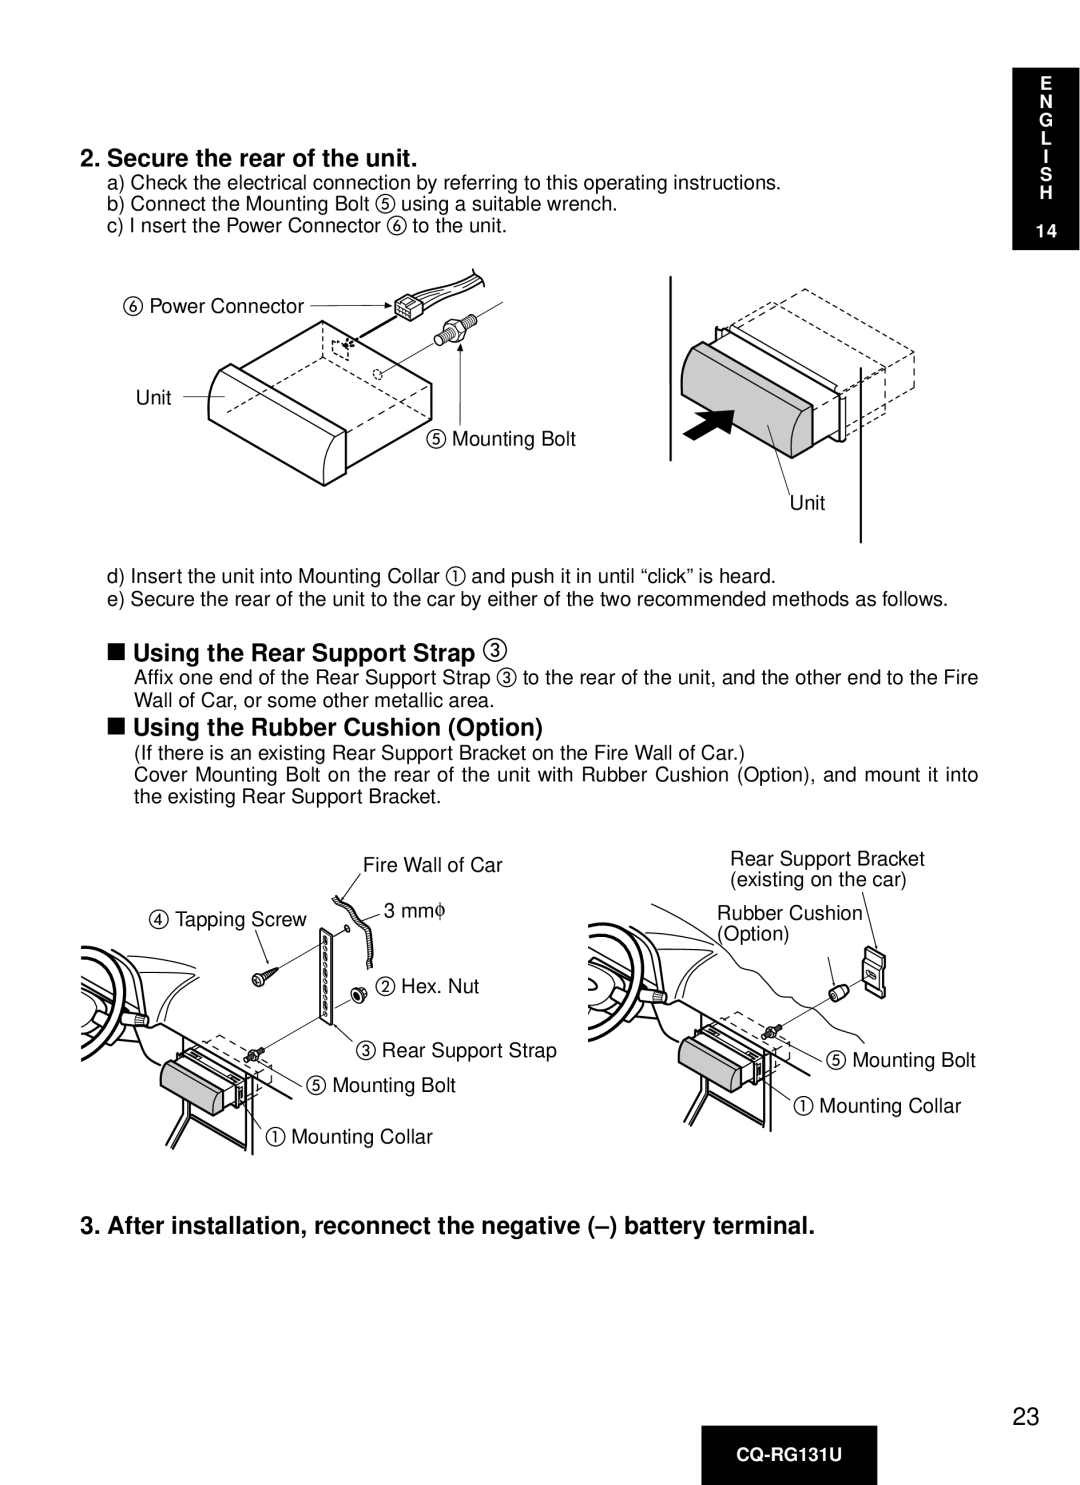
b) Connect the Mounting Bolt | using a suitable wrench. |
c) I nsert the Power Connector | to the unit. |
Power Connector |
|
Unit
Mounting Bolt
Unit
E
N
G
L
I
S
H
14
d) Insert the unit into Mounting Collar and push it in until “click” is heard.
e) Secure the rear of the unit to the car by either of the two recommended methods as follows.
■Using the Rear Support Strap
Affix one end of the Rear Support Strap to the rear of the unit, and the other end to the Fire Wall of Car, or some other metallic area.
■Using the Rubber Cushion (Option)
(If there is an existing Rear Support Bracket on the Fire Wall of Car.)
Cover Mounting Bolt on the rear of the unit with Rubber Cushion (Option), and mount it into the existing Rear Support Bracket.
| Fire Wall of Car | Rear Support Bracket |
| (existing on the car) | |
|
| |
Tapping Screw | 3 mmφ | Rubber Cushion |
| (Option) | |
|
| |
| Hex. Nut |
|
Rear Support Strap
Mounting Bolt
Mounting Collar
Mounting Bolt
Mounting Collar
3. After installation, reconnect the negative (–) battery terminal.
23