English
AV1/AV2
Preparation:
¡Connect an optional external device to the AV1/AV2.
29
Source Selection
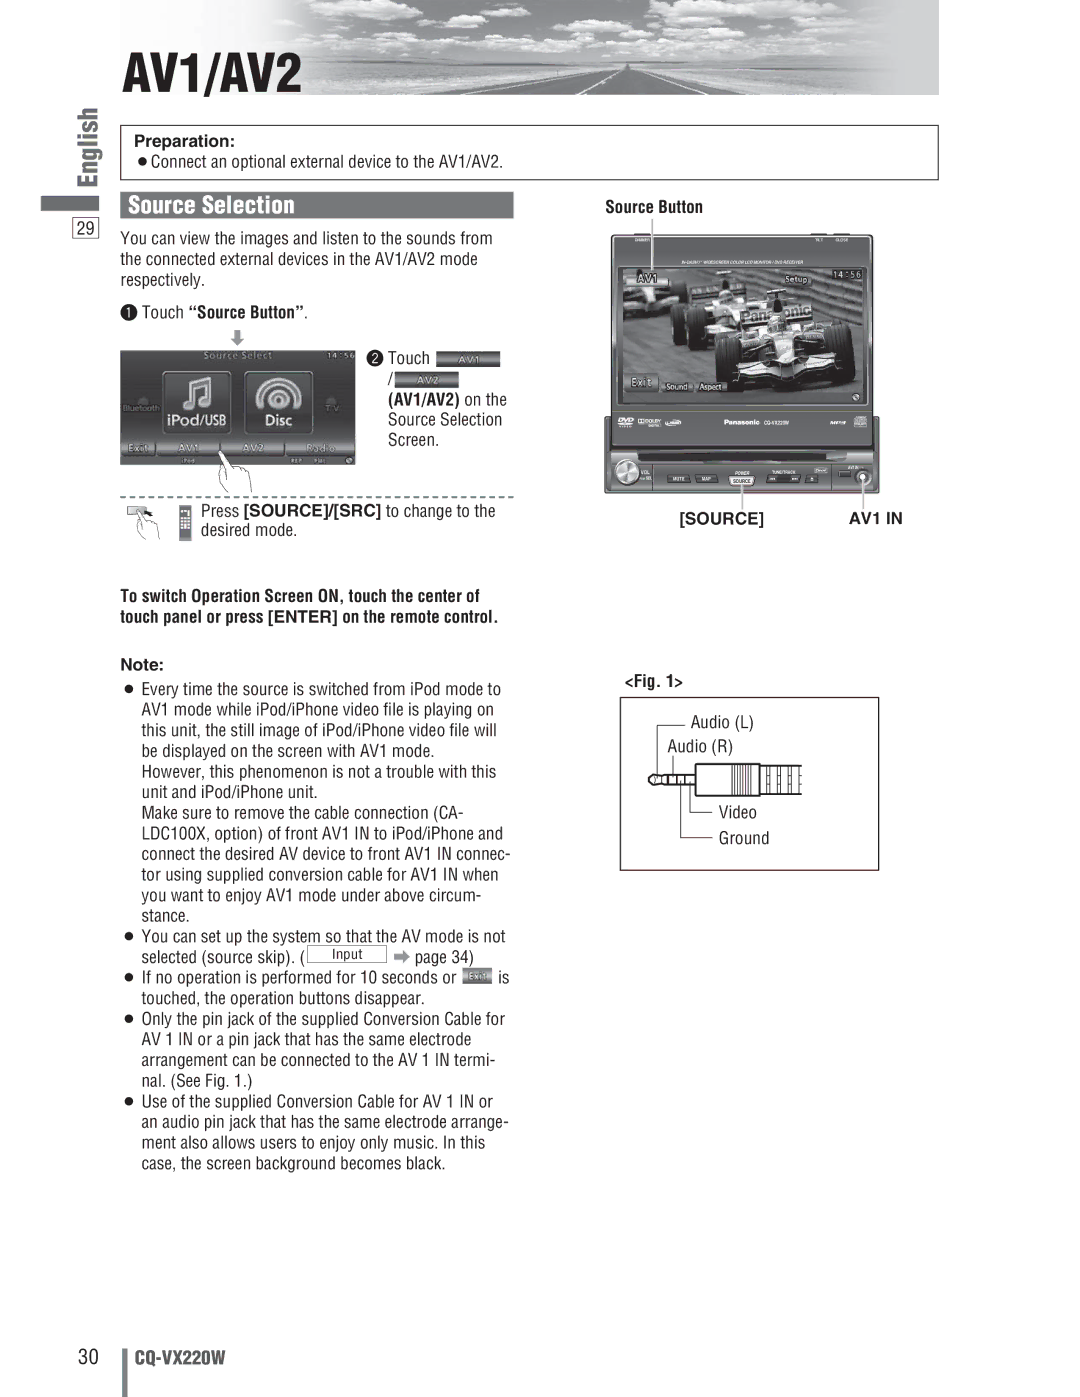
You can view the images and listen to the sounds from the connected external devices in the AV1/AV2 mode respectively.
q Touch “Source Button”.
d
w Touch
/ ![]()
(AV1/AV2) on the
Source Selection
Screen.
Source Button
DIMMER | TILT | CLOSE |
TEXT
DIMMER DIM |
|
|
| TILT | OPEN |
|
|
|
|
| |
VOL |
|
|
| TUNE/TRACK | AV1 IN |
|
| POWER |
| ||
PUSH SEL | MUTE | MAP | SOURCE |
|
|
|
|
|
|
|
Press [SOURCE]/[SRC] to change to the desired mode.
To switch Operation Screen ON, touch the center of touch panel or press [ENTER] on the remote control.
Note:
¡Every time the source is switched from iPod mode to AV1 mode while iPod/iPhone video file is playing on this unit, the still image of iPod/iPhone video file will be displayed on the screen with AV1 mode. However, this phenomenon is not a trouble with this unit and iPod/iPhone unit.
Make sure to remove the cable connection (CA- LDC100X, option) of front AV1 IN to iPod/iPhone and connect the desired AV device to front AV1 IN connec- tor using supplied conversion cable for AV1 IN when you want to enjoy AV1 mode under above circum- stance.
¡You can set up the system so that the AV mode is not
selected (source skip). ( | Input | a page 34) |
|
¡If no operation is performed for 10 seconds or ![]() is touched, the operation buttons disappear.
is touched, the operation buttons disappear.
¡Only the pin jack of the supplied Conversion Cable for AV 1 IN or a pin jack that has the same electrode arrangement can be connected to the AV 1 IN termi- nal. (See Fig. 1.)
¡Use of the supplied Conversion Cable for AV 1 IN or an audio pin jack that has the same electrode arrange- ment also allows users to enjoy only music. In this case, the screen background becomes black.
[SOURCE] | AV1 IN |
<Fig. 1>
Audio (L)
Audio (R)
Video
Ground
30
