DMC-LC40PP specifications
The Panasonic DMC-LC40PP is a compact digital camera that exemplifies the brand's commitment to delivering exceptional imaging technology in a user-friendly format. Launched in the early 2000s, this model was aimed at both amateur photographers and those looking for an easy-to-carry camera without compromising on quality.One of the key highlights of the DMC-LC40PP is its 4-megapixel resolution, which, at the time, provided sharp and clear images suitable for both printing and sharing. The camera is equipped with a 3x optical zoom lens, allowing users to get closer to subjects without sacrificing image quality. This feature made the DMC-LC40PP particularly versatile for a range of photography genres, from landscapes to close-up portraits.
The camera incorporates a 1/2.5-inch CCD sensor that enhances its ability to capture vibrant colors and detailed images across various lighting conditions. Coupled with Panasonic's image processing technology, the DMC-LC40PP minimizes noise and enhances clarity, ensuring that captured moments are shown in the best light.
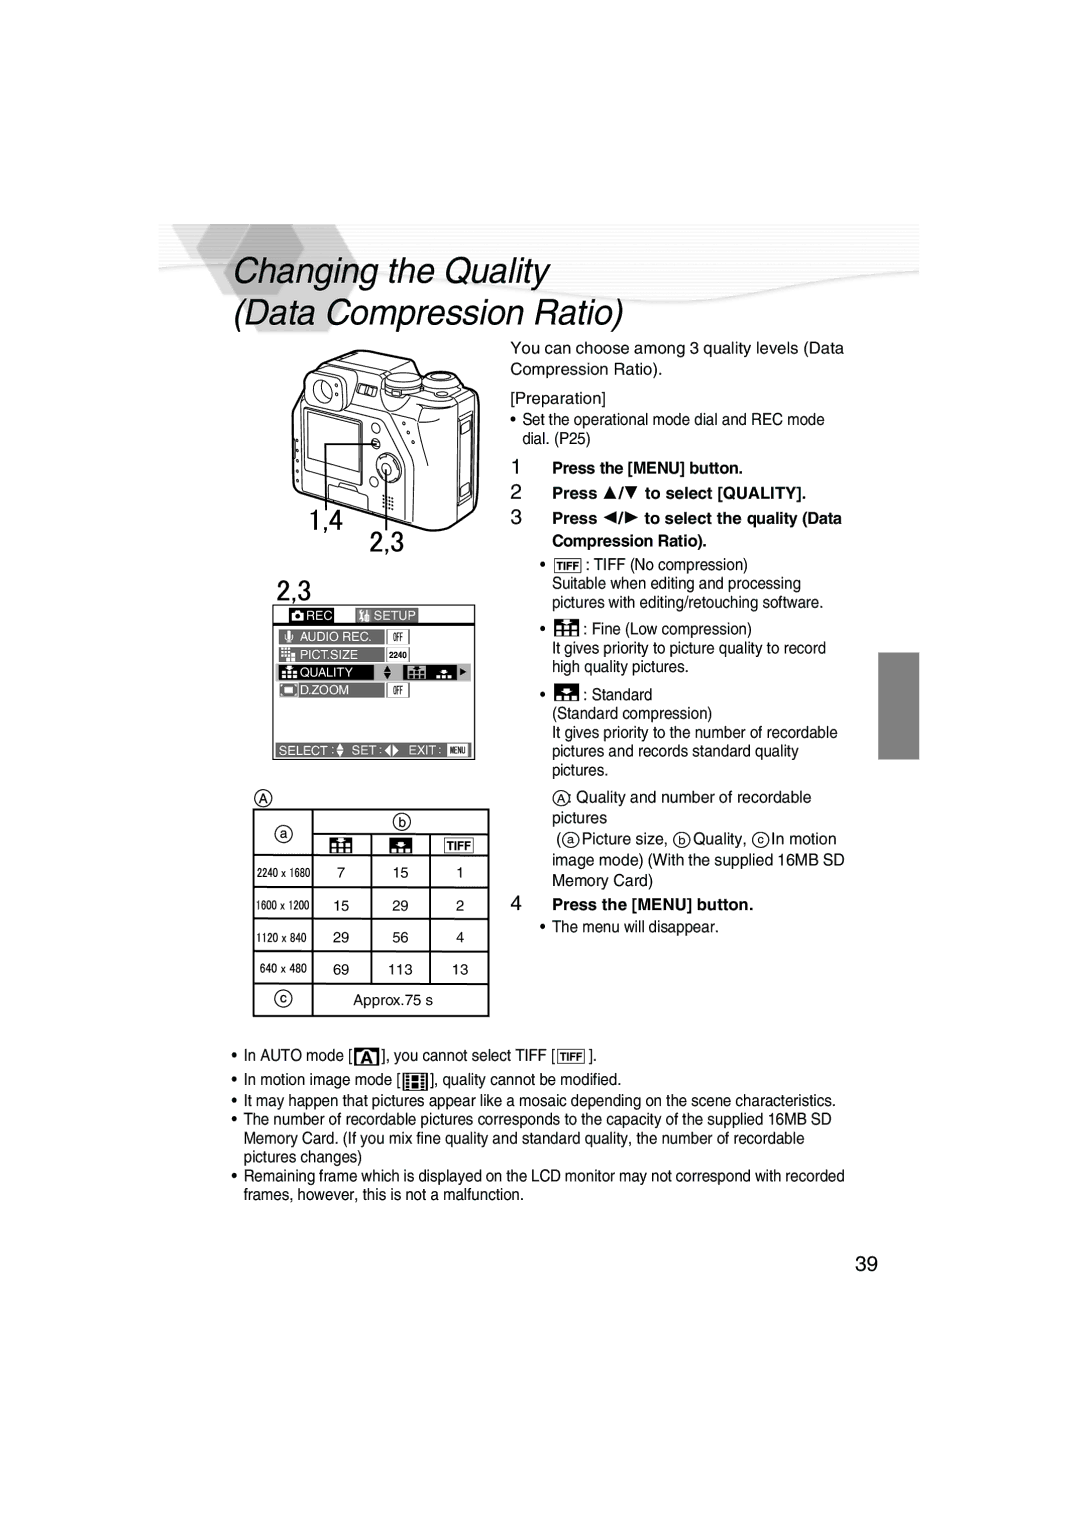
A notable characteristic of the DMC-LC40PP is its user-friendly interface, designed to cater to users of all experience levels. With an intuitive menu system and a range of automatic settings, users can easily navigate through different modes such as portrait, night scene, and landscape. Additionally, the inclusion of a built-in flash further assists in producing well-lit images regardless of environmental conditions.
For storage, the DMC-LC40PP utilizes Secure Digital (SD) cards, enabling users to expand storage capacity as needed. The camera can also capture short videos, making it a multifunctional option for those who want to document their experiences not just through still images but via motion as well.
In terms of design, the DMC-LC40PP boasts a sleek and compact body, making it conveniently portable for everyday use or travel. Its lightweight frame and ergonomic grip ensure that users can comfortably hold the camera for extended periods, enhancing the overall shooting experience.
Overall, the Panasonic DMC-LC40PP stands out as a reliable option for those seeking a compact digital camera with solid performance, optimal ergonomics, and essential features that cater to casual photographers' needs. Though it may be considered outdated by today’s standards, its historical significance and technological advancements from its time make it a notable entry in Panasonic’s digital camera lineup.

