How to connect
≥Turn on the unit.
1Select the menu.

 : [WEB CAMERA] # [ON]
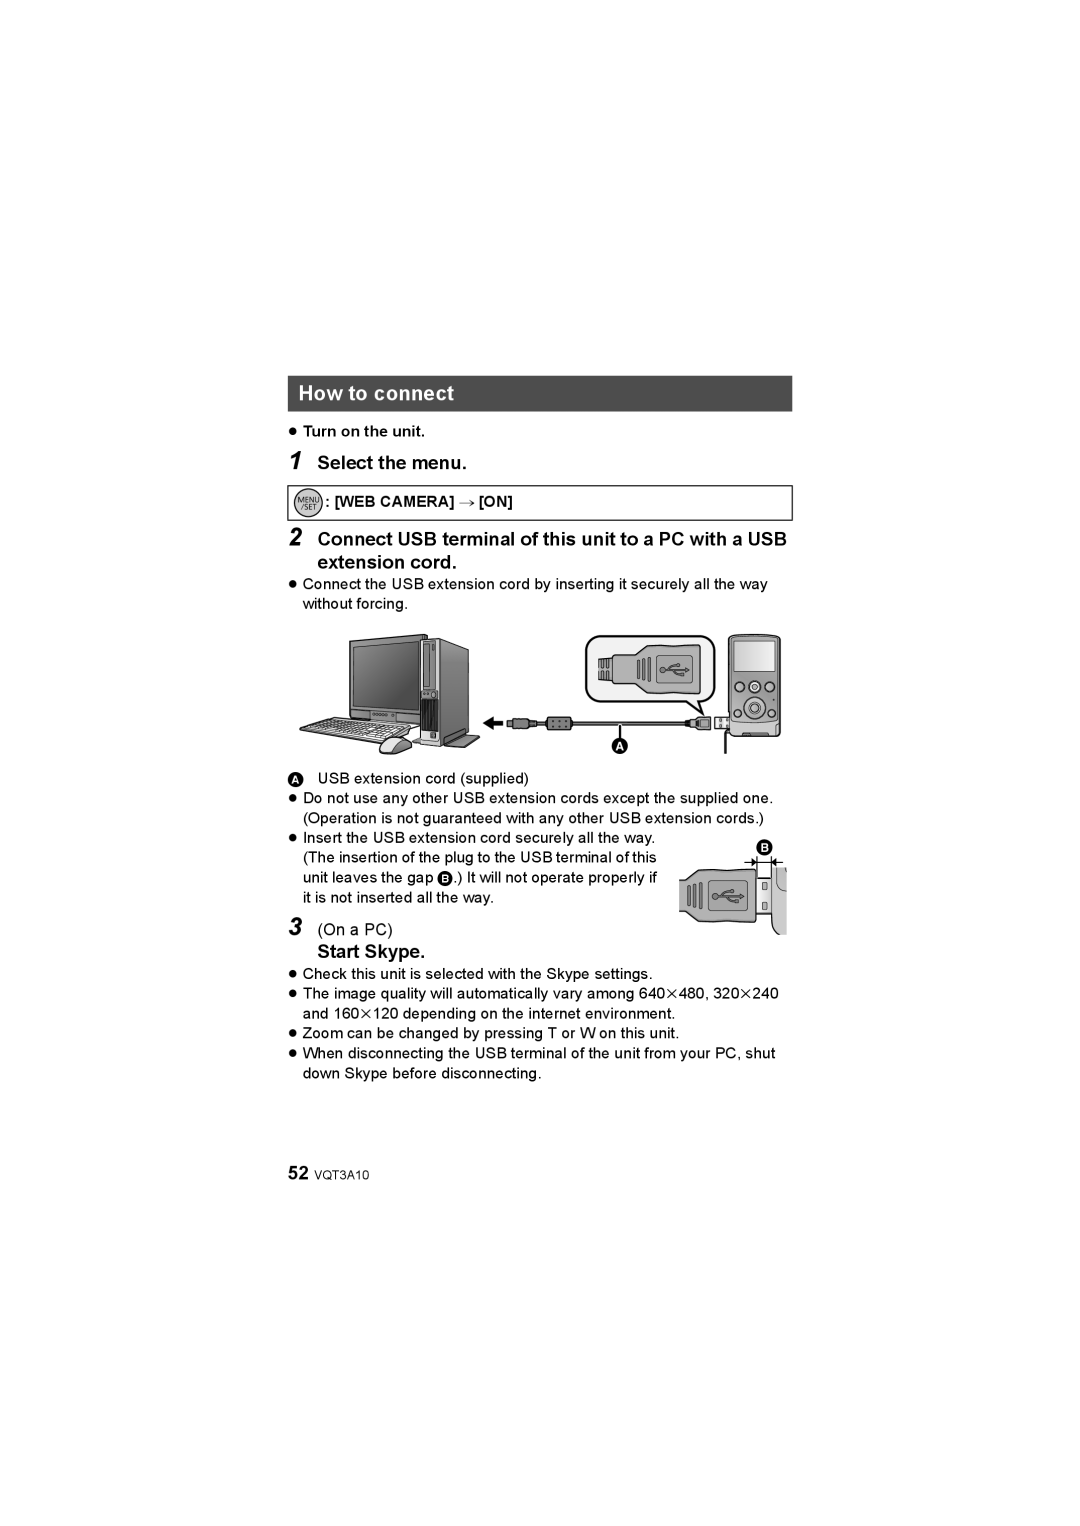
2Connect USB terminal of this unit to a PC with a USB
extension cord.
≥Connect the USB extension cord by inserting it securely all the way without forcing.
AUSB extension cord (supplied)
≥Do not use any other USB extension cords except the supplied one. (Operation is not guaranteed with any other USB extension cords.)
≥ Insert the USB extension cord securely all the way. | | |
(The insertion of the plug to the USB terminal of this | ||
| ||
unit leaves the gap B.) It will not operate properly if |
| |
it is not inserted all the way. |
|
3 (On a PC)
Start Skype.
≥Check this unit is selected with the Skype settings.
≥The image quality will automatically vary among 640k480, 320k240 and 160k120 depending on the internet environment.
≥Zoom can be changed by pressing T or W on this unit.
≥When disconnecting the USB terminal of the unit from your PC, shut down Skype before disconnecting.
52VQT3A10