With a PC
Connecting to a PC
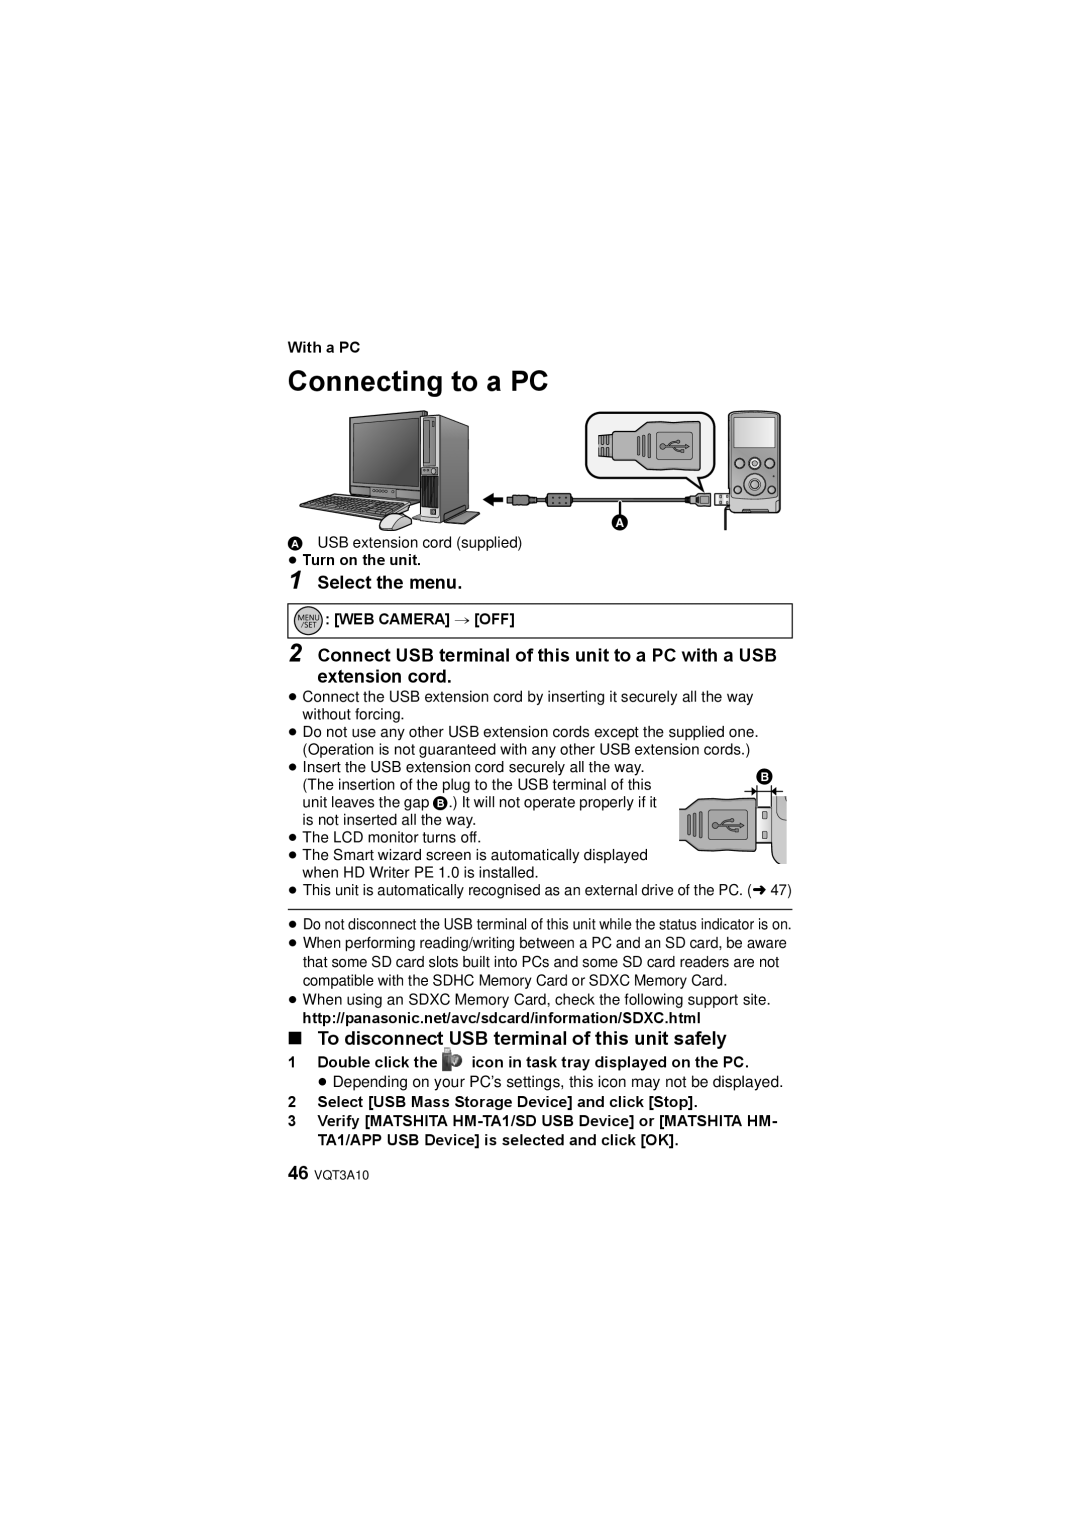
AUSB extension cord (supplied)
≥ Turn on the unit.
1 Select the menu.


 : [WEB CAMERA] # [OFF]
2 Connect USB terminal of this unit to a PC with a USB extension cord.
≥Connect the USB extension cord by inserting it securely all the way without forcing.
≥Do not use any other USB extension cords except the supplied one. (Operation is not guaranteed with any other USB extension cords.)
≥Insert the USB extension cord securely all the way.
(The insertion of the plug to the USB terminal of this unit leaves the gap B.) It will not operate properly if it is not inserted all the way.
≥ The LCD monitor turns off.
≥The Smart wizard screen is automatically displayed when HD Writer PE 1.0 is installed.
≥This unit is automatically recognised as an external drive of the PC. (l 47)
≥Do not disconnect the USB terminal of this unit while the status indicator is on.
≥When performing reading/writing between a PC and an SD card, be aware that some SD card slots built into PCs and some SD card readers are not compatible with the SDHC Memory Card or SDXC Memory Card.
≥When using an SDXC Memory Card, check the following support site. http://panasonic.net/avc/sdcard/information/SDXC.html
∫To disconnect USB terminal of this unit safely
1Double click the  icon in task tray displayed on the PC.
≥ Depending on your PC’s settings, this icon may not be displayed.
2Select [USB Mass Storage Device] and click [Stop].
3Verify [MATSHITA
46VQT3A10