Installations and connections
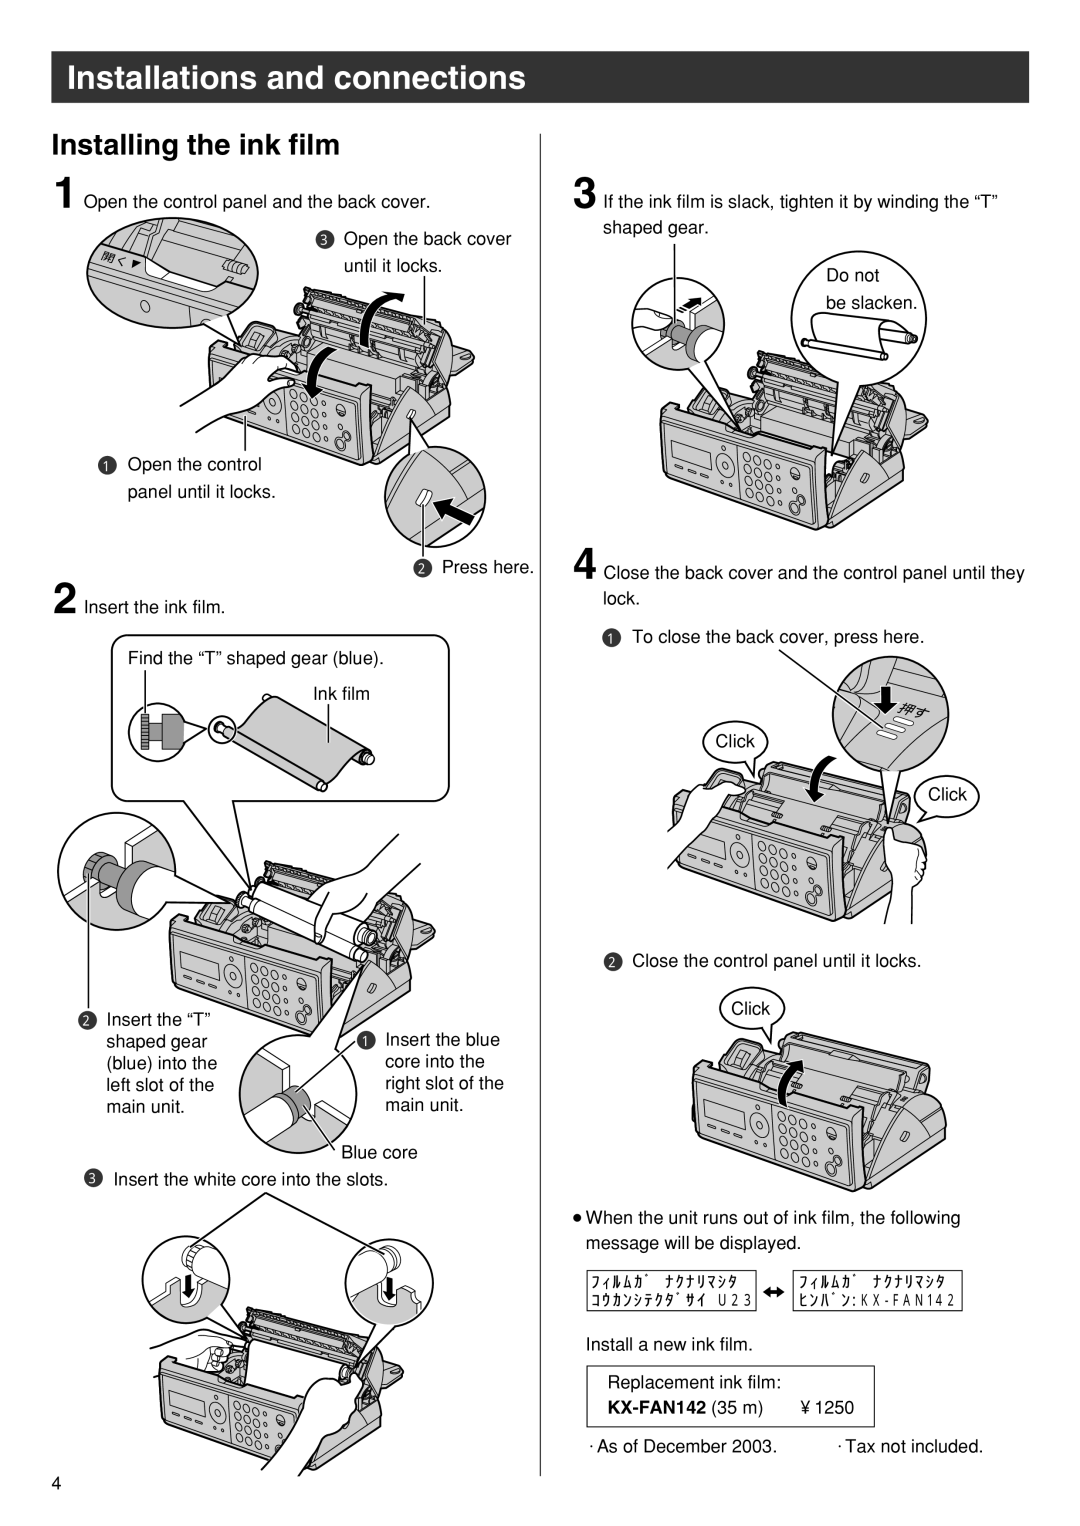
Installing the ink film
1 Open the control panel and the back cover.
3 Open the back cover
開 |
|
く | until it locks. |
|
3 If the ink film is slack, tighten it by winding the “T” shaped gear.
Do not
be slacken.
1Open the control
panel until it locks.
2 Press here.
2 Insert the ink film.
Find the “T” shaped gear (blue).
Ink film
4 Close the back cover and the control panel until they lock.
1 To close the back cover, press here.
押す
Click
Click
2Insert the “T” shaped gear (blue) into the left slot of the main unit.
1Insert the blue core into the right slot of the
main unit.
Blue core
2Close the control panel until it locks.
Click
3Insert the white core into the slots.
●When the unit runs out of ink film, the following message will be displayed.
フ ィ ル ム カ ゙ シ ナ ク ナ リ マ シ タ |
|
|
| フ ィ ル ム カ ゙ シ ナ ク ナ リ マ シ タ |
| |
コ ウ カ ン シ テ ク タ ゙ サ イ シ U 2 3 |
|
|
| ヒ ン ハ ゙ ン : K X - F A N 14 2 |
| |
Install a new ink film. |
|
|
| |||
|
|
|
|
|
|
|
Replacement ink film: |
|
|
| |||
| ¥1250 |
|
| |||
|
|
|
|
|
|
|
・As of December 2003. | ・Tax not included. | |||||
4